
Hey everyone! It’s Kara from A Kailo Chic Life, a lifestyle blog full of colorful DIYs and recipes. I first got into soapmaking after my daughter was born seven years ago. I even tried starting my own line of pastry-and dessert-themed soaps, but eventually motherhood took over and I stopped making soap. Recently with the start of my blog, I was able to dabble in soapmaking again and have loved coming up with unique shapes and techniques using melt and pour soap.
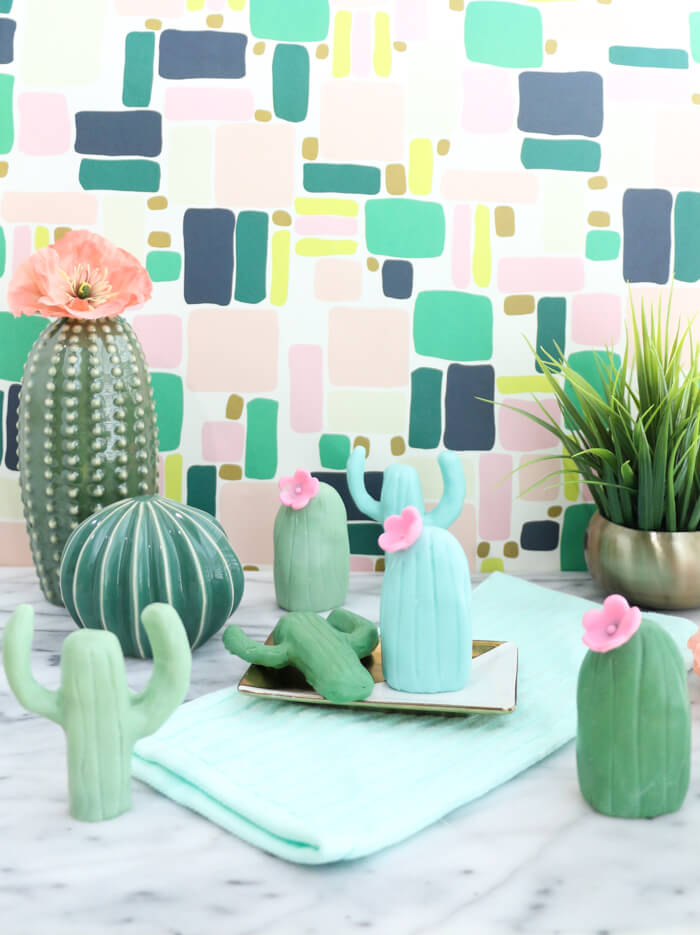
Today I am going to show you not only how to create cactus soap, but also how to make your very own cactus-shaped molds! Cacti are all the rage right now, and with the new Cactus Flower Fragrance Oil, what better time to make a few bars of cactus shaped soap? These melt and pour soap bars look just like cacti and smell amazing. The process is easier than you might think, so let’s get started.
What You’ll Need:
2 Part Pourable Silicone
Polymer Clay (1 lb brick)
About 10 oz. White Melt and Pour Soap Base
About 0.2 oz. Cactus Flower Fragrance Oil
Hydrated Chrome Green Color Block
Chrome Green Color Block
Electric Bubble Gum Color Block
99% Isopropyl Alcohol in Spray Bottle
Dropper
Tools:
Bramble Berry’s Perfect Scale
Microwave-safe bowl and spoon
Disposable plastic cup and spoon
Flat bottomed plastic storage container (slightly larger than the clay cacti you make)

Click here to add everything you need for this project to your Bramble Berry shopping cart!
TWO: Once your cactus is cool, it’s time to make your mold. Begin by placing your cactus face up in a plastic storage container. If you can’t find containers small enough, you can crunch up foil around the cactus—just don’t let the foil touch the clay. Smaller containers reduce the amount of silicone you need for each mold.
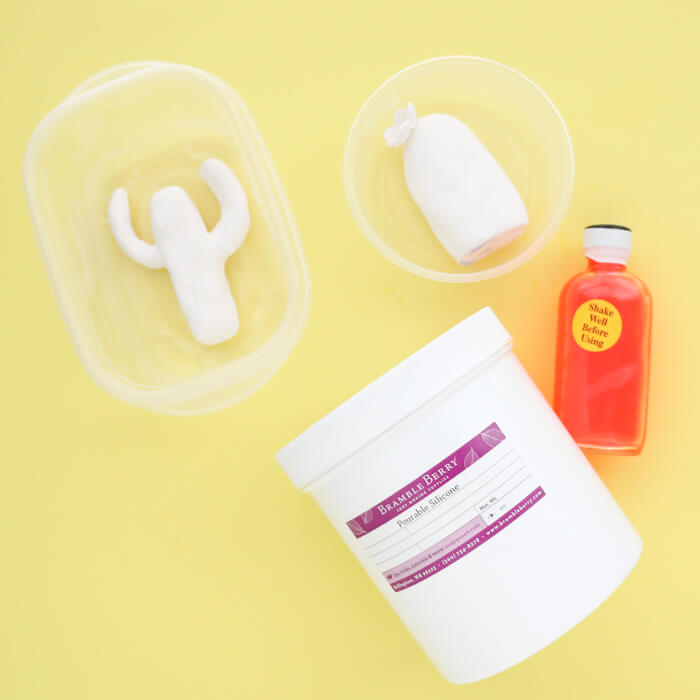
THREE: Once the containers are ready, measure 1 part of the orange B solution and 10 parts of A solution. I ended up needing three 10-ounce batches to mold both of my cacti, but the amount you need will depend on the size your container.
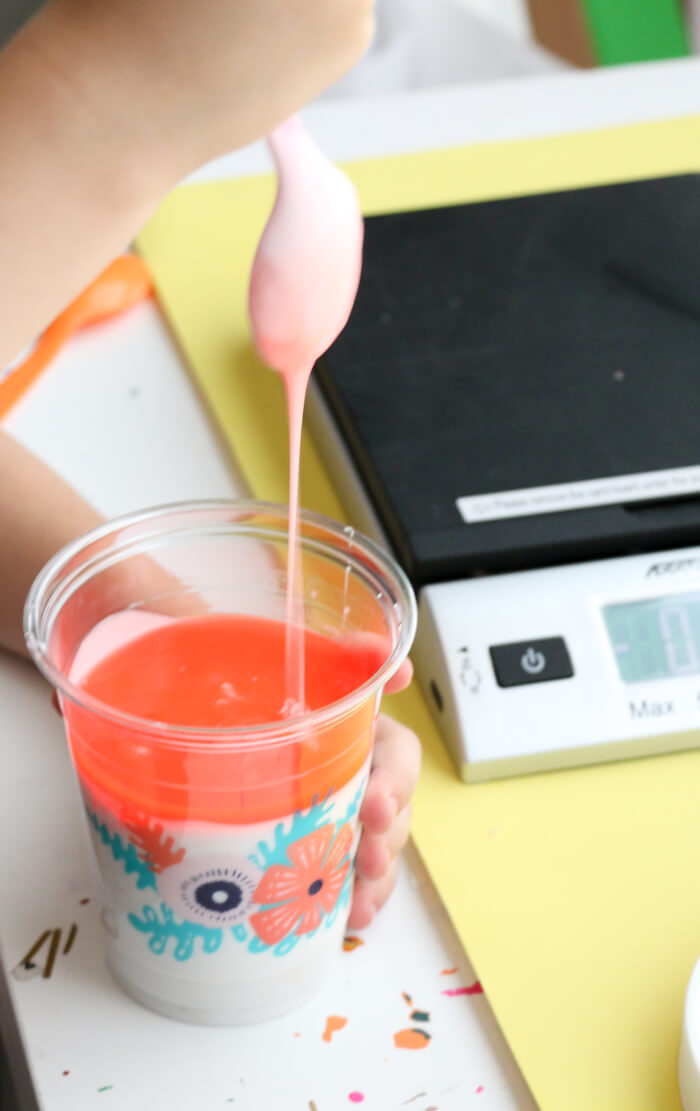
FOUR: Mix the two parts of the Pourable Silicone together until well combined and then pour over the clay cactus. Once it’s covered, set aside and allow the silicone to set for 24 hours.
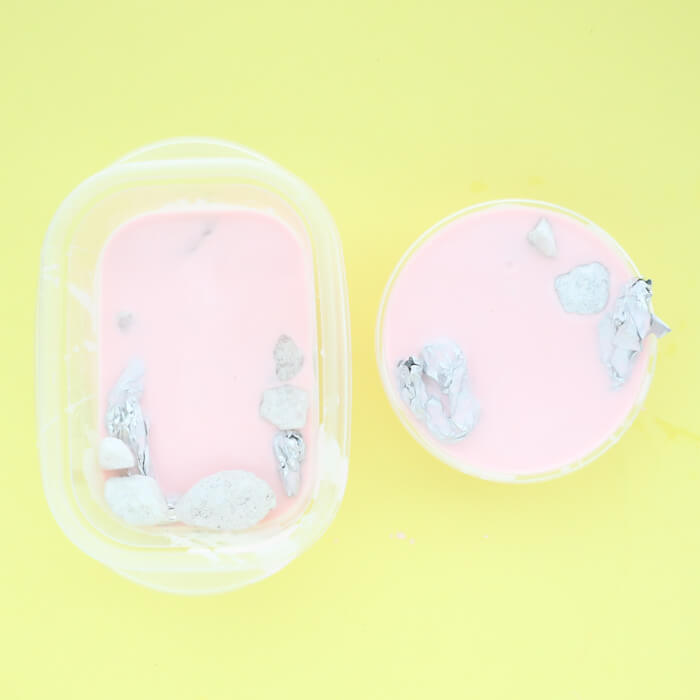
FIVE: After 24 hours, loosen the silicone with a knife and remove the mold from the container. Use scissors to cut away any extra silicone to reveal your cactus-shaped mold. Now it’s time to make cactus soap!
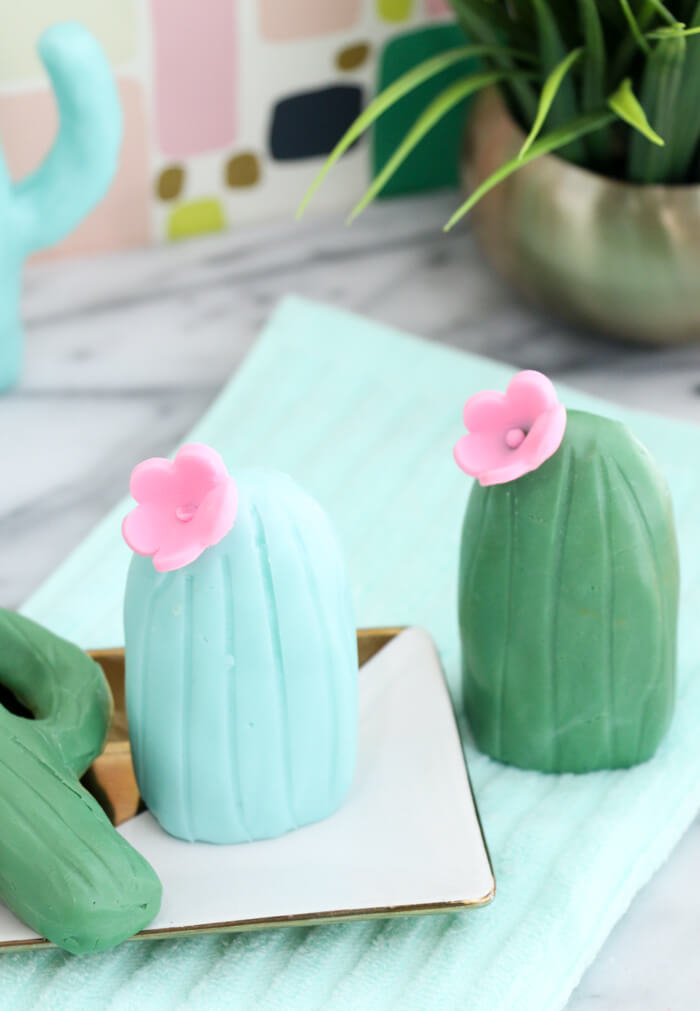
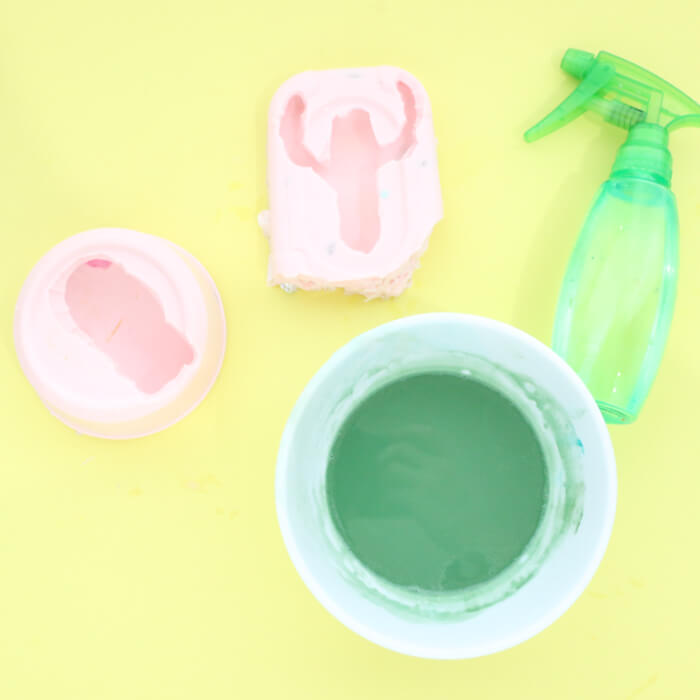
SIX: If you included a flower like I did, melt a few ounces of White Soap Base with a little bit of Electric Bubble Gum Color Block in the microwave using 10-second bursts. Stir the soap base and Color Block together. Once you reach a shade of pink that you like, gently pour or spoon the pink soap into the flower portion of the mold and hold until it hardens (about one minute).
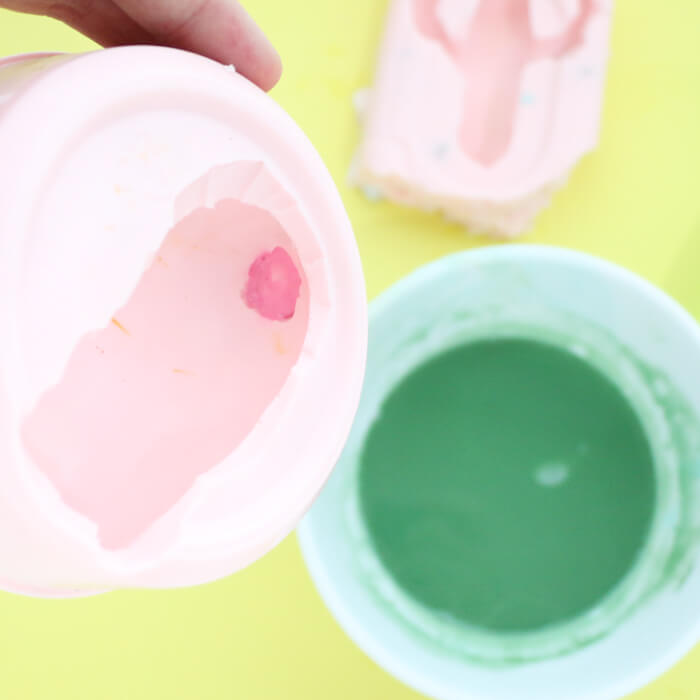
SEVEN: Cut up about 10 ounces of White Soap Base and melt in the microwave using 15-second bursts, along with a piece of the Chrome Green Color Block. You’re working with a small amount of soap, so be careful to not overheat it. Stir to combine the soap and colorant, and add 0.2 ounces of Cactus Flower Fragrance Oil. Spritz the pink soap in the mold with the 99% isopropyl alcohol and pour the melted green soap into the molds. Let the soap cool and harden for about an hour.
NOTE: The exact amount of White Melt and Pour Soap Base and fragrance oil will depend on how large your mold is. Use the Fragrance Calculator to find out how much fragrance oil you add.
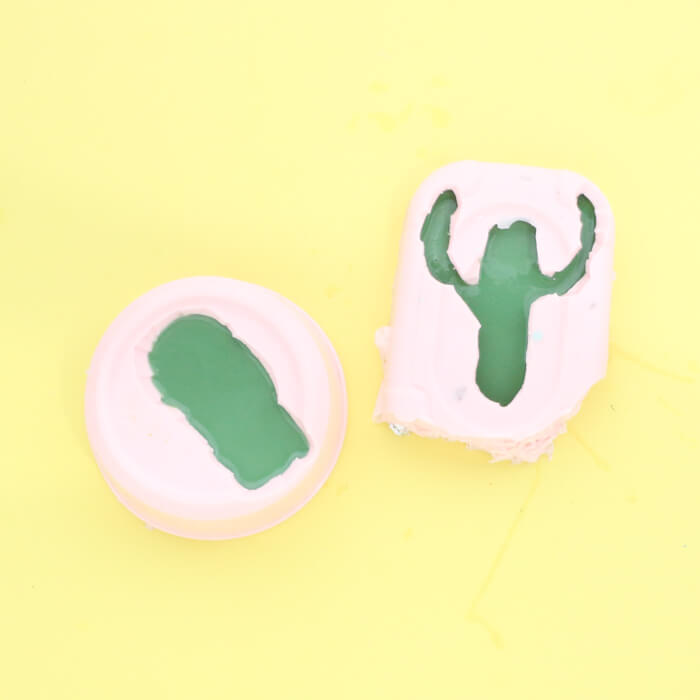
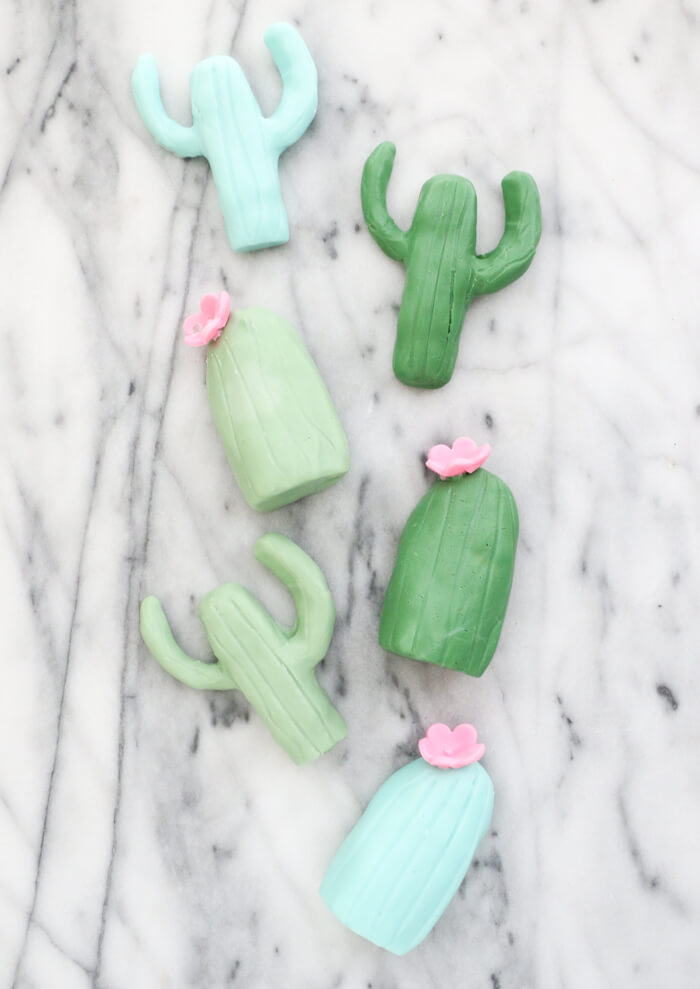
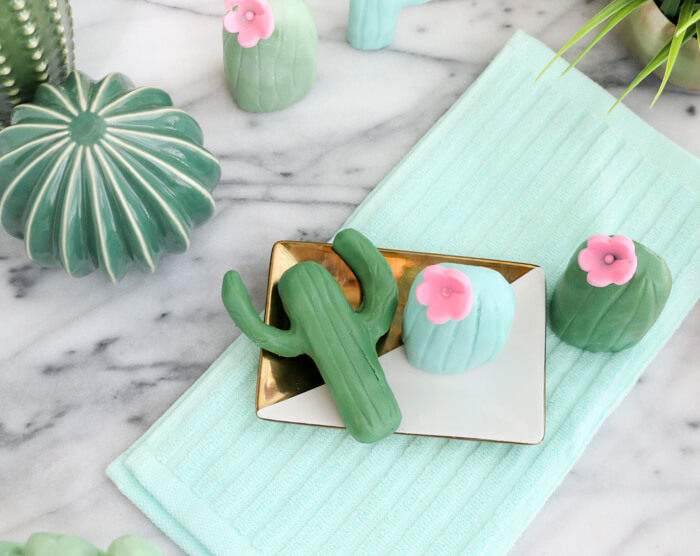
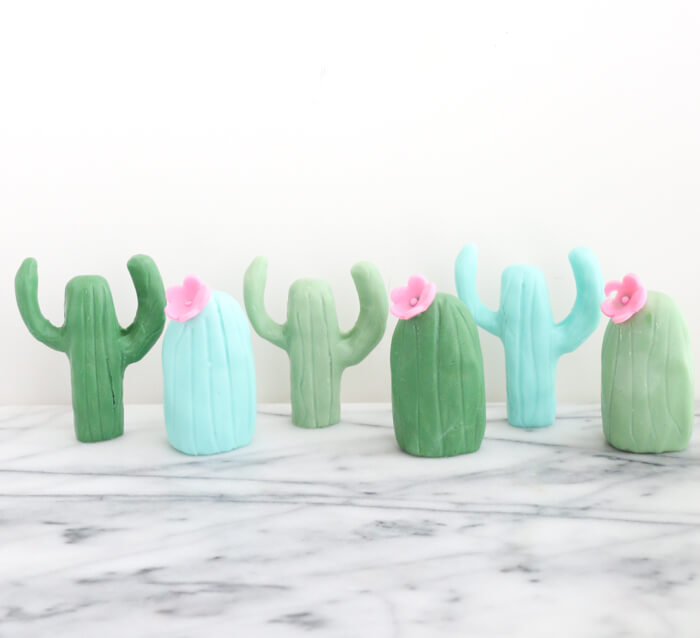
EIGHT: Once hard, unmold your soap and use a toothpick to draw cactus lines or make prick marks if desired. Your soap is now complete. And the best part is that you have a new mold to make as many cactus-shaped soaps as you want! Repeat this process using the Hydrated Chrome Green Color Block to create the blue-green cacti shown below. Wrap the soap in plastic wrap or store in an airtight container to help prevent glycerin dew.
|
Blog

DIY Melt & Pour Cactus Soap
Ingredients
- 2 Part Pourable Silicone
- Polymer Clay 1 lb brick
- Bramble Berry’s Perfect Scale
- About 10 oz. White Melt and Pour Soap Base
- About 0.2 oz. Cactus Flower Fragrance Oil
- Hydrated Chrome Green Color Block
- Chrome Green Color Block
- Electric Bubble Gum Color Block
- 99 % Isopropyl Alcohol in Spray Bottle
- Microwave safe bowl and spoon
- Disposable plastic cup and spoon
- Flat bottomed plastic storage container slightly larger than the clay cacti you make
Instructions
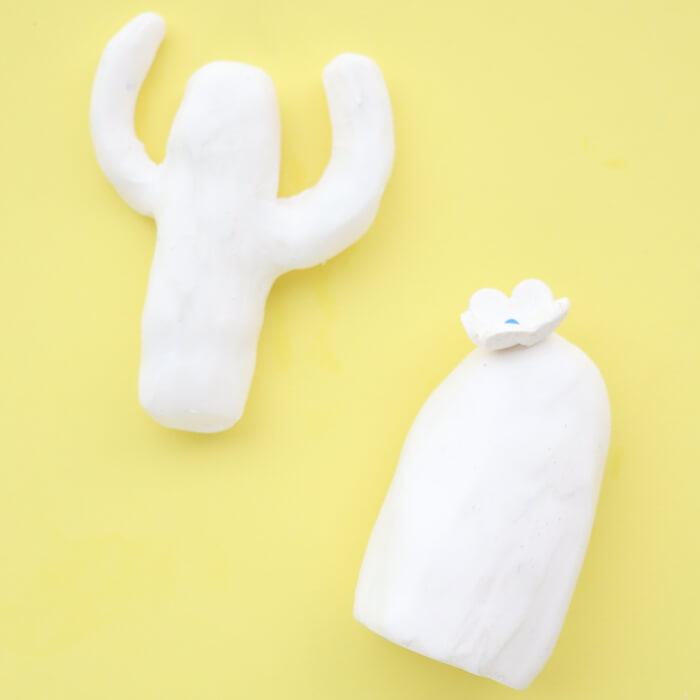
- Begin by taking a large piece of clay and molding it into a cactus. I made both a saguaro and a San Pedro cactus, but feel free to get creative and make any type of cactus you like best. Once you have a shape you like, bake the clay on an oven safe tray for 30 minutes at 275 ° F.
- Once your cactus is cool, it’s time to make your mold. Begin by placing your cactus face up in a plastic storage container. If you can’t find containers small enough, you can crunch up foil around the cactus—just don’t let the foil touch the clay. Smaller containers reduce the amount of silicone you need for each mold.
- Once the containers are ready, measure 1 part of the orange B solution and 10 parts of A solution. I ended up needing three 10-ounce batches to mold both of my cacti, but the amount you need will depend on the size your container.
- Mix the two parts of the Pourable Silicone together until well combined and then pour over the clay cactus. Once it’s covered, set aside and allow the silicone to set for 24 hours.
- After 24 hours, loosen the silicone with a knife and remove the mold from the container. Use scissors to cut away any extra silicone to reveal your cactus-shaped mold. Now it’s time to make cactus soap!
- If you included a flower like I did, melt a few ounces of White Soap Base with a little bit of Electric Bubble Gum Color Block in the microwave using 10-second bursts. Stir the soap base and Color Block together. Once you reach a shade of pink that you like, gently pour or spoon the pink soap into the flower portion of the mold and hold until it hardens (about one minute).
- Cut up about 10 ounces of White Soap Base and melt in the microwave using 15-second bursts, along with a piece of the Chrome Green Color Block. You’re working with a small amount of soap, so be careful to not overheat it. Stir to combine the soap and colorant, and add 0.2 ounces of Cactus Flower Fragrance Oil. Spritz the pink soap in the mold with the 99% isopropyl alcohol and pour the melted green soap into the molds. Let the soap cool and harden for about an hour.NOTE: The exact amount of White Melt and Pour Soap Base and fragrance oil will depend on how large your mold is. Use the Fragrance Calculator to find out how much fragrance oil you add.
- Once hard, unmold your soap and use a toothpick to draw cactus lines or make prick marks if desired. Your soap is now complete. And the best part is that you have a new mold to make as many cactus-shaped soaps as you want! Repeat this process using the Hydrated Chrome Green Color Block to create the blue-green cacti shown below. Wrap the soap in plastic wrap or store in an airtight container to help prevent glycerin dew.