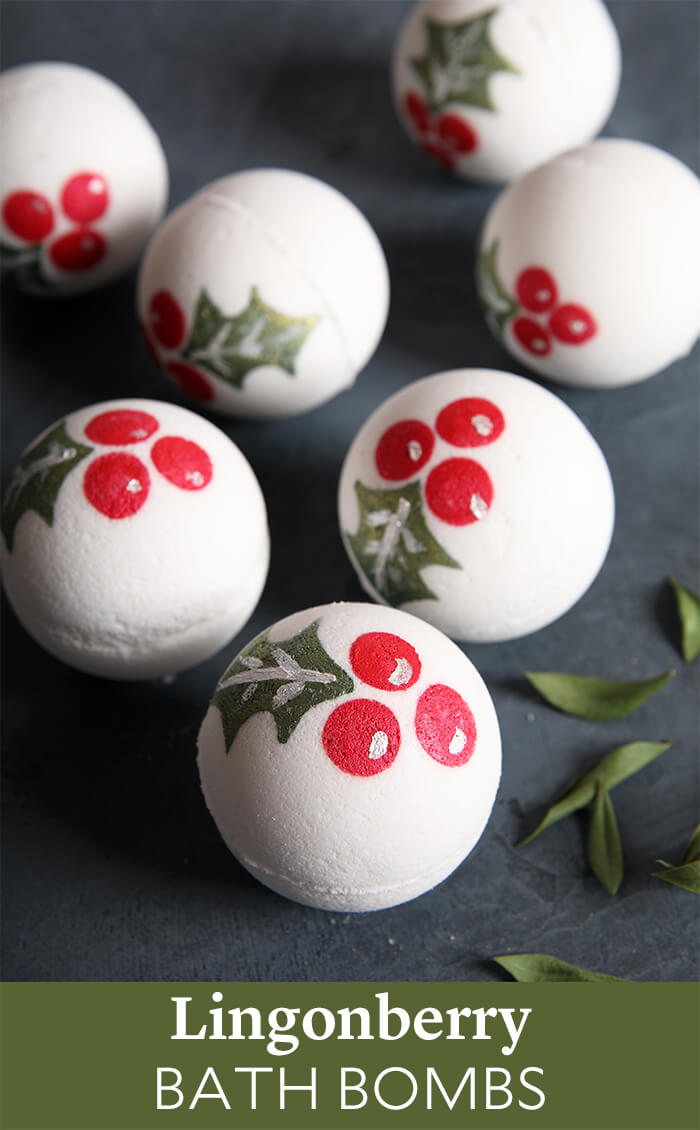
These bath bombs are made with skin-loving lingonberry seed oil and Lingonberry Spice Fragrance Oil. The berry design is painted on with a mixture of mica and 99% isopropyl alcohol. The end result is a festive, gift-worthy bath bomb.
The first step is making the base with the Bath Bomb Mold and Package. Once the bath bombs have dried overnight, they’re unmolded and painted. We recommend paint brushes with a small point for precision. The painting does take a steady hand and some patience, but it’s a relaxing process. It’s also a great project to do with friends, family, and kids.
Lingonberry Spice Fragrance Oil is a mix of apple, frozen berry, clove, and musk. It’s sure to be your new favorite scent for the holidays and beyond. It discolors tan in soap. Vanilla discoloration in bath bombs is hard to predict – sometimes it happens and sometimes it doesn’t. We haven’t noticed any discoloration in these bath bombs after about 3 weeks, but we will update the post if we do.
Lingonberry Bath Bombs
What You Need:
About 13 Bath Bomb Mold & Packages
32 oz. Baking Soda (Sodium Bicarbonate)
16 oz. Citric Acid
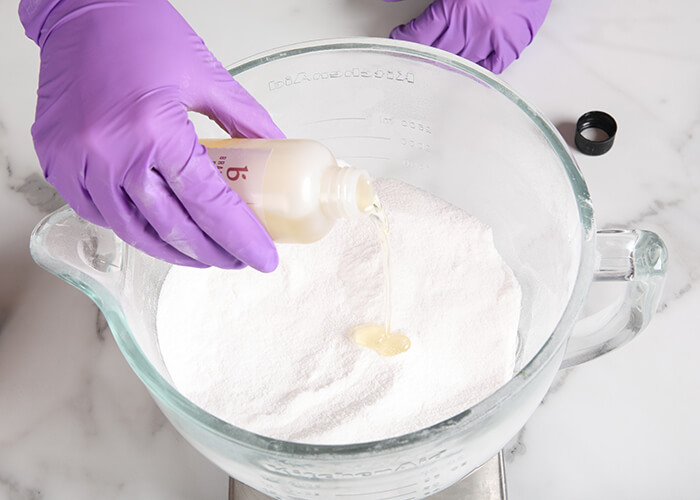
1 oz. Lingonberry Seed Oil
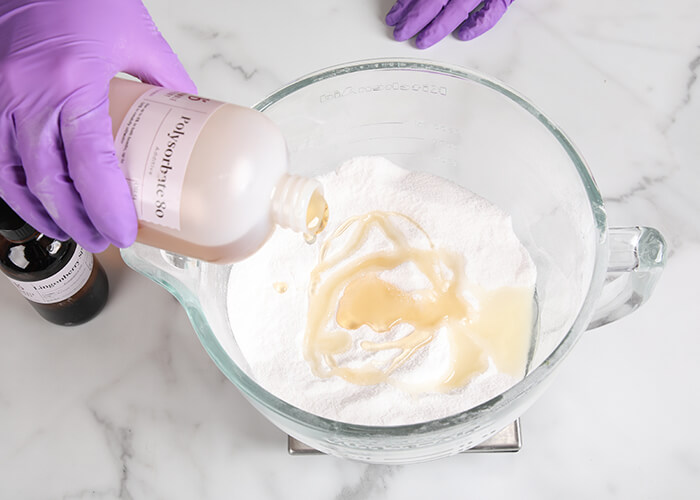
0.5 oz. Polysorbate 80
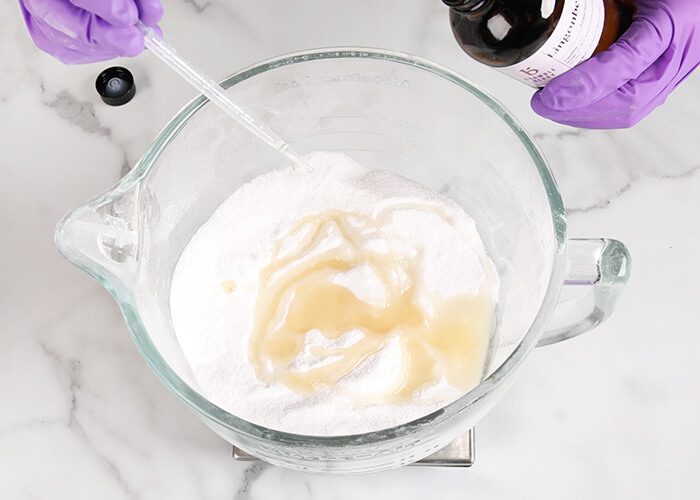
9 mL Lingonberry Spice Fragrance Oil
Red Mica
Evergreen Mica
Super Pearly White Mica
99% Isopropyl Alcohol
Witch Hazel in a Spray Bottle
Click below to add everything you need for this project to your Bramble Berry shopping cart!
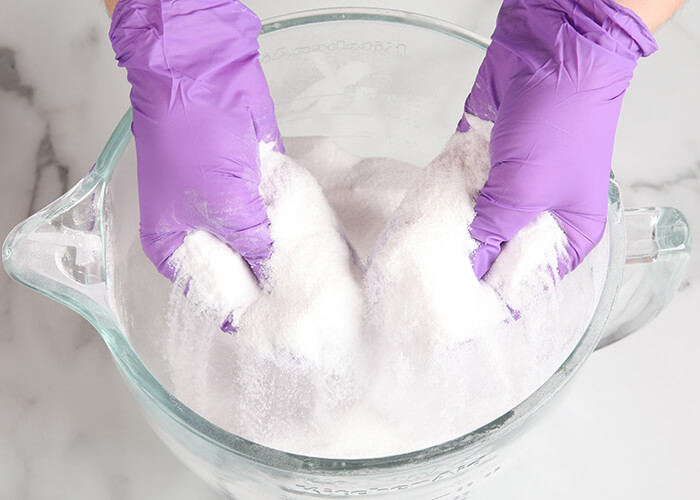
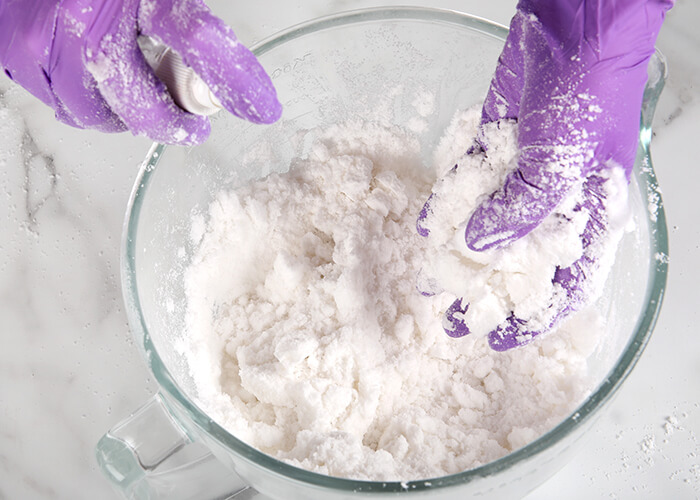
ONE: In a large container, mix together 32 ounces of baking soda and 16 ounces of citric acid. To get rid of clumps, you can push the powder through a sifter or break them up with your fingers. Citric acid has a tendency to take off nail polish, so wear gloves to protect your manicure. Thoroughly stir the ingredients together.
TWO: Add 1 ounce of lingonberry seed oil, 0.5 ounces of polysorbate 80, and 9 mL of Lingonberry Spice Fragrance Oil to the powder.
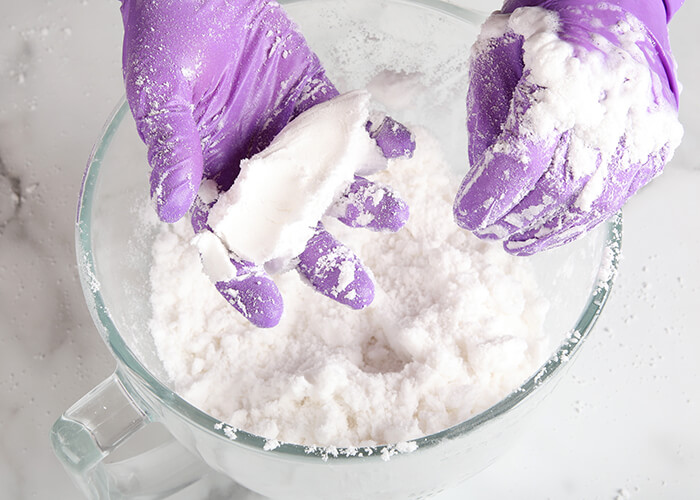
THREE: Use your hands to thoroughly mix in the wet ingredients.
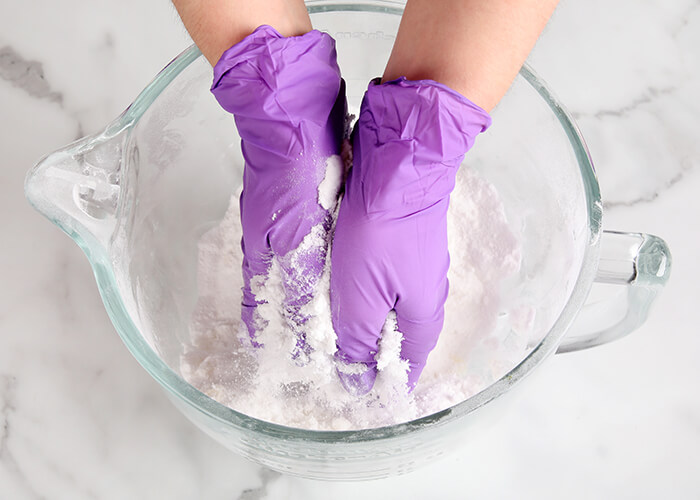
FOUR: Test the consistency of the bath bomb mixture. The perfect consistency for molding is similar to wet sand and holds its shape when squeezed. If it’s too dry, use one hand to spritz the mixture with witch hazel and one to mix. Continue spritzing until the mixture holds its shape when squeezed.
FIVE: Fill the two halves of the molds, gently pressing the bath bomb mixture in each so they hold their shape. Mound a little extra in the center of each half of the molds. Wipe away any mixture in the seams of the mold, match the eyelets of each side up, and press together. Make sure to direct pressure to the edges of the mold rather than the center. Continue filling up the bath bomb molds until the mixture is gone.

SIX: Allow the bath bombs to harden in the mold for at least 24 hours. Remove the bath bomb from the mold to ensure it’s completely hard. Before painting the bath bomb, you want to make sure it’s fairly durable.
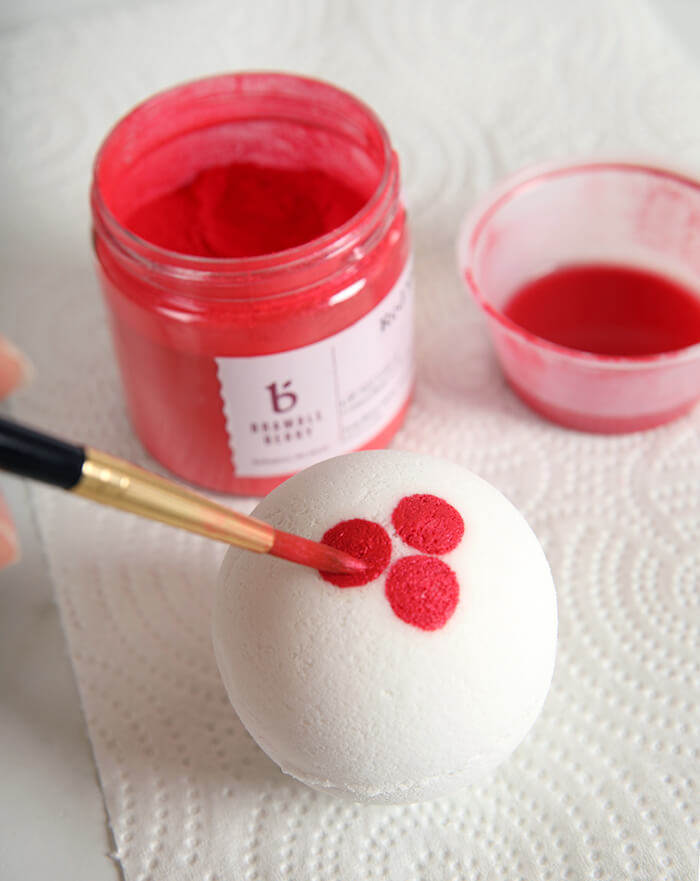
SEVEN: In three small separate containers, mix about 1/2 teaspoon of Red Mica, 1/2 teaspoon of Evergreen Mica, and 1/2 teaspoon of Super Pearly White Mica with about 1/2 tablespoon of 99% isopropyl alcohol. Mix thoroughly until smooth. The consistency of the mica paint is up to you. If you want a more saturated color, add a touch more mica. If you want a thinner, less saturated mixture, add more 99% isopropyl alcohol. Test the consistency on a paper towel or piece of paper.
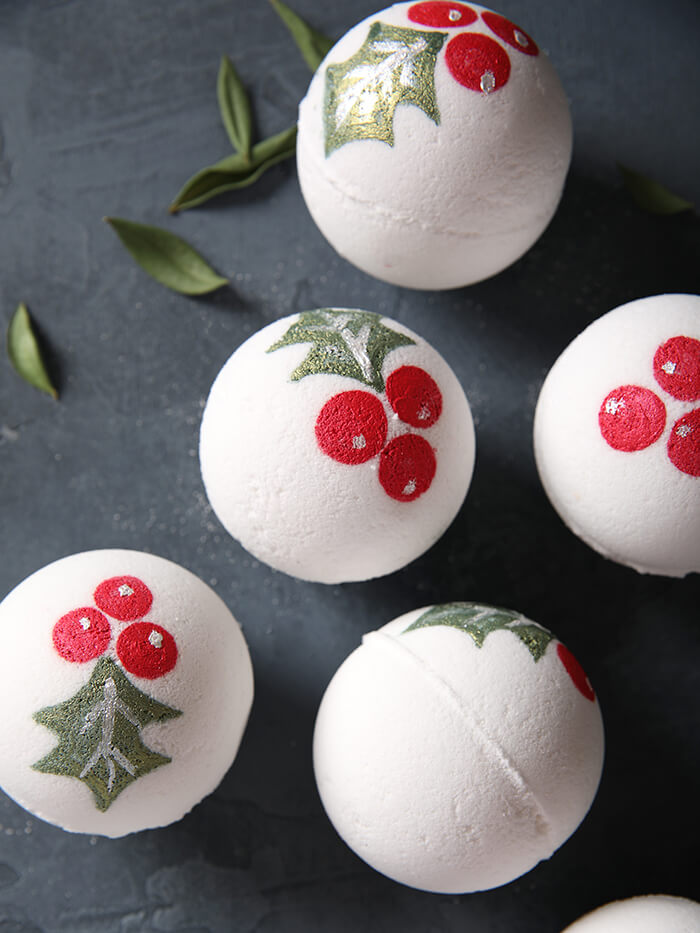
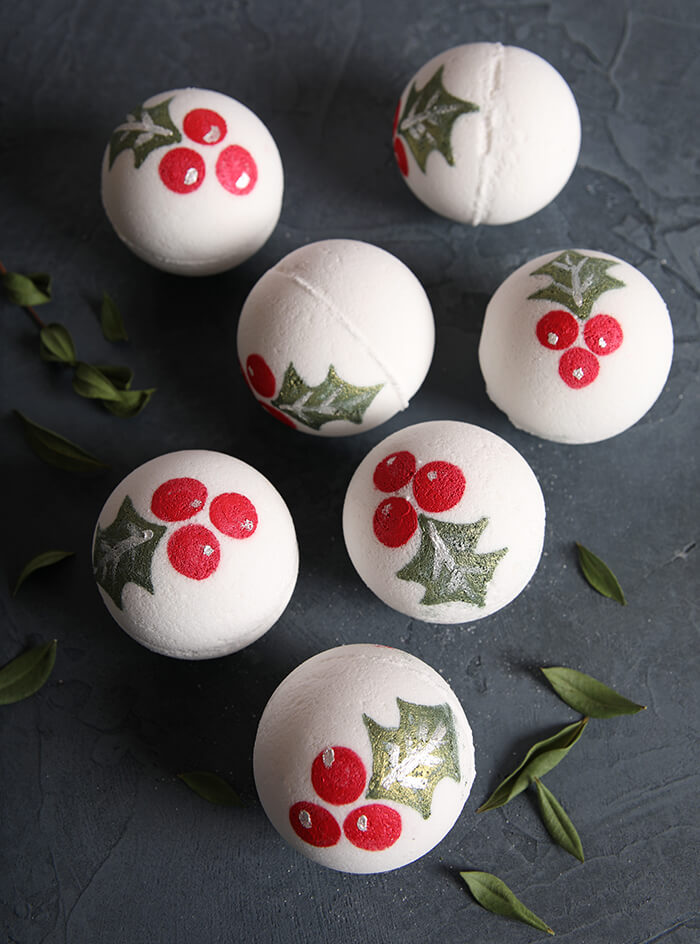
EIGHT: Using a small paint brush, create three circles in the center of the bath bomb using the Red Mica mixture.
NINE: Using a small paint brush, paint a leaf using the Evergreen Mica mixture.
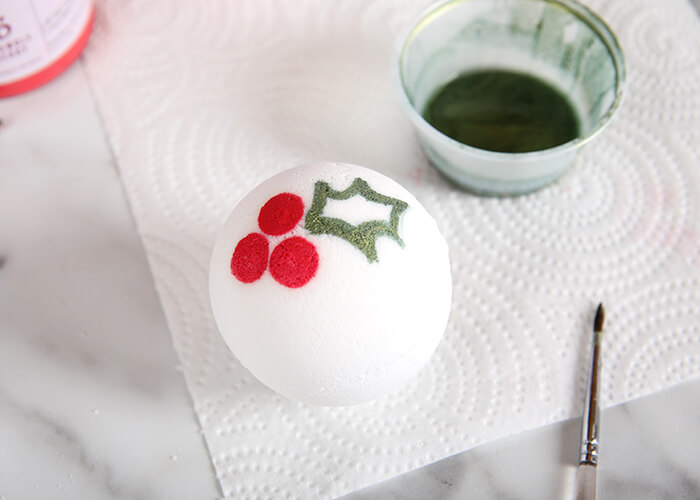
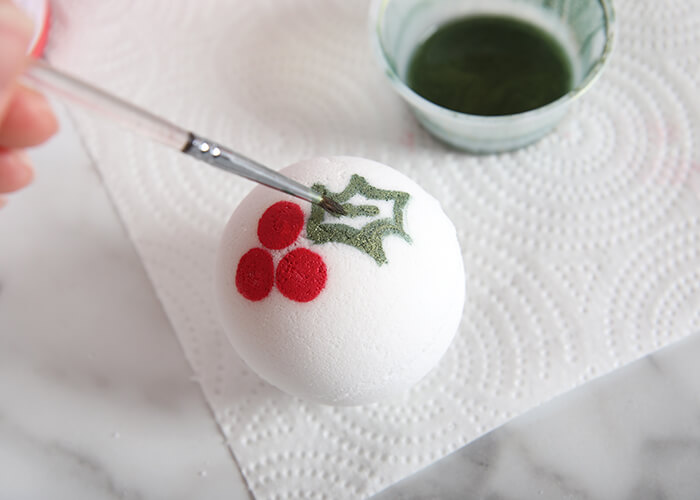
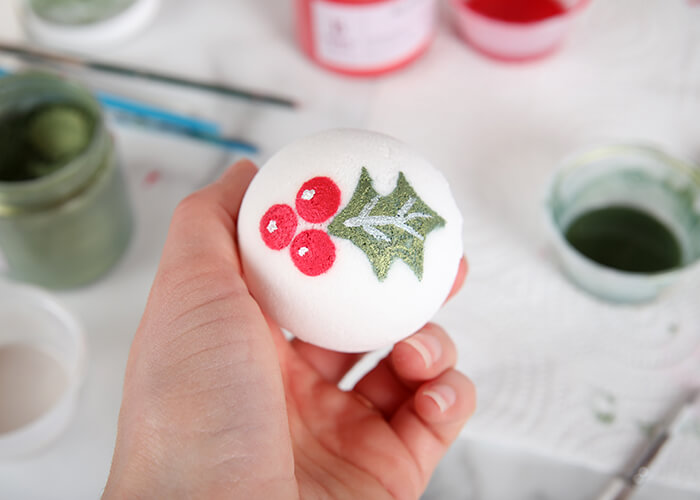
TEN: Finally, use a small paint brush to add small dots on the berries and lines on the leaves. This step really makes the design pop.
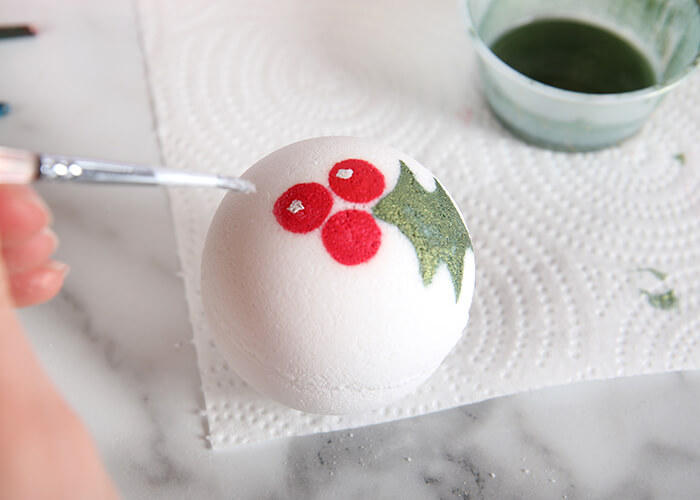
ELEVEN: Continue painting until all the bath bombs are decorated. Allow the bath bombs to fully dry. When you’re ready to use, drop them into a hot bath and enjoy. If you’re giving them as gifts, place them back into their mold – it doubles as packaging!


Lingonberry Bath Bombs
Ingredients
- About 13 Bath Bomb Mold & Packages
- 32 oz. Baking Soda Sodium Bicarbonate
- 16 oz. Citric Acid
- 1 oz. Lingonberry Seed Oil
- 0.5 oz. Polysorbate 80
- 9 mL Lingonberry Spice Fragrance Oil
- Red Mica
- Evergreen Mica
- Super Pearly White Mica
- 99 % Isopropyl Alcohol
- Witch Hazel in a Spray Bottle
Instructions
- In a large container, mix together 32 ounces of baking soda and 16 ounces of citric acid. To get rid of clumps, you can push the powder through a sifter or break them up with your fingers. Citric acid has a tendency to take off nail polish, so wear gloves to protect your manicure. Thoroughly stir the ingredients together.
- Add 1 ounce of lingonberry seed oil, 0.5 ounces of polysorbate 80, and 9 mL of Lingonberry Spice Fragrance Oil to the powder.
- Use your hands to thoroughly mix in the wet ingredients.
- Test the consistency of the bath bomb mixture. The perfect consistency for molding is similar to wet sand and holds its shape when squeezed. If it’s too dry, use one hand to spritz the mixture with witch hazel and one to mix. Continue spritzing until the mixture holds its shape when squeezed.
- Fill the two halves of the molds, gently pressing the bath bomb mixture in each so they hold their shape. Mound a little extra in the center of each half of the molds. Wipe away any mixture in the seams of the mold, match the eyelets of each side up, and press together. Make sure to direct pressure to the edges of the mold rather than the center. Continue filling up the bath bomb molds until the mixture is gone.
- Allow the bath bombs to harden in the mold for at least 24 hours. Remove the bath bomb from the mold to ensure it’s completely hard. Before painting the bath bomb, you want to make sure it’s fairly durable.
- In three small separate containers, mix about 1/2 teaspoon of Red Mica, 1/2 teaspoon of Evergreen Mica, and 1/2 teaspoon of Super Pearly White Mica with about 1/2 tablespoon of 99% isopropyl alcohol. Mix thoroughly until smooth. The consistency of the mica paint is up to you. If you want a more saturated color, add a touch more mica. If you want a thinner, less saturated mixture, add more 99% isopropyl alcohol. Test the consistency on a paper towel or piece of paper.
- Using a small paint brush, create three circles in the center of the bath bomb using the Red Mica mixture.
- Using a small paint brush, paint a leaf using the Evergreen Mica mixture.
- Finally, use a small paint brush to add small dots on the berries and lines on the leaves. This step really makes the design pop.
- Continue painting until all the bath bombs are decorated. Allow the bath bombs to fully dry. When you’re ready to use, drop them into a hot bath and enjoy. If you’re giving them as gifts, place them back into their mold – it doubles as packaging!