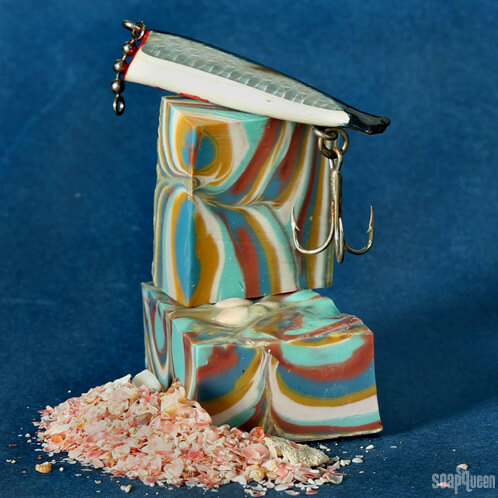
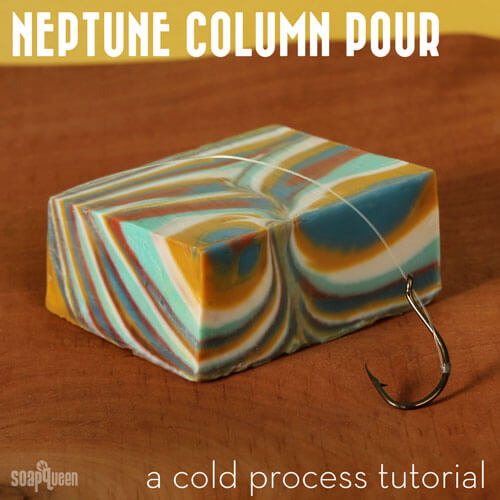
The Havana Classic series wraps up this week with one final tutorial — the Neptune Column Pour. Typically this look is achieved by pouring the soap batter over a weighed column shape. Check out page 74 in the Soap Crafting book for an example of this technique. In this project, we put a little twist on the traditional column. Instead of a 4-point rectangle shown in the Soap Crafting book, we poured over a 5-point star, resulting a beautiful and unique pattern. The star template is included for free in this tutorial.
What You’ll Need:
9.9 oz. Avocado Oil
3.3 oz. Cocoa Butter
13.2 oz. Coconut Oil
6.6 oz. Mango Butter
19.8 oz. Olive Oil
13.2 oz. Palm Oil
9 oz. Sodium Hydroxide
21.7 oz. distilled water
4 oz. Tobacco and Bay Leaf Fragrance Oil
Free 5-Pointed Star Column Template
18 Bar Birchwood Mold with Silicone Liner

Click here to add everything you need for this project to your Bramble Berry shopping cart!
If you’ve never made Cold Process soap before, stop here! I highly recommend checking out our FREE four part SoapQueen.tv series on Cold Process Soapmaking, especially the episode on lye safety. And if you’d rather do some reading, Bramble Berry carries a wide range of books on the topic, including my newest book, Soap Crafting. You can also checkout the digital downloads for that instant gratification factor.
SAFETY FIRST: Suit up for safe handling practices! That means goggles, gloves and long sleeves. Make sure kids, pets, and other distractions and tripping hazards are out of the house or don’t have access to your soaping space. Always soap in a well-ventilated area.
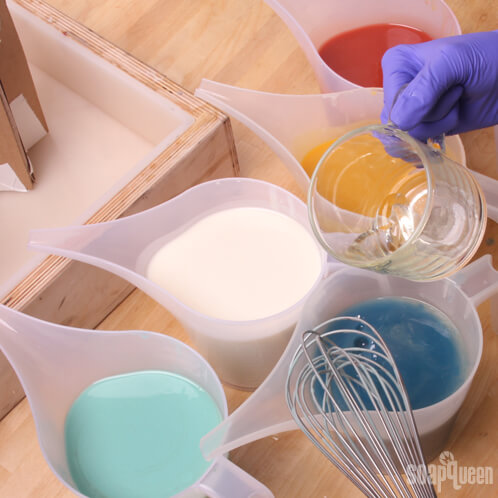
COLORANT PREP: The colors in this project are special blends. Prepare them ahead of time in the following ratios. We recommend dispersing colorants in liquid oils, such as Sweet Almond or Sunflower oil:
- Dark Blue: 1/2 teaspoon Ultramarine Blue + 1/2 teaspoon Hydrated Chrome Green dispersed in 1 tablespoon liquid oil.
- Aqua: 1 teaspoon Titanium Dioxide + 1/2 teaspoon Hydrated Chrome Green dispersed in 1 tablespoon liquid oil.
- White: 1 tablespoon Titanium Dioxide dispersed in 2 tablespoons liquid oil.
- Yellow: 1 teaspoon Yellow Oxide dispersed in 1 tablespoon liquid oil.
- Red: 1/4 teaspoon Brick Red Oxide + 1 teaspoon Tangerine Wow dispersed in 1 tablespoon liquid oil.
For more on preparing colorants for cold process soaping, check out this SQTV Short.
TOOL PREP:
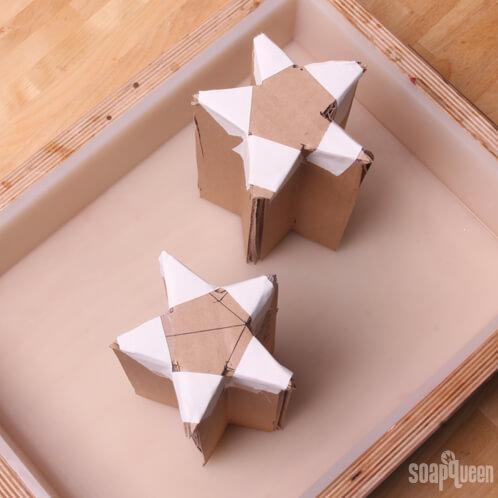
You will need to create two star-shaped columns for this design. We made ours out of cardboard but you can use whatever you have on hand.
ONE: Cut out the template along the solid lines. Place the large rectangles over your cardboard and cut the cardboard to size along the edges using a craft knife.
TWO: Use a pen or pencil and mark out the dashed lines on your cardboard. These lines indicate the mountains and valleys which will result in an accordion shape and form the body of the column. Mark the A’s and B’s on your cardboard as well. These will indicate the edges you need to tape together in later steps.
THREE: Place a ruler between the marks and use a craft knife to score your cardboard along the ruler. You will score one side of the cardboard for one set of dotted lines and the other side of the cardboard for the other set of lines. This will ensure that you are able to fold your cardboard correctly creating the accordion shape you see in the photo below.
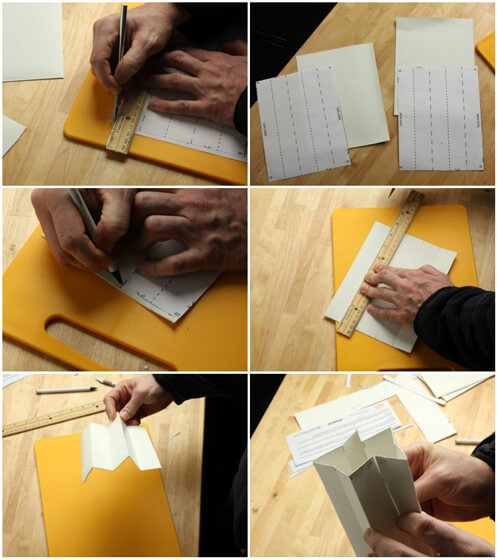
From top left — Step 1: Cutting the paper to the template size. Step 2: The cut out pieces. Step 3: Marking the cut outs along the lines of the template. Step 4: Scoring the cut out along the lines, connecting the marks made in Step 3. Step 5: The accordion-folded cut out. Remember to score each line on the opposite side so you can fold the paper into an accordion shape. Step 6: Tape the sides with the same corresponding letter together.
FOUR: Lay both of your cardboard accordions down and line up the edges marked with an A. These should rise to a ridge. Tape these two pieces together along this ridge. This will be the bottom part of your star between the two bottom legs.
FIVE: Join the two edges marked with B together and again tape along the ridge. At this point you should be able to shape your two accordion pieces into the shape of a 5-pointed star. To ensure they hold shape tape one of the star-shaped end caps on one end of the tube.
SIX: Now you should have an open ended column in the general shape of a 5-pointed star. Fill this column with some sort of weight. We used small rocks, but you can use anything that will help hold the column down so the soap does not pick it up and move it. Make sure your column retains its five-pointed shape while filling it.
SEVEN: Once your column is filled, tape the other end cap on. We taped one point at a time and once the first two were taped we found it easier to lay the column on its side and rotate it through the remaining points. This helped the column keep its shape since we used a relatively lightweight cardboard. If you are using a heavier cardboard this likely won’t be a concern. Ensure both end caps are secure and now your star columns are ready for your mold.
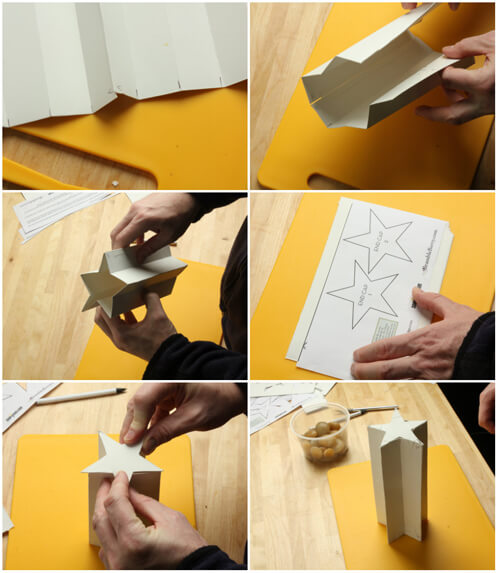
Top left — Step 7: Taping the sides with corresponding letters together. Step 8: Taping the open side together. Step 9: Your star is starting to take shape. Step 10: Cutting out the star-shaped end pieces. Step 11: Taping the end pieces to the column. Step 12: Don’t forget to fill your column with something heavy before sealing it shut!
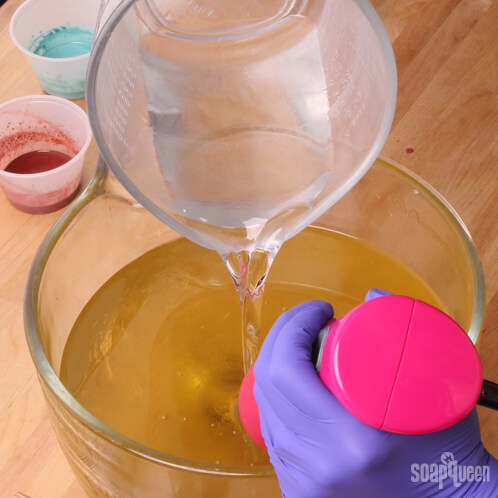
ONE: Slowly and carefully add the lye to the water and gently stir until the lye has fully dissolved and the liquid is clear. Set aside to cool.
TWO: Combine the Avocado, Cocoa Butter, Mango Butter, Coconut, Olive and Palm oils (remember to fully melt then mix your entire container of Palm Oil before portioning). Once the lye water and the oils have cooled to 130 degrees or below (and are ideally within 10 degrees of each other), add the lye water to the oils and stick blend until thin trace.
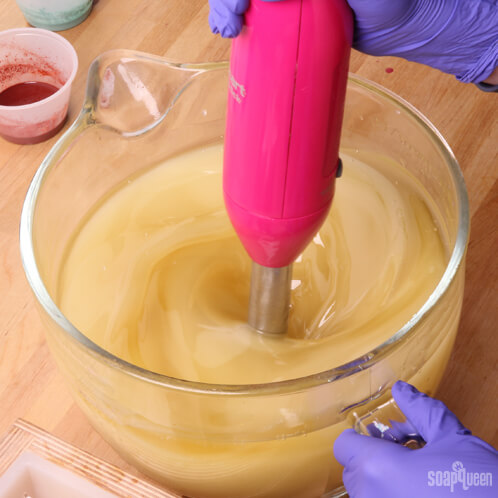
THREE: Once the batter has reached light trace, split it equally into five containers.
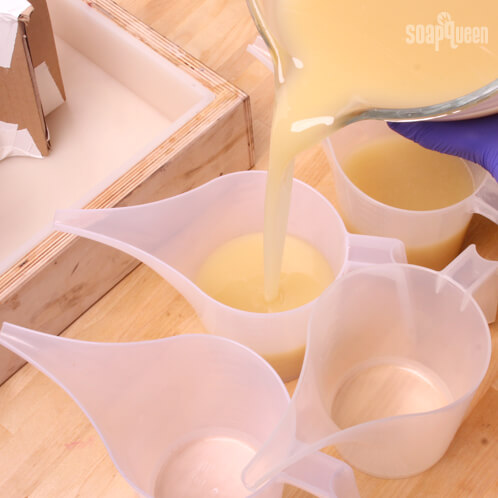
FOUR: Add the dispersed colorant mixtures. Whisk in one color per container in the following amounts:
- 2 teaspoons dispersed Yellow + 1/4 teaspoon dispersed White
- 1.5 teaspoons dispersed Red
- 3 teaspoons dispersed White
- 2 teaspoons dispersed Dark Blue
- 3 teaspoons dispersed Aqua

FIVE: Divide the fragrance equally among the five containers. Incorporate with a wire whisk.
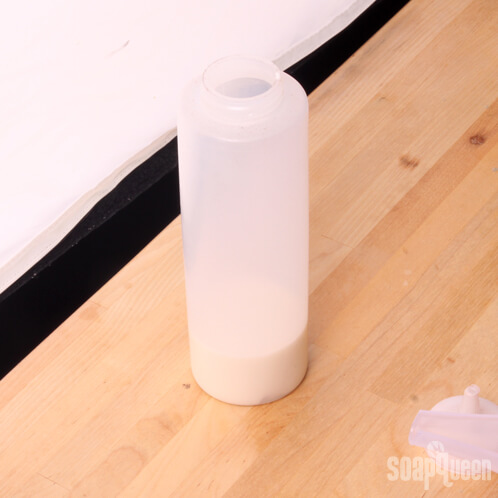
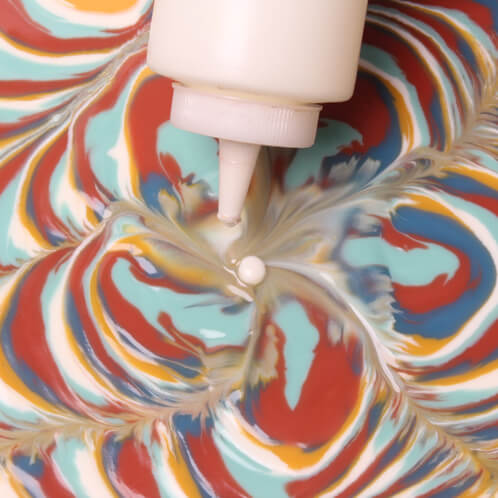
SIX: Pour a tiny amount (about 1/8 of the bottle) of White soap in a squeeze bottle. This is for any final embellishment after you pour the design. Set aside.
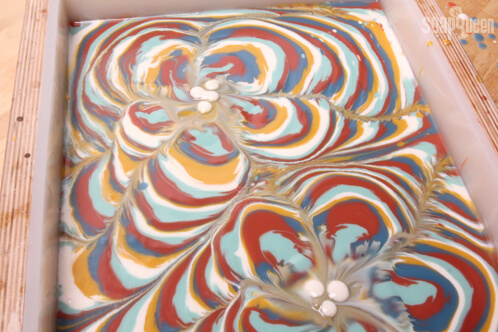
SEVEN: Decide on a color order and stick with it for the entirety of the pour. Then pour the first color in the center of the star column while counting to 3. Repeat this step with the other colors, again counting to three. Repeat the process until the containers have been emptied.
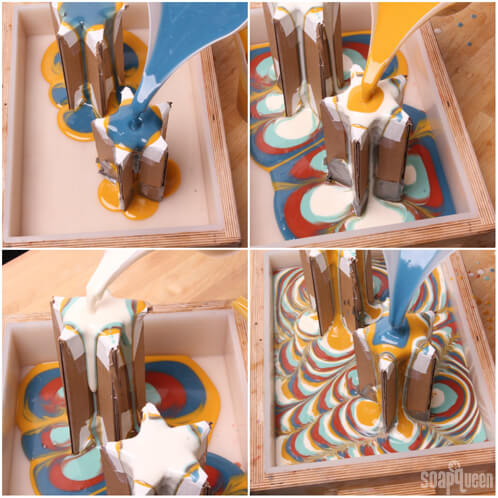
EIGHT: When the containers are empty, slowly remove the column from the soap. Have a container waiting near by to set the column in.
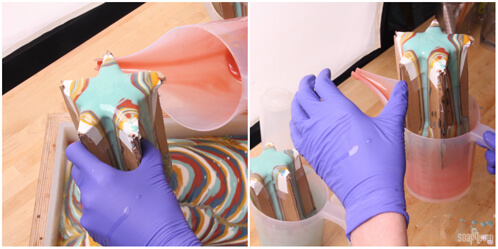
NINE: Using the squeeze bottle you poured in step six, embellish the area where the column was removed. We made small dots to make the soap look like flowers.
Spray with isopopyl alcohol and then insulate the soap and place on a heating pad for 15 – 20 minutes. Then remove from heat and cover it overnight. Allow the soap to cure for 4 – 6 weeks and then enjoy!