One of the great things about melt and pour soap is its versatility. It allows you to create intricate details, complicated patterns and in this case, cute little bows! The key to this project is adding extra liquid glycerin to the melt & pour base to give the soap extra flexibility to manipulate into bows.
This project does take a little extra patience and a steady hand, but once you get the hang of making them they make for adorable embellishments on all kinds of soapy projects.

What You’ll Need:
17 oz. Shea Melt & Pour Base
40 oz. Clear Melt & Pour Base
.3 oz. Love Spell Fragrance Oil
1.2 oz. White Tea and Ginger Fragrance Oil
.4 oz. Liquid Glycerin
Shimmer Light Gold Color Block
12 Cavity Rectangle Silicone Mold
 Click here to add everything you need for this project to your Bramble Berry shopping cart!
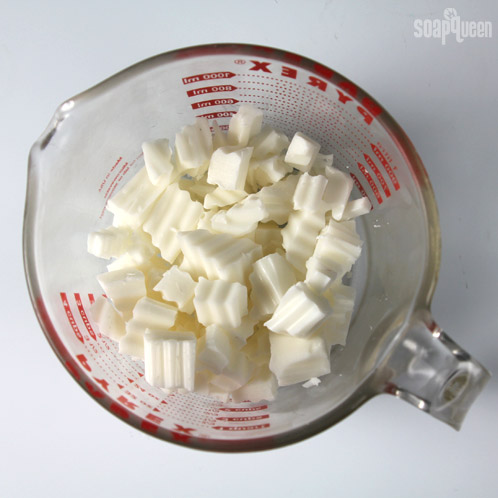
ONE: Cut and melt 7 oz. of Shea Melt and Pour base and place in a microwave-safe container. Heat the soap on 10 second bursts until fully melted.
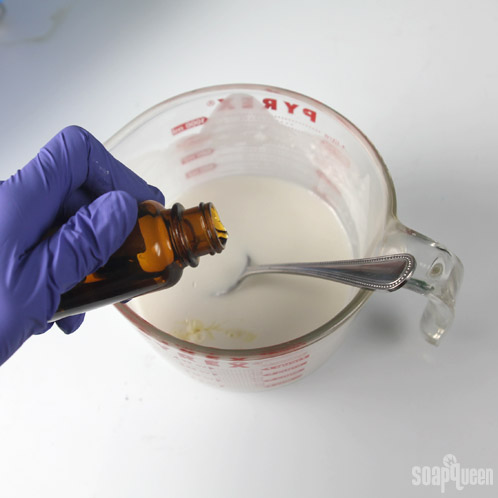
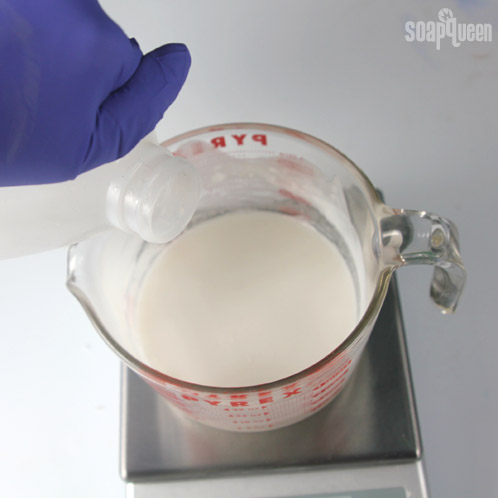
TWO: Add .3 oz. of Love Spell Fragrance Oil, a few shavings of the Shimmer Light Gold Color Block and .4 oz. Liquid Glycerin and stir.
THREE: Now here comes the tricky part! Pour a thin layer into the cavity of the 12 Bar Silicone Rectangle Mold. Pour only enough to just barely cover the surface of the cavity. The thinner you pour, the easier it will be to manipulate the soap in the bow shape. We found it helpful to spray 99% alcohol in the cavity beforehand to help the soap thin out. Be sure to spray with alcohol after too to disperse bubbles. We made enough white soap to fill 8 of the 12 cavities.
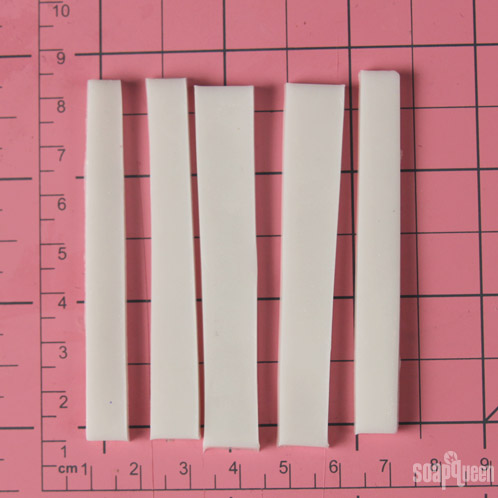
FOUR: Give the soap 15 – 20 minutes to dry and then unmold. Cut the soap rectangles into 5 equal sections.
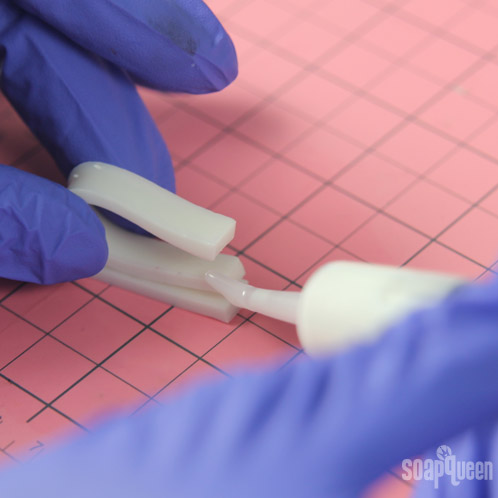
FIVE: Now start building your ribbons. This part can get a little messy, so lay down some parchment paper or other surface you don’t mind getting some melt and pour soap on. Bend one of the strips into a half-loop. Then, spray 99% alcohol liberally on a flat strip and place the loop on top. Use the injector tool to glue the two pieces together.
SIX: Now repeat step 5 but for the second half of the bow. This part takes some patience, and you’ll need to spray plenty of alcohol and soapy ‘glue’ to get the two sides to adhere. Don’t worry if you get melt & pour all over your work surface in the process. It’s better to have too much soapy glue than too little and have the sides come apart.
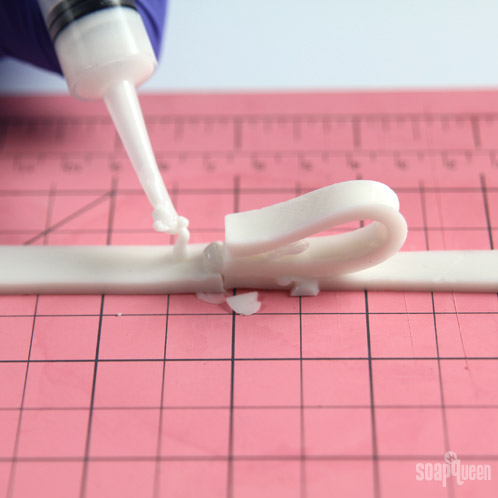
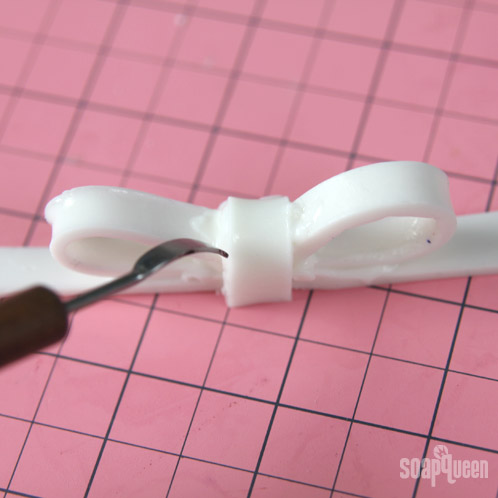
SEVEN: Wrap the last strip of melt and pour around the middle of the bow. The two ends will hang over, so use an Exacto knife or other cutting tool to gently slice them off.
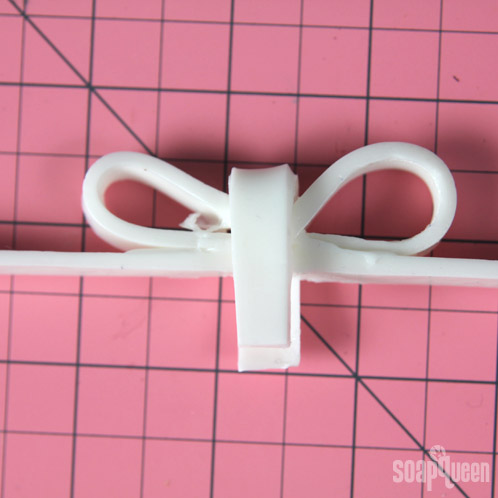
EIGHT: You may have excess soap all over the bow from gluing all the small parts together, so use a Clean Up Tool to gently pick them away.
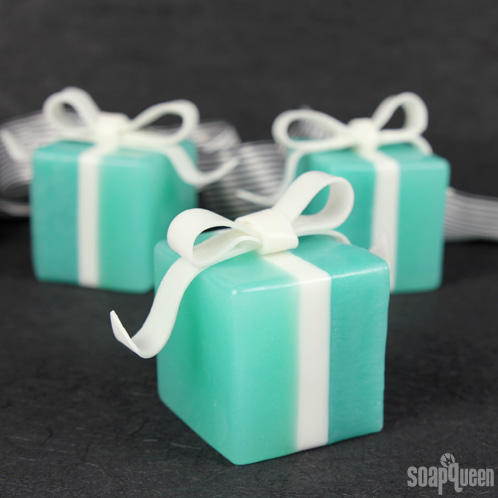
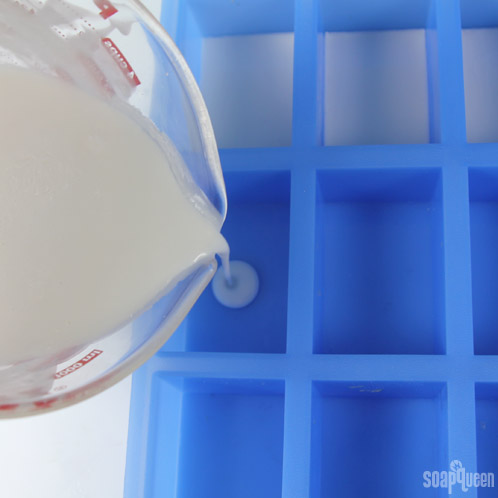
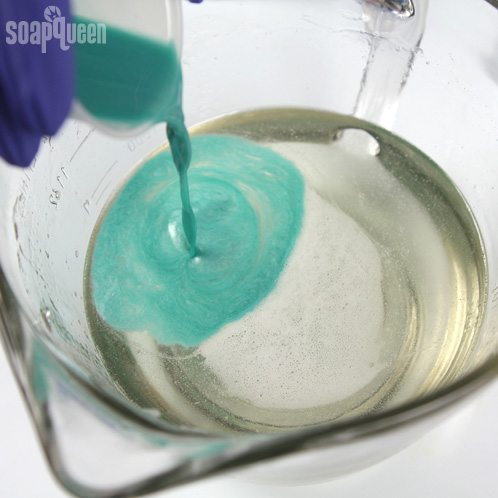
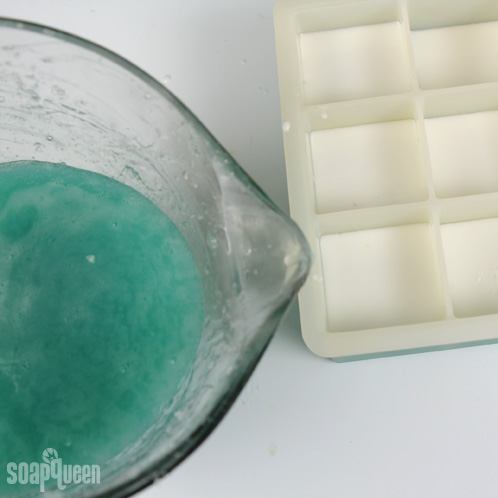
NINE: Once you’re satisfied with the bow, it’s ready to use! We placed ours on little melt and pour soap ‘boxes’ made with the Clear Melt & Pour Base in the 9 Cube Soap Silicone Mold and colored with Aqua Pearl Mica. Start making the boxes by cutting and melting 40 oz. of Clear Melt & Pour Base in a microwave-safe container on 30 second bursts. Fragrance with 1.2 oz. of White Tea and Ginger Fragrance Oil. Color with a mixture of 2 tsp. Aqua Pearl dispersed in 1 tbsp. Isopropyl Alcohol.
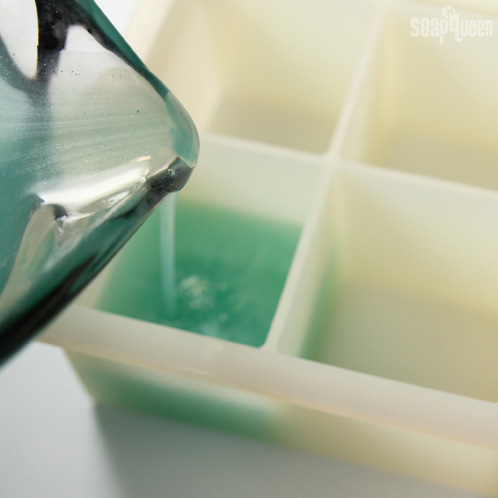
TEN: Once the fragrance and color are fully incorporated, fill each cavity about halfway with aqua-colored soap. Spray with isopropyl alcohol to disperse bubbles.
ELEVEN: Give the soap 30 – 40 minutes to dry. Meanwhile, cut and melt 10 oz. of Shea Melt & Pour in a microwave-safe container on 10 second bursts. When the aqua soap has formed a thick skin and the white soap has cooled to 125 degrees F or below, spray with the aqua soap with isopropyl alcohol and then pour a thin layer of white soap in each of the cavities. Spray with alcohol to disperse bubbles.

TWELVE: When the white soap has formed a thick skin, reheat the remaining aqua soap. When the aqua soap has reached 125 degrees F or below, spray the white soap with alcohol and then pour the aqua soap. Spray again to disperse bubbles.
Allow the soap to fully dry for 45 minutes before unmolding. Top off the soap cubes with the bow and you’re all done!