I love love love color. From packaging inspiration to pops of color in the fashion world to wonderful soapy creations, COLOR is all the rage. We spent a super fun but slightly grey week in one of our favorite getaway spots (family pictures to come soon!) and upon my return, these great little soaps were on my brain. Who doesn’t love rainbows? Correction- Who doesn’t love double rainbows?

Recipe:
30 oz Clear Melt and Pour Soap Base
0.4 oz Island Coconut Fragrance Oil
0.2 oz Violet Fragrance Oil
Liquid Non-Bleeding Cherry Colorant
Liquid Non-Bleeding Teal Colorant
Buy everything you need for this project with the click of a button!
![]()
COLOR PREP: Before using the neon pigments, you’ll want to disperse them in glycerin so they mix into the soap well. Check out our quick video on dispersing neon pigments, or if you’ve done this before the usage rate I used was 1/3 cup Liquid Glycerin to 1/2 teaspoon pigment.
ONE: Cut Clear Melt and Pour Soap into 1 inch chunks and melt completely in a heat safe container. Microwave using 30 second bursts, stirring between each burst.
TWO: Once the soap is fully melted, add both the Island Coconut Fragrance Oil and the Violet Fragrance Oil and stir until incorporated. Split the soap into 6 equal parts, weighing 5 ounces each.
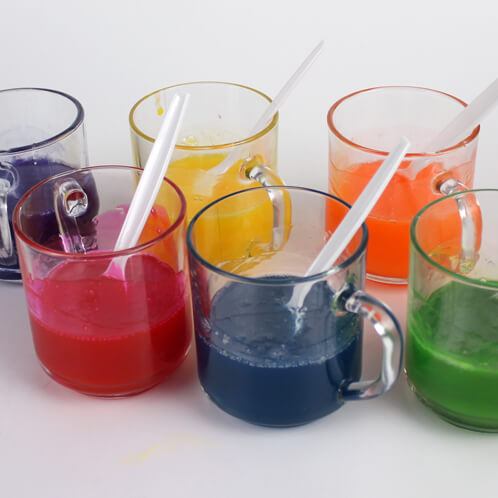
 THREE: Color each of the melted soaps as follows:
- Red: 10 drops Liquid Non-Bleeding Cherry Colorant
- Orange: 3/4 teaspoon dispersed Tangerine Wow! Pigment
- Yellow: 3/4 teaspoon dispersed Fizzy Lemonade Pigment
- Green: 5 drops Liquid Green Colorant + 3 drops Diluted Lime LabColor
- Blue: 8 drops Liquid Non-Bleeding Teal Colorant
- Violet: 1/2 teaspoon dispersed Ultraviolet Blue Pigment
FOUR: Starting with Violet, pour a small layer into the bottom of the sphere molds. Pour an even amount into all of the cavities of the mold (it’s totally fine to eyeball it). Spritz the layer with rubbing alcohol and allow to harden.

FIVE: Repeat step four with the Blue, Green, Yellow, Orange and Red layers (in that order), being sure to spray more rubbing alcohol between layers. I got a little messy with mine!
TIP: Bramble Berry’s Four Sphere Mold comes in two pieces, a top and a bottom, which come together to create the spheres. For the first couple layers of this project, I found it worked well to pour into the bottom of the mold without the top connected. I got the first three layers poured before I needed to put the top on the mold again. Make sure the soap is fully hardened before attempting to reattach the top of the mold to the bottom!

SIX: Allow to fully harden for 4-6 hours before removing from mold.
