If you’ve missed Days 1, 2 or 3, read them first so you’re up to date on the set-up and secret (shhhhh, it’s liquid glycerin) to making really great jelly rolls.
In the video above, you can see the initial rolling process. Notice that the soap is malleable and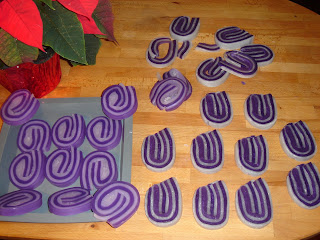 though it is quite thick, it rolls with a minimal amount of effort. Unfortunately, this four layer pour is too thick. The thickness is the reason that the soap looks more like an oval, rather than a cute little round.
After the video cuts off, I spent a minute or so massaging the rolled soap into more of a tight, oval shape.
The final soaps are different and unique but the oval shape is not quite what I wanted. Check back tomorrow for photos of the final soap. Plus, we’ll have photos of the same recipe with thinner layers and a clear concise recipe so you can make perfect jelly rolls at home – every time.