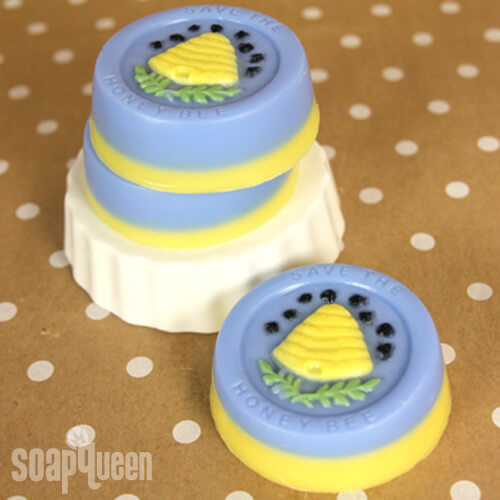
The decline of the honey bee population, known as Colony Collapse Disorder, poses a serious threat to our ecosystem. Researchers estimate one-third of all honey bee colonies in the country have vanished. With a wide variety of agricultural crops pollinated by honey bees, the potential impact to our environment and economy is serious.
Unfortunately, the cause of the honey bee population decline remains a mystery. While theories have been posed, more research is crucial to identifying the cause. To aid research, Bramble Berry donates $3.50 for every Save the Honey Bee Mold sold to the UC Davis Honey Bee Research Fund.
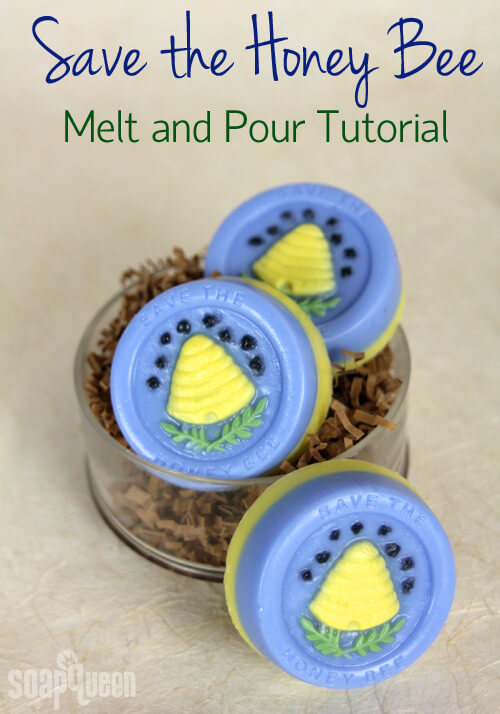
As of July, more than $260 has been donated! Bramble Berry will continue to donate to the program every quarter. Not only are these molds supporting a great cause, they make an adorable bar of soap. Scented with Wildflower Honey Fragrance Oil, this project is a great way to get crafty while making a difference.
What You Need:
Save the Honey Bee Mold
Injector Soap Tool
6.5 ounces White Melt and Pour Base
7.5 ounces Honey Melt and Pour Base
Yellow Oxide Color Block
Ultramarine Blue Color Block
Black Oxide Color Block
Chrome Green Color Block
4 mL Wildflower Honey Fragrance Oil
4 mL Vanilla Color Stabilizer
 Click here to add everything you need for this project to your Bramble Berry shopping cart!
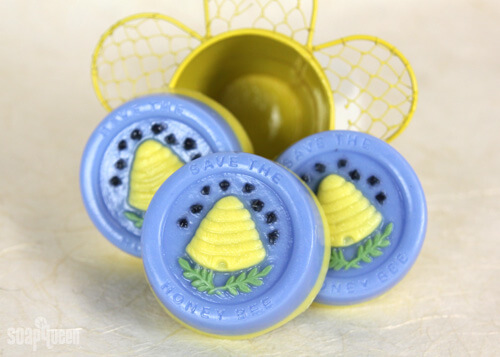
Tip: The injector tool will become clogged with hardened soap if you don’t push it out immediately after you’re done. Keep a cup of hot water near by so you can rinse the tool with hot water and keep it from getting clogged in between uses.
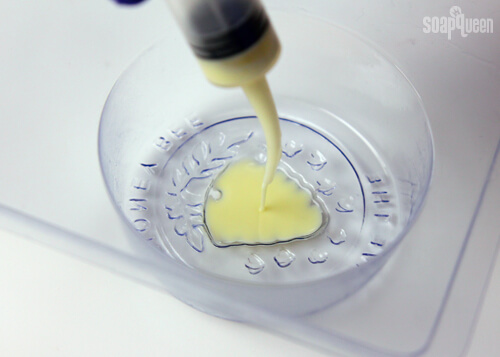
TWO: Cut and melt .5 oz. of White Melt and Pour base in the microwave on 10 second bursts. Add shavings of the Chrome Green Color Block and stir to incorporate. Using the Injector Tool, carefully fill in the leaf details. Spray with isopropyl alcohol to disperse any bubbles, and immediately clean the Injector Tool with hot soapy water.
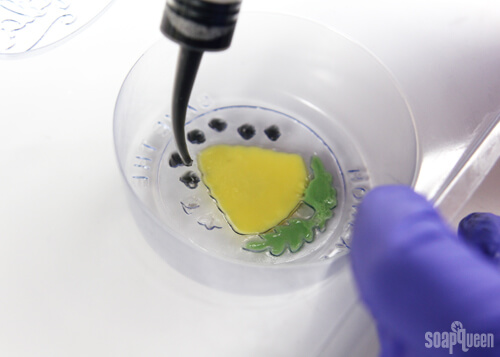
 THREE: Melt .5 ounces of Honey Melt and Pour Base in a heat-safe container on 5-10 second bursts. Add shavings of the Black Oxide Color Block and stir. Use the Injector Tool to carefully fill in the small bee details in the mold. Spray with isopropyl alcohol and immediately clean the Injector Tool with hot soapy water.
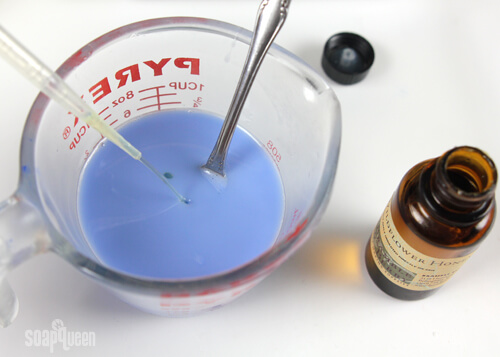
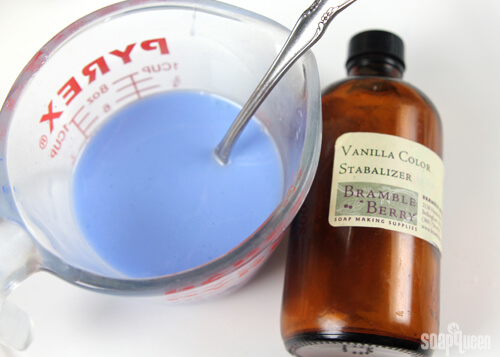
 FOUR: Once all the details have hardened, cut and melt 3 oz. of White Melt and Pour base, and 3 oz. of Honey Melt and Pour Base. Add shavings of the Ultramarine Blue Color Block, and stir to incorporate. Stir in 2 mL of Wildflower Honey Fragrance Oil, and 2 mL of Vanilla Color Stabilizer. Because Wildflower Honey is a fragrance that discolors due to the vanillin content, Vanilla Color Stabilizer prevents discoloration. To learn more about vanilla discoloration, check out the “Why Did My Soap Turn Brown” blog post!
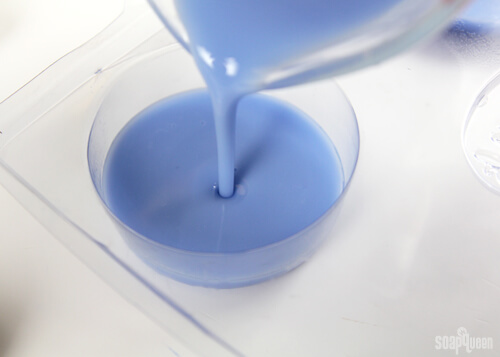
 FIVE: Once the fragrance and color block are fully mixed in and the soap is 130°F or cooler, spray the mold and small details with isopropyl alcohol. The soap needs to be 130°F or cooler or it will melt the details below. Spraying with isopropyl alcohol before pouring will help the blue layer adhere to the details. Pour the blue layer evenly into the three cavities, and spray with isopropyl alcohol to disperse any bubbles.
 SIX: Allow the blue layer to harden. Cut and melt 4 oz. of White Melt and Pour base and 2 oz. of Honey Melt and Pour base. Add shavings of the Yellow Oxide Color Block and stir. Add 2 mL of Wildflower Honey Fragrance Oil, and 2 mL of the Vanilla Color Stabilizer. Stir to fully incorporate the fragrance. When the yellow soap is 130°F or cooler, spray the blue layer with isopropyl alcohol and pour the yellow layer on top. Spray with isopropyl alcohol to disperse any bubbles.
 SEVEN: Allow your soap to fully harden. To release from the mold, use your palm to press firmly on the top in order to release the air lock and enjoy!

 To package this adorable project, check out the Soap Queen Tv Packaging Episode! Packaging melt and pour is important in order to prevent glycerin dew.