This is what the unmolded 3-D soap looks like. Because the soap naturally squishes out over the edges, the finished soap does need to be trimmed. Thursday’s posts will touch on trimming and coloring your soapy 3-D creations.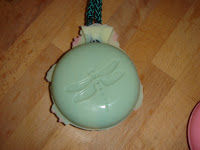
If the soap does not fully harden, it will leak all over. It is difficult to see inside the mold and impatience is easy to give into. If you do accidentally pry open the soap mold too early, leaks will happen (hopefully not over carpet).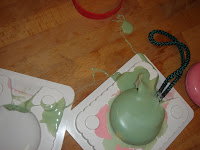 In this case, the middle was not full set up and liquid soap poured over the table and side of the mold. Thankfully, this error was easy to correct.

After scraping the soap off the sides of the mold, I snapped both sides of the mold back together and poured a new bit of soap through the open spigot. The soap turned out fine in the end.

If the soap does not fully harden, it will leak all over. It is difficult to see inside the mold and impatience is easy to give into. If you do accidentally pry open the soap mold too early, leaks will happen (hopefully not over carpet).
 In this case, the middle was not full set up and liquid soap poured over the table and side of the mold. Thankfully, this error was easy to correct.

After scraping the soap off the sides of the mold, I snapped both sides of the mold back together and poured a new bit of soap through the open spigot. The soap turned out fine in the end.
