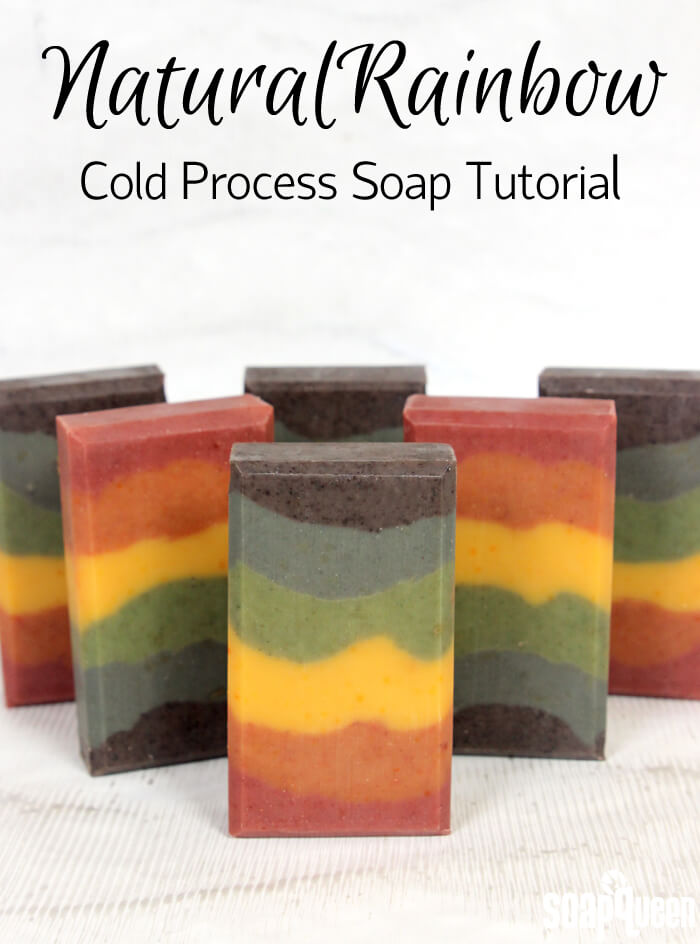
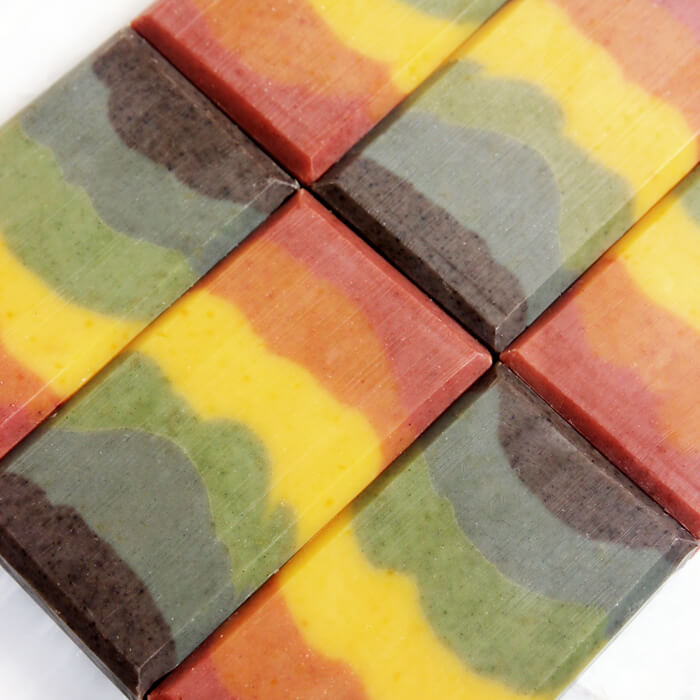
Vivid hues can be achieved with all natural colorants. In fact, you can create just about every color in the rainbow! For this Natural Rainbow Cold Process Soap, I used six colorants in the Natural Colorants Sampler Pack to create layers of red, orange, yellow, green, blue and purple. This soap is fragranced with a combination of lime and lemongrass essential oil for a scent that’s as bright as the layers.
For this project, I added the majority of the colorants directly to the soap batter. The one exception was annatto seed. I made an infusion with the seeds and used the infused oils to create the orange and yellow hues. To help the colors really pop, I recommend soaping at slightly higher temperatures (around 120-130° F) to help the soap go through a complete gel phase. I also recommend insulating the soap, and placing it on a heating pad if your room temperature is on the cooler side. Gel phase really helps natural colors pop! Click here to read more about gel phase, and when to insulate your soap.
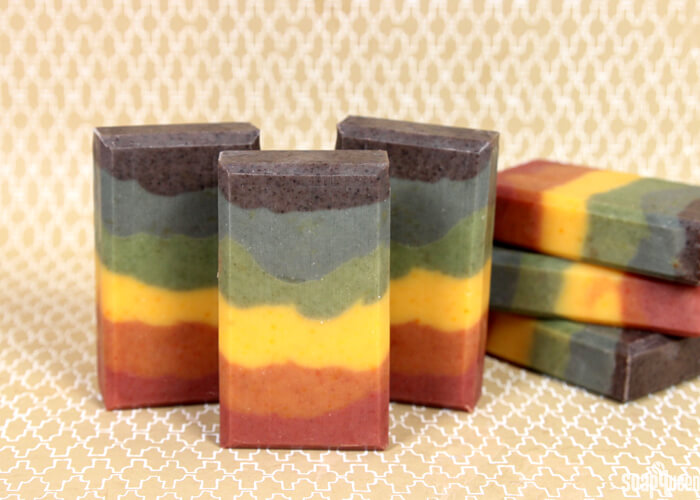
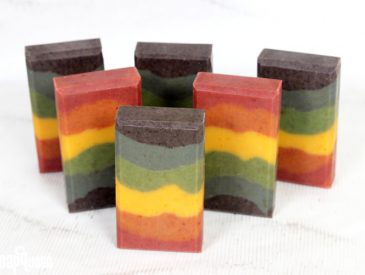
The drawback of natural colorants is they do tend to fade with time. These photos were taken about one week after cutting. The colors have faded slightly since then, but are still quite vivid. To help prevent the colors from fading, be sure to keep your bars out of direct sunlight. If you’ve never used natural colorants before, check out the Sunday Night Spotlight on natural colorants here. My new book, Pure Soapmaking, is also full of information on natural colorants, including how to infuse them and what they look like after they fade.

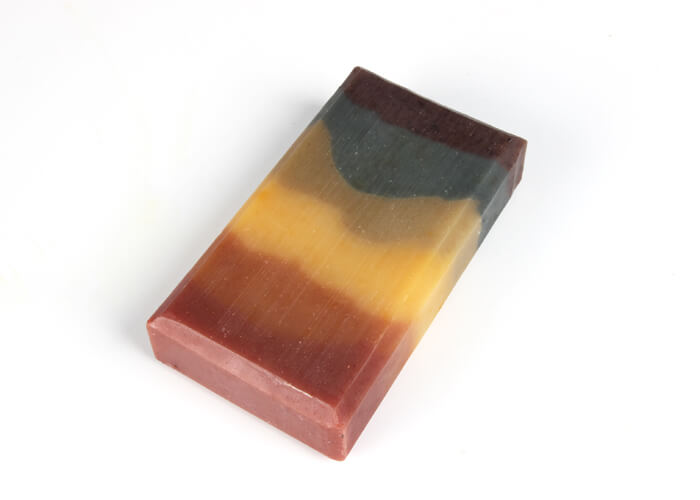
UPDATE 7/6/2016: Below is a photo of the soap about 5 months after unmolding. As you can see, some of the colors have faded slightly. Specifically, the green shade has faded the most. This soap was stored in a dry, cool and dark place. Most of the colors still look quite vivid!
What You’ll Need:
Tall Narrow Wood Loaf Mold
44 oz. Basic Quick Mix
6.3 oz. Sodium Hydroxide Lye
14.5 oz. Distilled Water
2 oz. Lemongrass Essential Oil
1 oz. Lime Essential Oil
Natural Colorants Sampler Pack:
Madder Root Powder
Annatto Seeds
Indigo Powder
Spirulina Powder
Alkanet Root Powder
Note: The button below adds the Natural Colorants Sampler Pack, rather than the individual colorants needed. The pack includes all the colors necessary for this project, in addition to rose clay, nettle leaf, walnut shells and activated charcoal.

Click here to add everything you need for this project to your Bramble Berry shopping cart!
If you’ve never made Cold Process soap before, stop here! I highly recommend checking out our FREE four part SoapQueen.tv series on Cold Process Soapmaking, especially the episode on lye safety. And if you’d rather do some reading, Bramble Berry carries a wide range of books on the topic, including my newest book, Soap Crafting. You can also checkout the digital downloads for that instant gratification factor.
SAFETY FIRST: Suit up for safe handling practices! That means goggles, gloves and long sleeves. Make sure kids, pets, and other distractions and tripping hazards are out of the house or don’t have access to your soaping space. Always soap in a well-ventilated area.
COLOR PREP: Disperse 1 teaspoon of the alkanet root powder, spirulina powder and indigo powder into 1 tablespoon of lightweight liquid oil such as sunflower or sweet almond oil. Use a mini mixer to help get rid of any clumps. Then, disperse 2 teaspoons of madder root powder into 2 tablespoons lightweight liquid oil. In a separate heat safe container, add 1 teaspoon annatto seeds into 1 ounce liquid oil (I used sweet almond oil). Place the container in the microwave for about 20 seconds, or until the oil is warm to hot. Allow the mixture to thoroughly cool and the seeds to infuse the oil with a dark orange color. Strain out the seeds and set infused oil aside.
FRAGRANCE PREP: Measure 2 ounces of the lemongrass essential oil and 1 ounce lime essential oil in a glass, essential oil safe container. Set aside.
MOLD PREP: Line the Tall Narrow Wood Loaf Mold with freezer paper with the shiny side up. For tips on how to line the mold, click here.
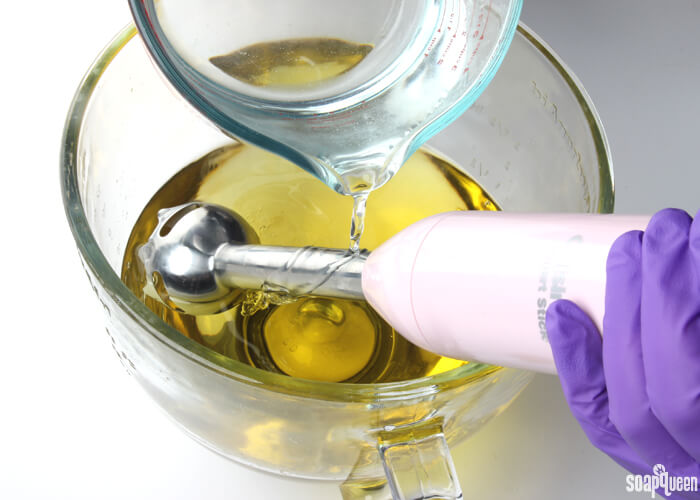
ONE: Slowly and carefully add the lye to the water and gently stir until the lye has fully dissolved and the liquid is clear. Set aside to cool.
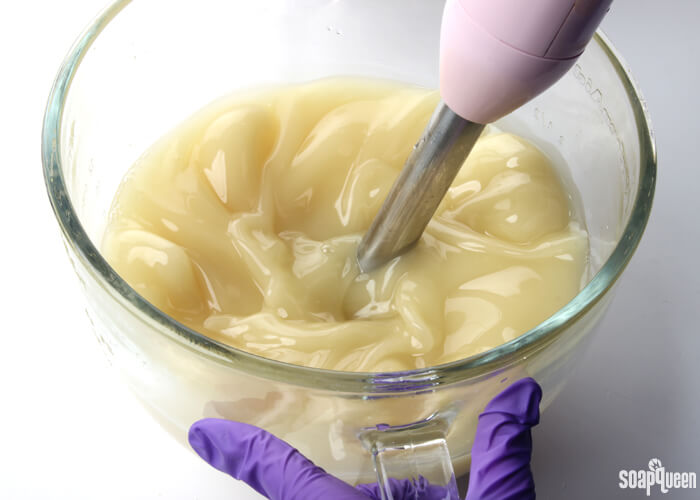
TWO: Fully melt the entire bag of Basic Quick Quick Mix until there is no cloudiness. Shake to mix and measure out 44 oz. Once the lye water and the oils have cooled to 130 degrees or below (and are ideally within 10 degrees of each other), add the lye water to the oils and stick blend until thin trace. If you’d like a harder bar of soap that releases faster from the mold, you can add sodium lactate to the cooled lye water. Use 1 teaspoon of sodium lactate per pound of oils in the recipe. For this recipe, you’d add about 2.5 teaspoons sodium lactate.
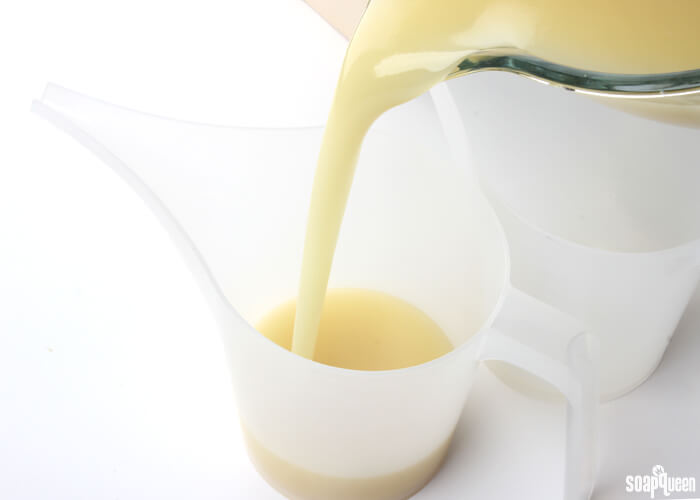
THREE: Once you’ve reached a thin trace, split the soap into six equal containers. Each container will contain about 300 mL.
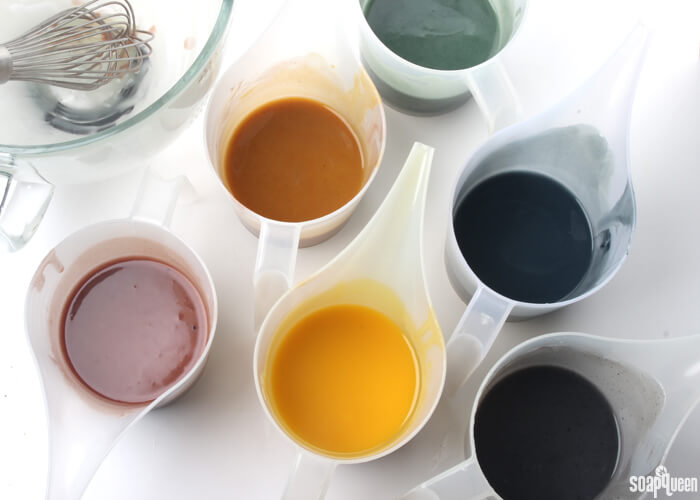
FOUR: To each container, add the amount of dispersed colorants listed below. Use a whisk to thoroughly mix in the colorants.
- Red: 1 Tbs. dispersed madder root powder
- Orange: 2 tsp. dispersed madder root powder + 3/4 tsp. annatto seed infused oil
- Yellow: 2 tsp. annatto seed infused oil
- Green: 2 tsp. dispersed spirulina powder
- Blue: 2 tsp. dispersed indigo powder
- Purple: 1.5 tsp. dispersed alkanet root powder
FIVE: Add the essential oil blend evenly between the six containers, it’s okay to eyeball it. Use a whisk to thoroughly mix in the oil. If the soap is still extremely thin, give each color a few bursts with the stick blender to thicken slightly. The soap should be thin enough to pour and spread, but thick enough that it will support layers on top. Then, pour all the red colored soap into the mold. Tap the mold firmly on the counter to help even out the soap.
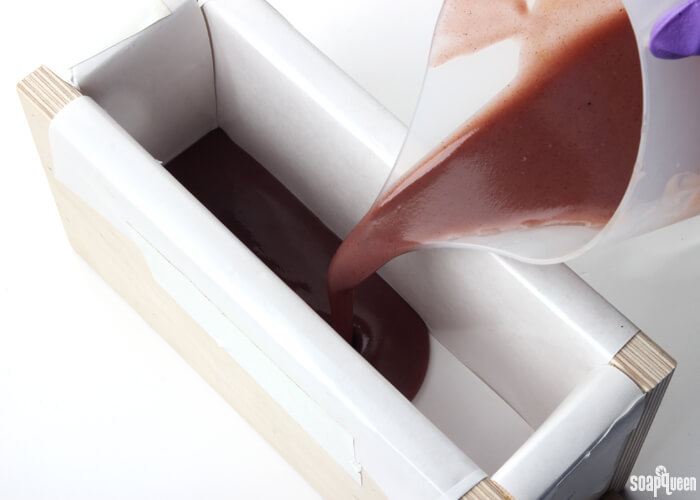
SIX: Carefully spoon the orange colored soap on top of the red, being careful to not let the orange soap break through the red layer below. Use a spoon to spread the orange soap evenly if necessary, then tap the mold firmly on the counter to help release any air bubbles. Continue layering the yellow, green, blue and purple soap into the mold, being careful to not break through to the layers below.
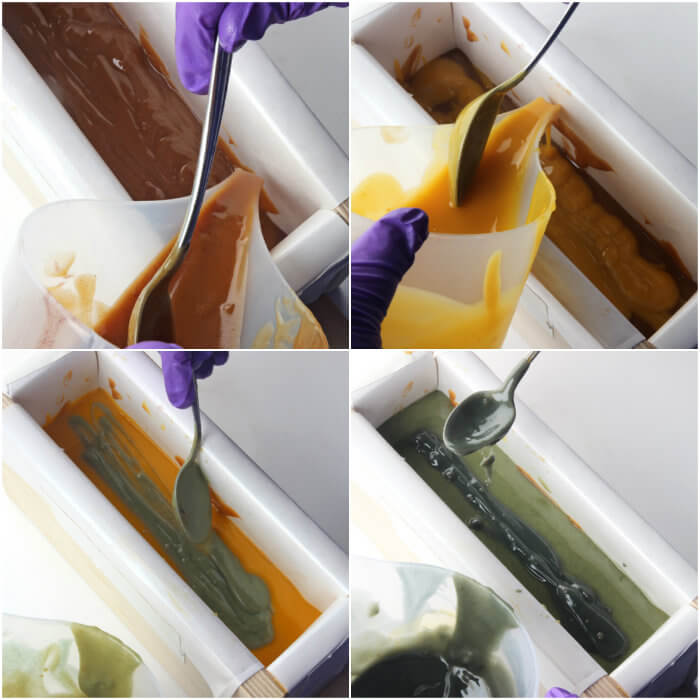
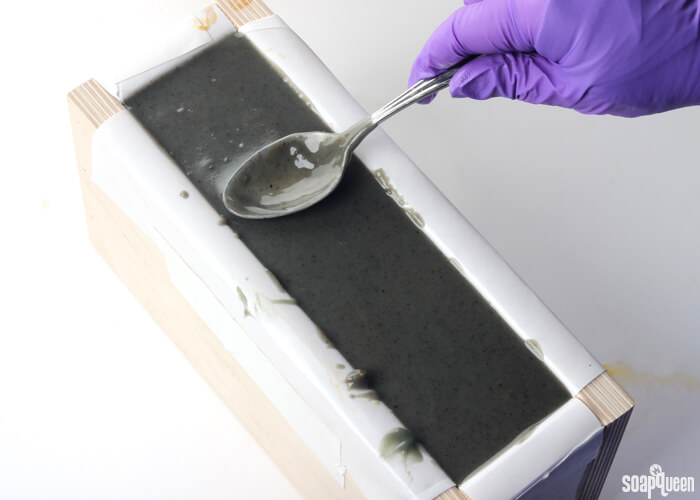
SEVEN: After you pour the purple soap on the very top, smooth the top with a spoon. Spritz the top with 99% isopropyl alcohol to prevent soda ash. Then, cover and insulate the soap for 24 hours. To help the colors pop, you want the soap to go through gel phase. If you’re soaping in a cold room, I would recommend placing the mold on a heating pad on medium heat for about an 30 minutes to help promote gel phase. After 2-3 days, remove from the mold and cut into bars. Allow to cure for 4-6 weeks and enjoy!
What is your favorite way to use natural colorants?
Natural Colorant Rainbow Cold Process Soap
Ingredients
- Tall Narrow Wood Loaf Mold
- 44 oz. Basic Quick Mix
- 6.3 oz. Sodium Hydroxide Lye
- 14.5 oz. Distilled Water
- 2 oz. Lemongrass Essential Oil
- 1 oz. Lime Essential Oil
- Natural Colorants Sampler Pack:
- Madder Root Powder
- Annatto Seeds
- Indigo Powder
- Spirulina Powder
- Alkanet Root Powder
Instructions
SAFETY FIRST: Suit up for safe handling practices! That means goggles, gloves and long sleeves. Make sure kids, pets, and other distractions and tripping hazards are out of the house or don’t have access to your soaping space. Always soap in a well-ventilated area.
COLOR PREP: Disperse 1 teaspoon of the alkanet root powder, spirulina powder and indigo powder into 1 tablespoon of lightweight liquid oil such as sunflower or sweet almond oil. Use a mini mixer to help get rid of any clumps. Then, disperse 2 teaspoons of madder root powder into 2 tablespoons lightweight liquid oil. In a separate heat safe container, add 1 teaspoon annatto seeds into 1 ounce liquid oil (I used sweet almond oil). Place the container in the microwave for about 20 seconds, or until the oil is warm to hot. Allow the mixture to thoroughly cool and the seeds to infuse the oil with a dark orange color. Strain out the seeds and set infused oil aside.
FRAGRANCE PREP: Measure 2 ounces of the lemongrass essential oil and 1 ounce lime essential oil in a glass, essential oil safe container. Set aside.
MOLD PREP: Line the Tall Narrow Wood Loaf Mold with freezer paper with the shiny side up. For tips on how to line the mold, click here.
- Slowly and carefully add the lye to the water and gently stir until the lye has fully dissolved and the liquid is clear. Set aside to cool.
- Fully melt the entire bag of Basic Quick Quick Mix until there is no cloudiness. Shake to mix and measure out 44 oz. Once the lye water and the oils have cooled to 130 degrees or below (and are ideally within 10 degrees of each other), add the lye water to the oils and stick blend until thin trace. If you’d like a harder bar of soap that releases faster from the mold, you can add sodium lactate to the cooled lye water. Use 1 teaspoon of sodium lactate per pound of oils in the recipe. For this recipe, you’d add about 2.5 sodium lactate.
- Once you’ve reached a thin trace, split the soap into six equal containers. Each container will contain about 300 mL.
- To each container, add the amount of dispersed colorants listed below. Use a whisk to thoroughly mix in the colorants.
Red: 1 Tbs. dispersed madder root powder
Orange: 2 tsp. dispersed madder root powder + 3/4 tsp. annatto seed infused oil<br>Yellow: 2 tsp. annatto seed infused oil
Green: 2 tsp. dispersed spirulina powder
Blue: 2 tsp. dispersed indigo powder
Purple: 1.5 tsp. dispersed alkanet root powder - Add the essential oil blend evenly between the six containers, it’s okay to eyeball it. Use a whisk to thoroughly mix in the oil. If the soap is still extremely thin, give each color a few bursts with the stick blender to thicken slightly. The soap should be thin enough to pour and spread, but thick enough that it will support layers on top. Then, pour all the red colored soap into the mold. Tap the mold firmly on the counter to help even out the soap.
- Carefully spoon the orange colored soap on top of the red, being careful to not let the orange soap break through the red layer below. Use a spoon to spread the orange soap evenly if necessary, then tap the mold firmly on the counter to help release any air bubbles. Continue layering the yellow, green, blue and purple soap into the mold, being careful to not break through to the layers below.
- After you pour the purple soap on the very top, smooth the top with a spoon. Spritz the top with 99% isopropyl alcohol to prevent soda ash. Then, cover and insulate the soap for 24 hours. To help the colors pop, you want the soap to go through gel phase. If you’re soaping in a cold room, I would recommend placing the mold on a heating pad on medium heat for about an 30 minutes to help promote gel phase. After 2-3 days, remove from the mold and cut into bars. Allow to cure for 4-6 weeks and enjoy!