Waiting is one of the hardest parts of soapmaking. Cutting it into bars and seeing the design for the first time is such an amazing feeling. However, cutting too early can lead to dents and drag marks.
Patience is best when it comes to unmolding soap. But if you want to speed the process up a few days, we’ve got you covered.
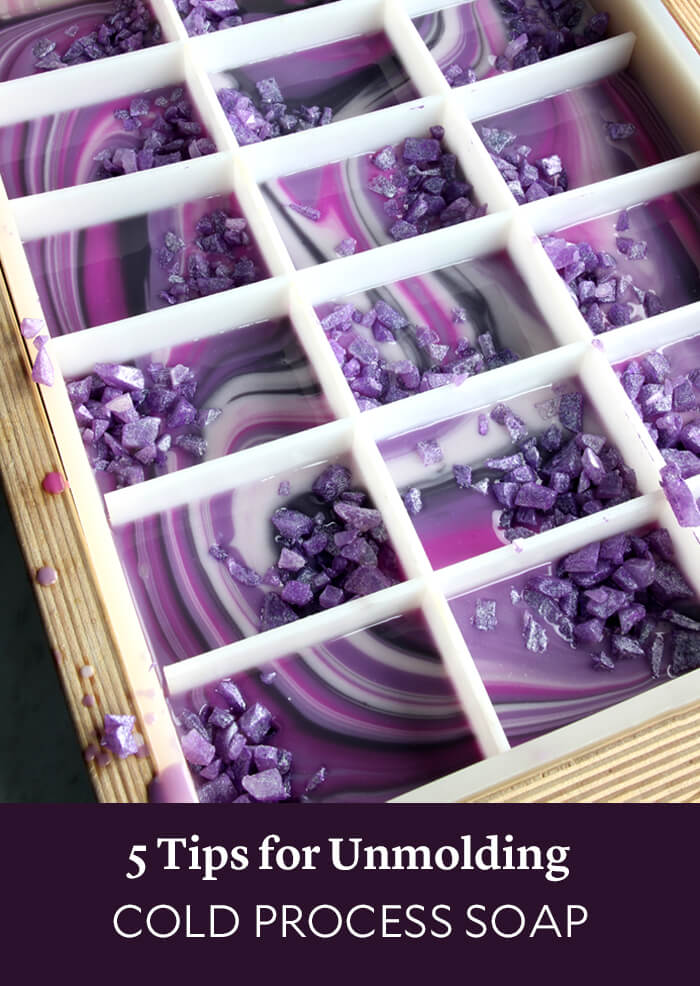
Choosing the right mold
Wood molds tend to be the fastest option. That’s because they have good airflow and they insulate soap well, which causes it to heat up. Higher temperatures can help you unmold your batch more quickly.
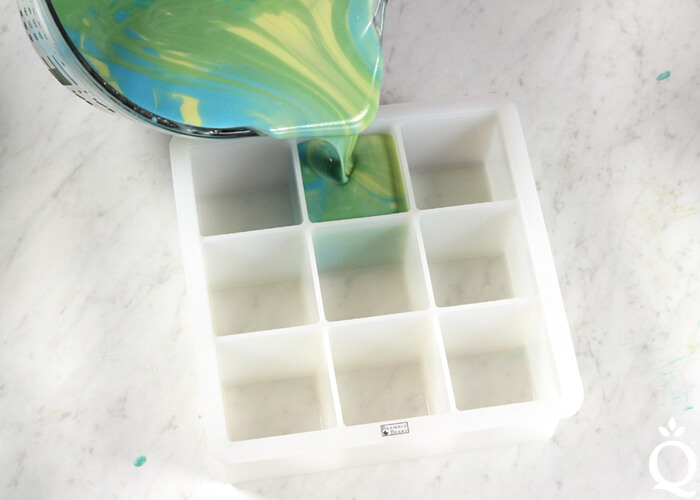
Silicone molds are another good option – they’re sturdy, flexible, and easy to use. They don’t have as much airflow as wood, so unmolding can take longer. You can speed the process up with single cavity silicone molds.
Plastic molds take the longest. You can unmold the bars cleanly with a few tricks, but if you’re in a hurry we recommend wood or silicone. Learn more about choosing molds in this blog.
Formulating a hard recipe
When it comes to unmolding, hard oils are your friend. Oils like coconut and palm are solid at room temperature and help firm the recipe. Learn more about common oils and how to work with them here.
A good place to start is around 70% hard oils. That creates a firm bar that unmolds quickly. The rest of the recipe can be moisturizing options like olive and sweet almond oil. Learn more about formulating cold process recipes in this post.
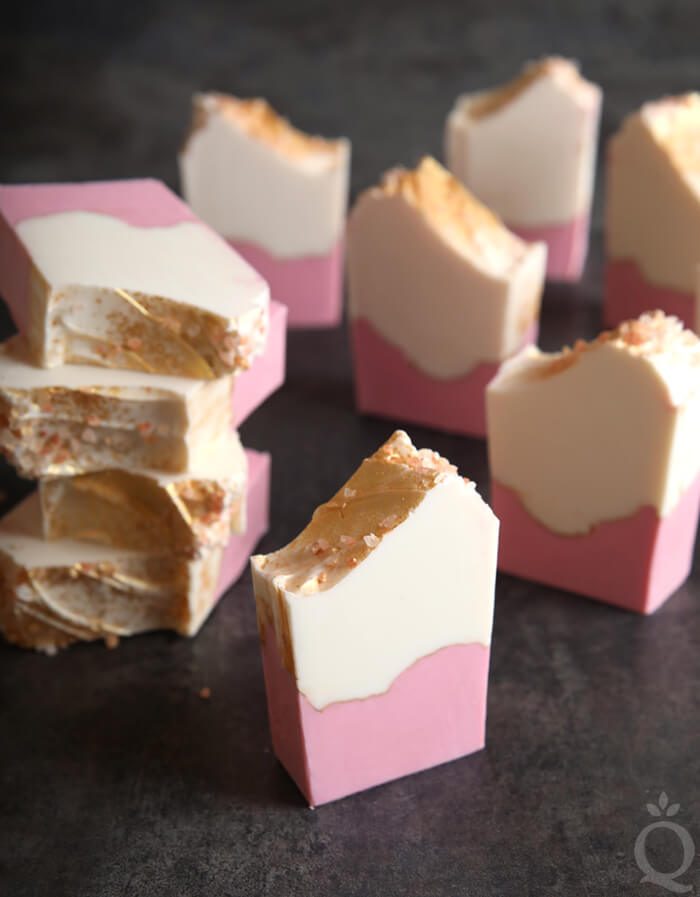
We unmolded the Pink Salt and Gold Soap after just a few days. It has 71% hard oils, as well as soft oils like rice bran that feel silky on the skin.
Another option is decreasing the superfat level. We typically use around 5%, but you can drop that to 2-4%. The less free-floating oil in the recipe, the faster it will unmold.
Using a water discount
This technique is simple – adding less water to your recipe means it won’t take as long to evaporate. The soap will unmold and cure more quickly. Water discounts also help prevent soda ash and glycerin rivers.
We usually discount around 5-10%. Higher amounts can accelerate trace and make the soap a bit trickier to work with. Learn how to get started in this post.
Using sodium lactate
You’ve probably heard us mention sodium lactate a time or two. It’s a liquid salt that helps harden cold process soap. Simply adding 1 teaspoon per pound of oils to your cooled lye water helps the soap release 1-2 days earlier.
Sodium lactate can also be used in hot process soap to make it smooth and in lotion to draw moisture to the skin. We definitely recommend having it on hand.
Using higher temperatures and forcing gel phase
Gel phase is a part of the saponification process where the batch gets hot and gelatinous. It doesn’t affect the quality of the bars, but it does help the colors pop. Gel phase also helps the soap harden more quickly.
To force gel phase, we recommend having your lye and oils around 120-130°F. Then, cover the mold with a piece of cardboard and a blanket. You can also place it on a heating pad. Learn more about how to insulate soap here.

How to unmold soap
You can typically unmold soap in 2-3 days using the tips above. Once it’s firm to the touch, gently pull on one side of the mold or liner. If it releases without sticking, pull on the other sides of the mold to release the airlock. Flip the mold over and gently push the soap out.
If you still end up with drag marks, don’t worry – it happens to the best of us. We have tools that can help. The Soap Shaver removes dents, drag marks, and soda ash. If the bars are dented on the corner, try the Soap Beveller. It removes imperfections and gives the soap a polished look.
If the dents are pretty deep, you can shred or cut the soap up and use it in a variety of ways. It may not be what you originally planned, but it will still feel amazing on the skin.
