This article was originally published in the March/April 2013 issue of Saponifier Magazine. I was so taken by the ingenuity of the tutorial that I asked Saponifier if I could reprint it here on Soap Queen. Enjoy! -Anne-Marie P.S. Election sign season is just a few months away!
Personal Touch: The 15-Minute Soap Mold
by Victoria Donaldson
I was never so glad to see anything end, as I was the 2011 elections. Is it just me, or did it go on forever? While driving, I was inundated with political signs for everything from president to dog catcher. After November 6, I decided it was time for the remaining ones to go, so I started plucking them up. They were destined for my local recycling center, only my trip out there ended in the discovery that my recycling center did not handle them. So I decided they would reside in my utility room until I had the time to discover where to ship them.
Then my neighbor asked for help making yard sale signs. A quick cover of spray paint and some lettering and he was set. A last minute, oddly sized, Christmas gift resulted in a mad hunt for a suitable box, bag—anything! After an unsuccessful search led to the utility room, I was desperate. I thought perhaps I could do something with a piece of corrugated plastic. Voila! It was so easy, who needs a recycling center? Then I had a lightbulb moment: if I could make a box, I could make a mold for soap. After a little experimentation, I discovered that creating several in different sizes wasn’t a problem since it’s free, it folds flat for easy storage, and it’s really, really easy. What more could you ask for? Plus it gives you a little feeling of revenge for all the TV plugs you had to sit through.
Supplies Needed:
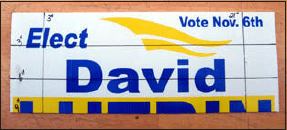
1 corrugated plastic sign
yard stick or long ruler
metal straight edge
exacto or box knife
wide packaging tape
One: First of all, find a large, flat surface that you don’t care if you cut up. The sign I used was a standard 24 inches by 18 inches. For this tutorial we’ll make a mold for 18 bars of soap 3 inches by 2 inches by 1 inch. So I want the interior of my mold to be 18 inches long, 3 inches wide, and 2 inches deep (plus 1 inch of space to avoid overflowing). The dimensions of your mold are limited only by the size of the sign.
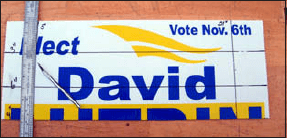
Two: From the top left hand corner, measure down 3 inches and mark. Measure 3 inches further and mark, then another 3 inches and mark. From the top right hand corner, measure and make the same marks down as you did on the left hand side. I used a magic marker for visibility in the photos, but a pencil line will give you a more accurate cut.
Three: Draw a line connecting the right and left hand 9 inch marks and using a metal straightedge, cut along the line with your knife, all the way through. You now have a 9 inch x 24 inch piece. Save the leftover piece for another mold or some other use.
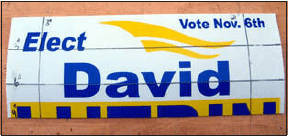
Four: Starting from the top left hand corner, measure 3 inches to the right and mark. Measure 18 inches further and mark. Repeat these measurements and marks starting from the bottom left hand corner.
Five: Draw straight lines connecting your marks. Using light pressure, cut along the lines only part way through the board. Try bending the board along the cuts–if any portion won’t bend, very gently run the knife down those little ribs inside. When all cuts bend, on to the next step.
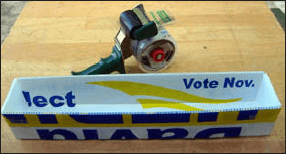
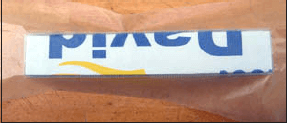
Six: Pressing down hard, cut out all four corner pieces and discard. Flip over and bend all four sides up.
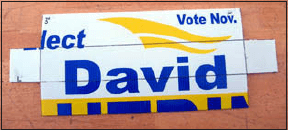
Seven: Tape together end pieces to sides and your mold is done. Note that scotch tape will not hold well. The wide clear tape used on tape guns is ideal. This is especially easy to line with parchment paper since the bottom is exactly the same size as the inside. Turn the mold upside down, lay your paper on the bottom and crease along the edge. Fold as you usually do, insert in mold, make a mark how wide you want your soap bars to be and pour!
NOTE: Since corrugated plastic is slightly flexible there may be some bowing in the middle of the long side. You can solve this by pushing the mold up against the wall and resting a heavy bookend/brick/etc. on the other side
In searching for a recycling center, I discovered that wildlife rehabilitation centers, pet shelters, and other worthwhile organizations can use corrugated plastic (also known by brand names such as Coroplast and Correx) and welcome your donations! Also, removing political signs can be unlawful in some areas, even after an election is long over, so check with the local ordinances before you reach for your first sign.
“The 15-Minute Soap Mold”, written by Victoria Donaldson, was published in the March/April 2013 issue of Saponifier Magazine. It is reprinted here with full permission of the publisher, www.Saponifier.com.
Retired from the graphic arts industry, Victoria does the layout for Saponifier magazine and dabbles in soap and candle making. A lifetime Florida resident, she spends much of her time with her two grandchildren nearby and visits the youngest in California whenever she can.