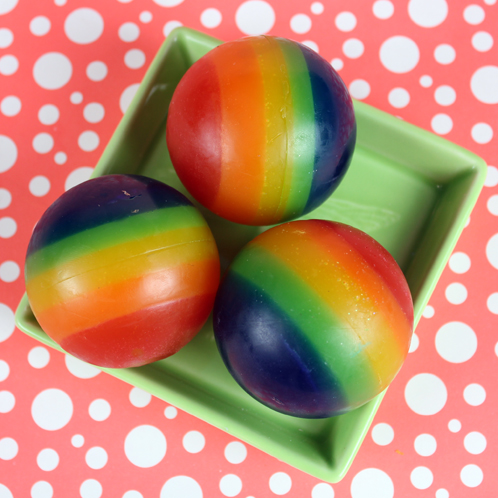
I love love love color. From packaging inspiration to pops of color in the fashion world to wonderful soapy creations, COLOR is all the rage. We spent a super fun but slightly grey week in one of our favorite getaway spots (family pictures to come soon!) and upon my return, these great little soaps were on my brain. Who doesn’t love rainbows? Correction- Who doesn’t love double rainbows?

Recipe:
30 oz Clear Melt and Pour Soap Base
0.4 oz Island Coconut Fragrance Oil
0.2 oz Violet Fragrance Oil
Liquid Non-Bleeding Cherry Colorant
Liquid Non-Bleeding Teal Colorant
Buy everything you need for this project with the click of a button!
COLOR PREP: Before using the neon pigments, you’ll want to disperse them in glycerin so they mix into the soap well. Check out our quick video on dispersing neon pigments, or if you’ve done this before the usage rate I used was 1/3 cup Liquid Glycerin to 1/2 teaspoon pigment.
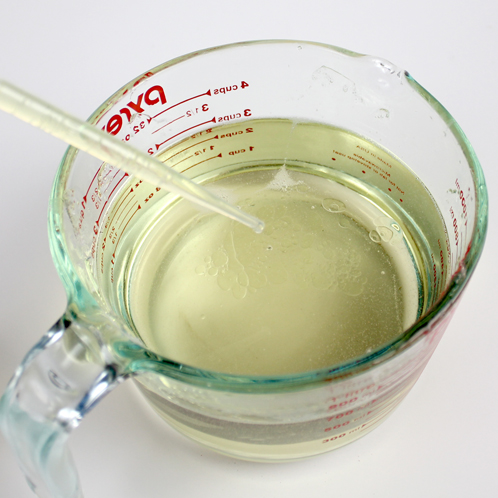
ONE: Cut Clear Melt and Pour Soap into 1 inch chunks and melt completely in a heat safe container. Microwave using 30 second bursts, stirring between each burst.
TWO: Once the soap is fully melted, add both the Island Coconut Fragrance Oil and the Violet Fragrance Oil and stir until incorporated. Split the soap into 6 equal parts, weighing 5 ounces each.
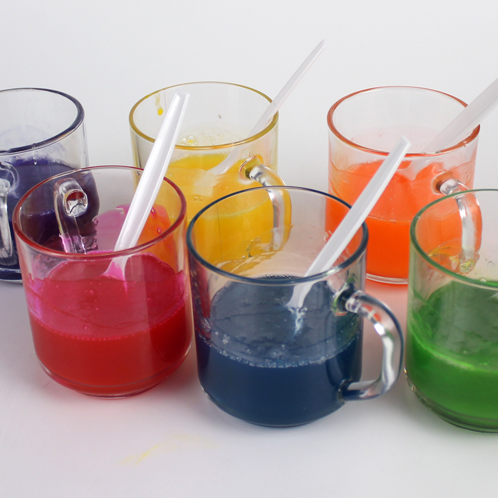
 THREE: Color each of the melted soaps as follows:
- Red: 10 drops Liquid Non-Bleeding Cherry Colorant
- Orange: 3/4 teaspoon dispersed Tangerine Wow! Pigment
- Yellow: 3/4 teaspoon dispersed Fizzy Lemonade Pigment
- Green: 5 drops Liquid Green Colorant + 3 drops Diluted Lime LabColor
- Blue: 8 drops Liquid Non-Bleeding Teal Colorant
- Violet: 1/2 teaspoon dispersed Ultraviolet Blue Pigment
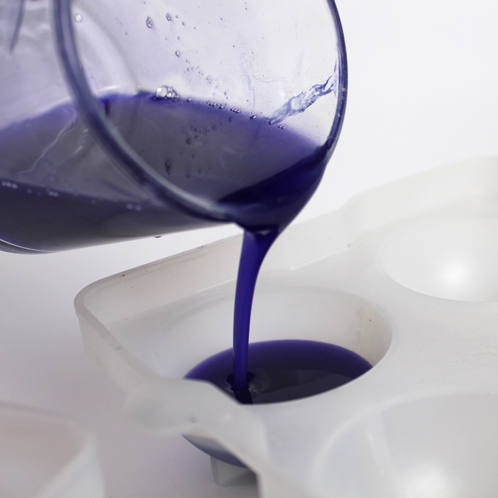
FOUR: Starting with Violet, pour a small layer into the bottom of the sphere molds. Pour an even amount into all of the cavities of the mold (it’s totally fine to eyeball it). Spritz the layer with rubbing alcohol and allow to harden.
FIVE: Repeat step four with the Blue, Green, Yellow, Orange and Red layers (in that order), being sure to spray more rubbing alcohol between layers. I got a little messy with mine!
TIP: Bramble Berry’s Four Sphere Mold comes in two pieces, a top and a bottom, which come together to create the spheres. For the first couple layers of this project, I found it worked well to pour into the bottom of the mold without the top connected. I got the first three layers poured before I needed to put the top on the mold again. Make sure the soap is fully hardened before attempting to reattach the top of the mold to the bottom!
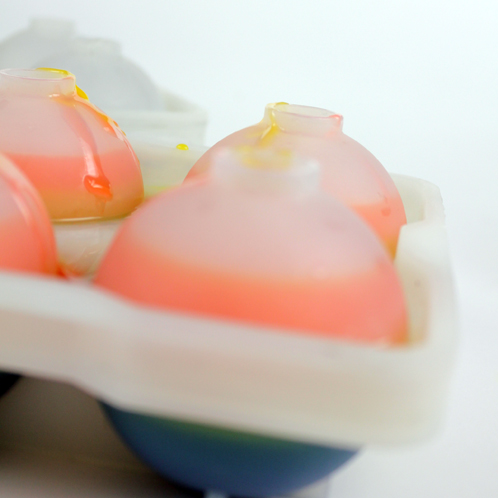
SIX: Allow to fully harden for 4-6 hours before removing from mold.



I am just beginning to make soap, and find your website very helpful. Are there any problems shipping to Australia? I have been looking at the tutorial on rainbow spheres and was wondering if there are any problems using the cold press method.Thankyou Regards Dianna
Hi Dianna!
I’m so glad you are enjoying the blog :). You may find this blog post regarding international shipping options helpful! There are a few restrictions when it comes to international shipping. That being said, Aussie Soap Supplies is an official distributor for Bramble Berry, and would probably be a more affordable option for you 🙂
International Soaping Resources:
http://www.soapqueen.com/bramble-berry-news/soaping-world-resources-international-soapers/
Aussie Soap Making Supplies:
http://www.aussiesoapsupplies.com.au/
I hope this helps!
-Amanda with Bramble Berry
Please PLEASE do a tutorial for cold process using this mold! I am begging you!
Hi Laura!
I’m glad you liked this tutorial! While we can definitely try to do another tutorial using this mold, here is a tutorial that you may enjoy! It uses the 9 Ball Silicone Mold, which is very similar 🙂
Crisp Anjou Pear Embed Tutorial:
http://www.soapqueen.com/bath-and-body-tutorials/cold-process-soap/crisp-anjou-pear-embed-tutorial/
I hope this helps!
-Amanda with Bramble Berry
Mrs. Anne- Marie,
I am twelve years old and always been interested in soap making. My mom makes lotions, hand creams, and lip balms, and we recently discovered Brambleberry. I got melt and pour base, the basic color sampler, and red apple scent. I made my first batch this morning, and, thanks to your advice, it turned out perfect! Thank you for your website and keep making videos!
Hi Eleanor!
We are so excited that you have started soaping — we can’t wait to hear more about your adventures in soapmaking and hope to see some pictures from you soon. If you get an photos that you would like to share with us, you can post them on Bramble Berry’s Facebook page.
Happy Soaping!
-Becky with Bramble Berry
https://www.facebook.com/BrambleBerry
Mrs. Becky or Mrs. Anne Marie,
I don’t have a Facebook account, but I am on pinterest( with my mom). I can put it on a board. Search for the person “Eleanor Terry”. You should find the board entitled “soap”.
I would like opinions and help, the soap would not behave for me.
Thank you!
Good morning, Eleanor!
I was able to take a look at your Pinterest board and I just love how your soaps turned out. The Red Apple scent goes perfect with the colors you picked. How did the soap misbehave for you? Your picture looks great, but I’d love to help you troubleshoot any issues you came across. You can email us at info(at)brambleberry(dot)com for troubleshooting advice too.
We can’t wait to hear more about your soaping adventures!
-Becky with Bramble Berry
I’ve bought this mold mold,I’ve used it in two ways. The first : By pouring just half of the mold and then once the first part set I poured the sencond half. In this way once I unmolded, the sphere wasn’t even, it was like if I did every part apart and then stick them together… Then I’ve tried to pour the soap in just one shot the whole sphere , but part of the soap went into the mold divisions, draining the soap from the mold….
What is the best way to use this mold ? or is there any special trick ?
Make sure that you line up the tabs so that the seams are even. Give that a try and keep us posted. Also, make sure the lid is on nice and tight so there’s no leaking.
Courtney with Bramble Berry
These are too adorable!!!
OMG – I LOVE these. They are just so cute.
A.M must have read my mind! I JUST made a wonderful rainbow M&P bar with the premium Brambleberry Clear Base and used several gorgeous pearlescent micas for a glittery effect. They turned out very well! 🙂 I wish I could post a picture for all to see but I will put a link up!
The ball idea is fantastic! I also believe it would look WONDERFUL in the cube molds! 🙂
The picture does no justice to what the soap turned out like after buffered and cleaned and packaged. The layers have a trickle down illuminating effect onto each layer! 🙂
https://www.facebook.com/photo.php?fbid=459783564043611&set=a.432643386757629.93048.429492457072722&type=3&theater
xoxoxoxo
– Leela
It looks great Leela, I totally love your rainbow layers. 🙂 We’d love it if you ever want to share any of your soapy creations on Bramble Berry’s Facebook page!
https://www.facebook.com/BrambleBerry
-Becky with Bramble Berry
YES! I completely forgot about that. How do I share? Just tag BB’s page? Or post a link? 🙂 Thank you for the love! <3
All you need to do to share a picture with us is upload your photo to Bramble Berry’s Facebook timeline! 🙂
-Becky with Bramble Berry
Oh I gotta try this for stocking stuffers!!!!
What a great idea! These would be perfect for stocking stuffers. 🙂
-Becky with Bramble Berry
Very cute rainbow spheres. Love the bright colors!