If you’re like me, you know it’s not a good idea to have candles burning with toddlers running around. With another little one on the way, I sure don’t want to take any chances! To get all the benefits of burning candles without the fire hazard, I decided to try making a few wax tarts. Not only are they super easy to make, you can really dress them up by experimenting with different colors and finding a cute wax tart warmer.

What you’ll need:
15.6 oz. EcoSoya Advanced Soy Wax
.3 oz. Apple Macintosh (Candle & Soap) Fragrance Oil
.3 oz. Lemongrass Sage (Candle & Soap) Fragrance Oil
.3 oz. Orange Blossom (Candle & Soap) Fragrance Oil
(NOTE: The Apple Wax Tart Mold has been discontinued. It has been substituted with the Petite Bendy Stars Soap Mold.)

Click here to add everything you need for this project to your Bramble Berry shopping cart!
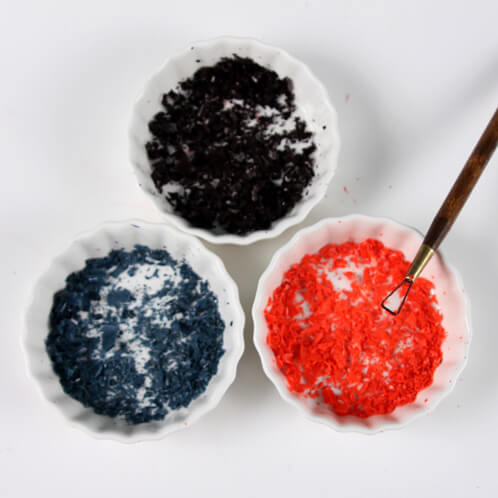
ONE: Start by using a clean up tool to shave off chunks of the dye blocks. The amount of color you want is up to you. Shave off more for a darker color and less for a more pale color. Set the colors aside.
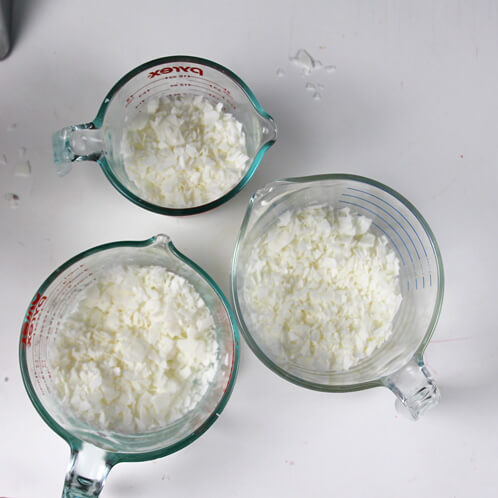
TWO: Measure out 15.6 oz. of soy wax. This will be enough to fill all three molds.

THREE: After measuring wax into the large container, split the wax into three containers each measuring 5.2 oz. At this point, melt your wax by putting the containers in the microwave for 1 minute intervals. After each 1 minute burst, check on the wax and stir with a spoon until it is fully melted. Wax has a higher melting point than melt & pour soap, so it may take slightly longer to fully melt.
FOUR: Now you can add in the red, teal and orange color block shavings you set aside earlier. Pour one color per container.
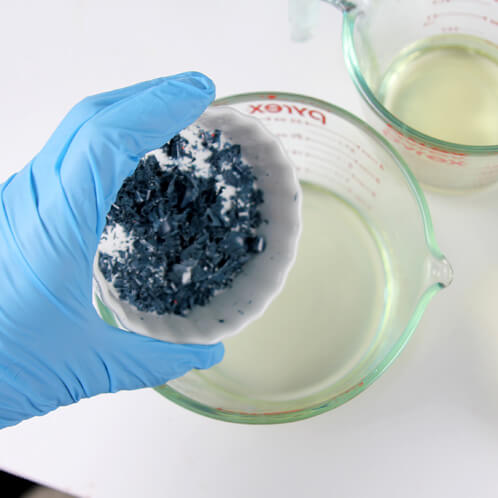
FIVE: Mix your colors thoroughly into the wax. If the colors don’t want to mix in, put the containers in the microwave for 15 second bursts to fully melt the colors into the wax.
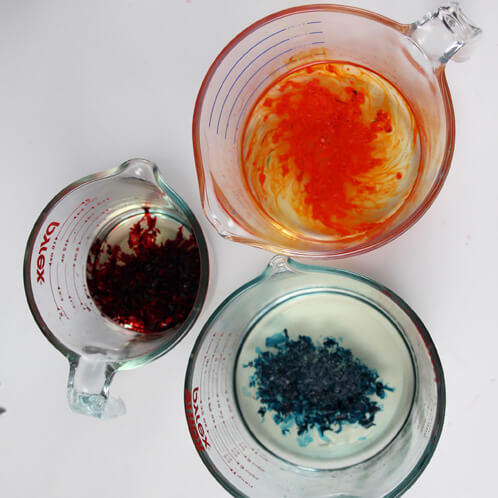
SIX: Now add the fragrance oils. I added the Apple Macintosh fragrance to the red wax, the Lemongrass Sage fragrance to the teal wax and the Orange Blossom fragrance to the orange wax.
TIP: Did you know that our new line of candle fragrance oils are also skin safe? You can create a perfectly scent-matched soap to go along with your wax tarts!

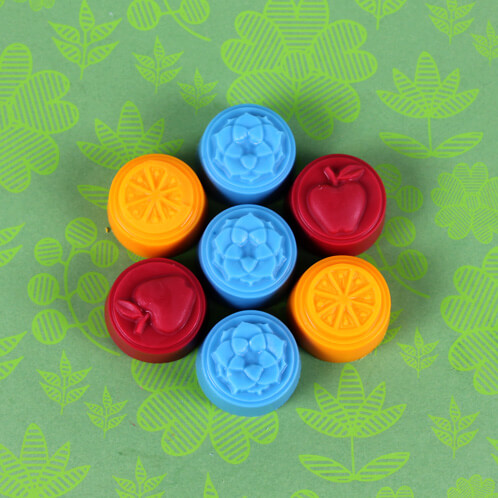
SEVEN: Now carefully pour one container of wax per mold. I put the blue wax in the Lotus Blossom mold, the orange wax in the Citrus mold and the red wax in the Apple mold.
(NOTE: The Apple Wax Tart Mold has been discontinued. It has been substituted with the Petite Bendy Stars Soap Mold.)
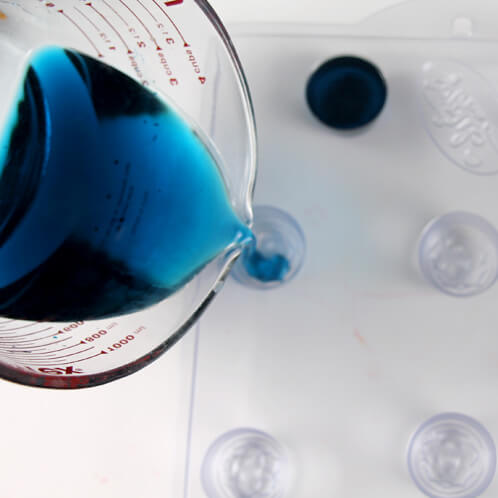
NOTE: When you first pour your colors, the tarts will appear clear. As the wax dries, they will become more opaque. This is totally normal!
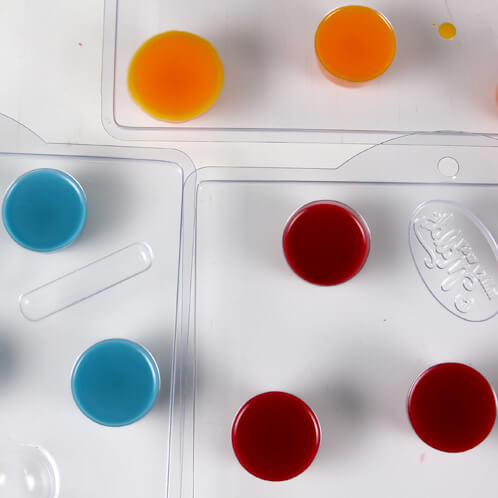
Pop them out of their molds after about 24 hours and enjoy your delightfully scented tarts in any wax tart warmer.