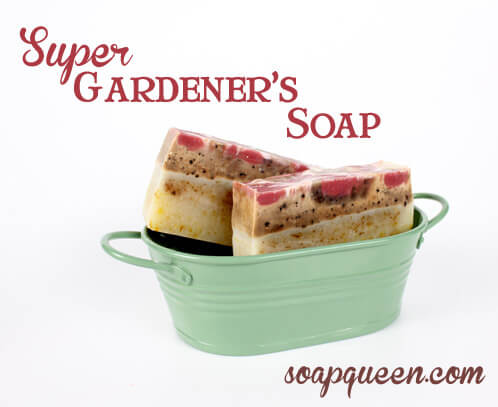
AKA: Everything but the kitchen sink soap! When we were shooting the photos for my upcoming book Soap Crafting, the artistic director for Storey Publishing wanted a great shot of some soap batter with multiple additives. Of course I obliged, splitting a batch into 5 oddly-sized parts and adding anything I happened to have on hand. The result was a crazy herbed-up super exfoliating soap worthy of cleaning the Hulk himself, but not being one to keep a recipe to myself I just had to share. I was too happy with the scrubby results not to!
Recipe:
13.2 oz Palm Oil
13.2 oz Coconut Oil
13.2 oz Canola Oil
4.4 oz Sunflower Seed Oil
6.3 oz Sodium Hydroxide (Lye)
14.5 oz Distilled Water
Coffee Grounds
0.5 oz Jasmine Absolute Essential Oil
0.5 oz Litsea Essential Oil
2.0 oz Hungarian Lavender Essential Oil
Condiment Squirt Bottle

Click here to add everything you need for this project to your Bramble Berry shopping cart!
COLOR PREP: Disperse 1/2 teaspoon Titanium Dioxide in 1/2 Tablespoon Sunflower Seed Oil (or any liquid oil). Mix in well using a mini-mixer, but before to saturate the powder in the oil before turning on the mixer or you’ll get a messy pouf of pigment! Once the Titanium Dioxide is fully dispersed, measure 1/2 teaspoon of the mixture into the condiment squirt bottle and set aside.
MOLD PREP: Line the 4 lb Wood Mold with freezer paper, shiny side up.
ESSENTIAL OIL BLEND: In a separate container, combine the Jasmine Absolute, Litsea, and Hungarian Lavender Essential Oils. Looking for a more economical blend? Try 2 parts Lavender 40/42 Essential Oil with 1/2 part Orange 10x Essential Oil and 1/2 part Rosehip Jasmine Fragrance oil.
SAFETY FIRST: Suit up for safe handling practices! That means goggles, gloves and long sleeves. Make sure kids, pets, and other distractions and tripping hazards are out of the house or don’t have access to your soaping space. Always soap in a well-ventilated area.
If you’ve never made Cold Process soap before, this is a great recipe for getting your feet wet! However, I still highly recommend checking out our FREE four part SoapQueen.tv series on Cold Process Soapmaking, especially the episode on lye safety. And if you’d rather do some reading, Bramble Berry carries a wide range of books on the topic, as well as digital downloads for that instant gratification factor.
ONE: Slowly and carefully add the lye to the water, and stir until clear. Set aside to cool.
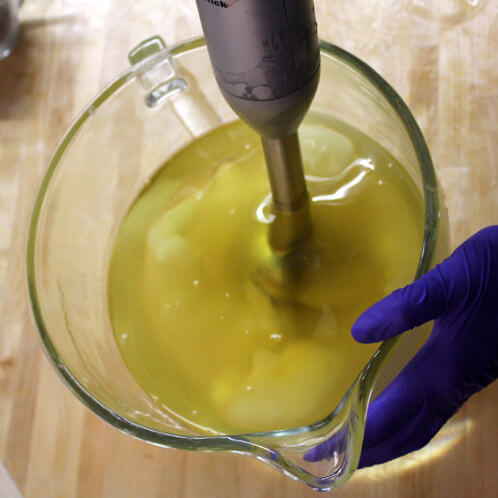
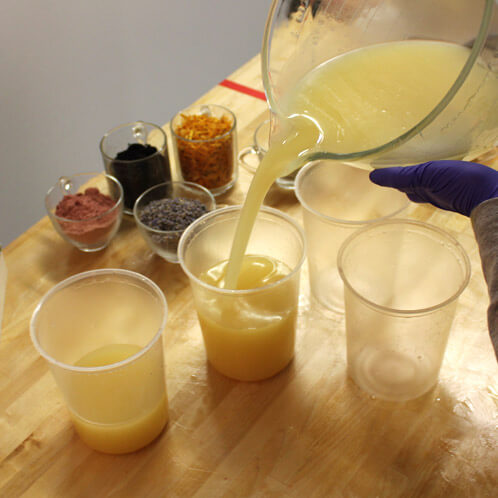
TWO: Melt and combine the Palm, Coconut, Canola, and Sunflower Seed Oils. Once the lye water and the oils have cooled to 130 degrees or below (and are ideally within 10 degrees of each other), add the lye water to the oils and stick blend until thin trace.
THREE: Pour soap batter into the condiment bottle until the bottle is about 1/3 full. With your finger over the tip of the bottle, shake until the color is mixed in and set aside.
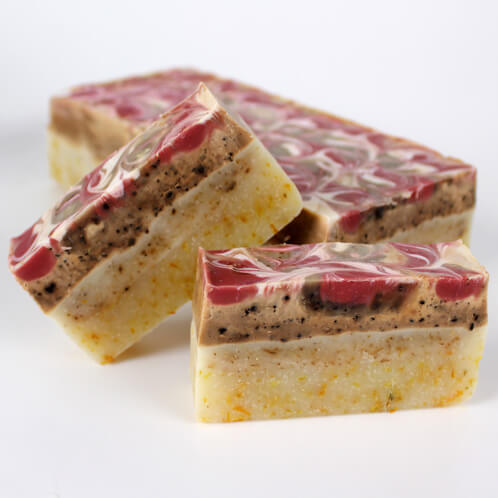
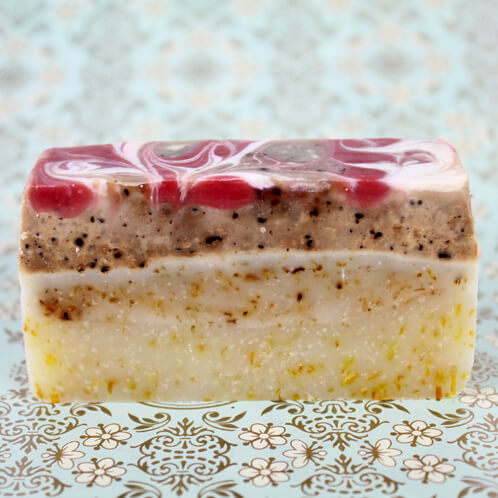
FOUR: Split the remaining soap into 5 parts, two parts measuring about 1 cup each, another part measuring 2 cups, the fourth about 1/2 cup, and the fifth being the remainder.
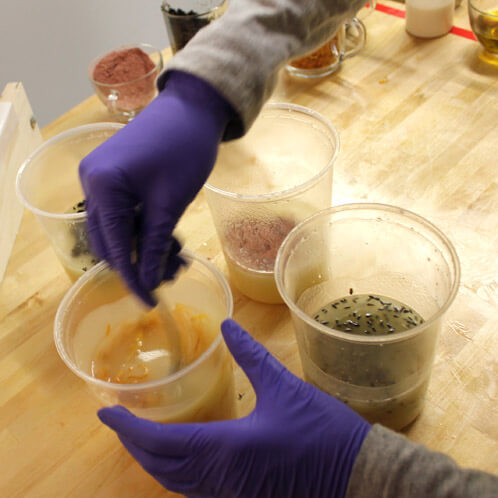
FIVE: To one of the parts measuring 1 cup, add 1 Tablespoon Rose Clay and 3 mL Diluted Fuchsia LabColor. To the other 1 cup part, add 1 Tablespoon Lavender buds.To the part measuring 2 cups, add 1 Tablespoon Coffee Grounds. To the part measuring 1/2 cup, add 1 Tablespoon Kelp Powder. And to the remaining soap, add 1 pinch Calendula. Stir each colorant or additive in with a whisk or spoon.
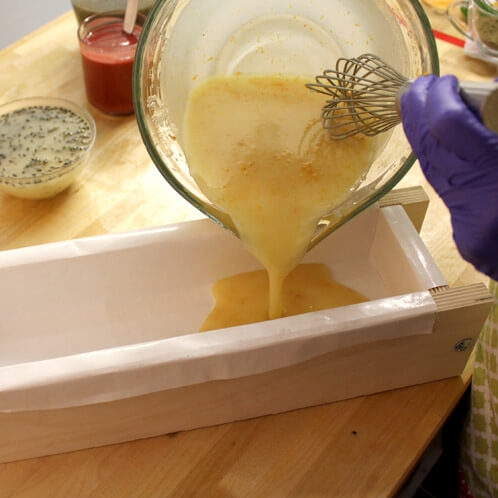
SIX: Add the essential oil blend to each split part. I poured the Calendula layer into the mold first, so after I added the essential oil blend I used a stick blender to simultaneously mix in the essential oils and bring the soap to a thick trace. This will chop the Calendula petals a bit, which was my intention. Pour the soap into the mold and tamp the mold on the table to remove any air bubbles.
SEVEN: Next, bring the lavender layer to thick trace using your stick blender. Pour this layer into the mold as well, but this time pour the soap over a spatula so not to break through the first layer. Tamp the mold on the table to remove air bubbles.
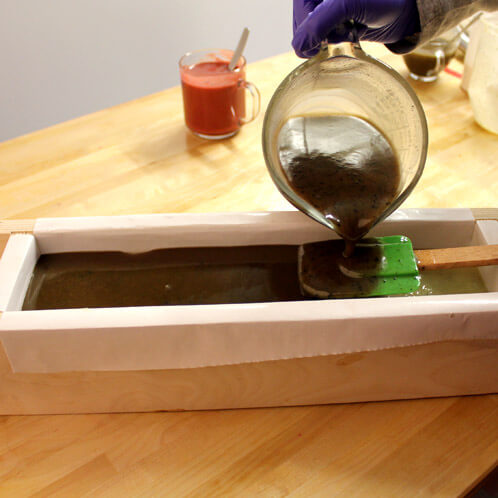
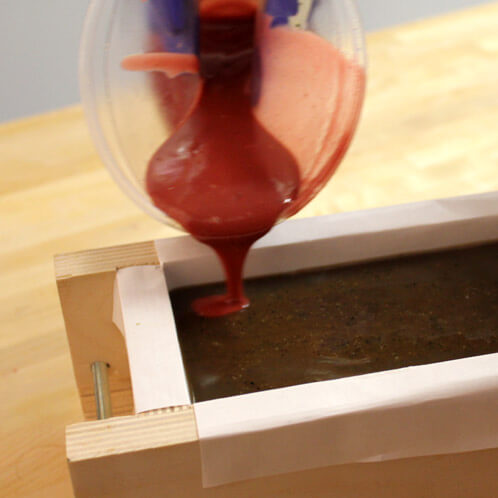
EIGHT: After the Lavender layer, in went the soap with the Coffee Grounds. Bring the soap to a thick trace and pour into the mold over a spatula so not to break the layers. Tamp the mold on the table to eliminate air bubbles.
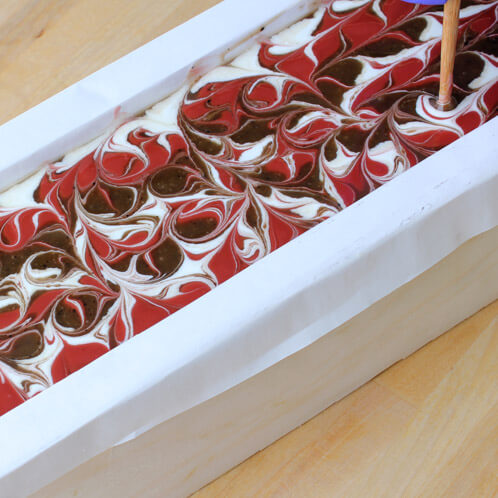
NINE: The Rose Clay layer is next. Bring the soap to a thick trace as well, but instead of pouring all of the soap in at once, start building the foundation for the swirled top. Pour the soap in thin lines down the length of the mold, curving back up and around when you reach the end, creating “S” curves. Build on those “S” curves until all of the soap is in the mold.
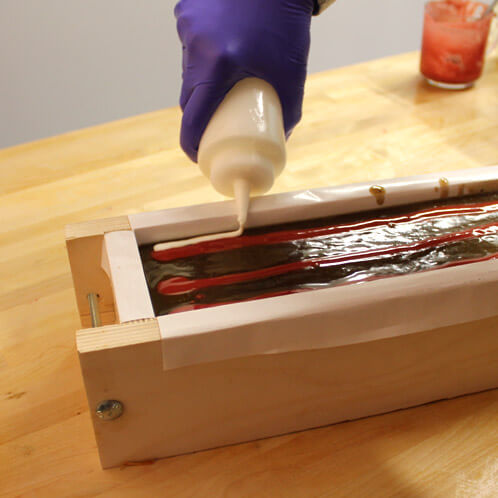
TEN: Follow the Rose Clay “S” curves with the Kelp Powder soap. Bring the soap to thick trace and pour right next to the lines created by the Rose Clay soap, until all of the soap is in the mold. Finally, repeat with the Titanium Dioxide-colored soap in the squirt bottle, giving it a good shake before you start to pour.
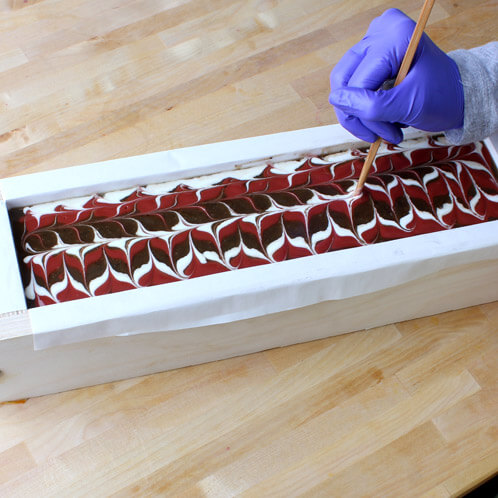
ELEVEN: Time to swirl! Using a chopstick or dowel inserted into just the top 1/4″ of the soap, drag perpendicularly through the lines created by the three different colors of soap, curving back up when you reach the end of the mold. You’re creating “S” curves again! Go back and forth down the mold until you reach the end.
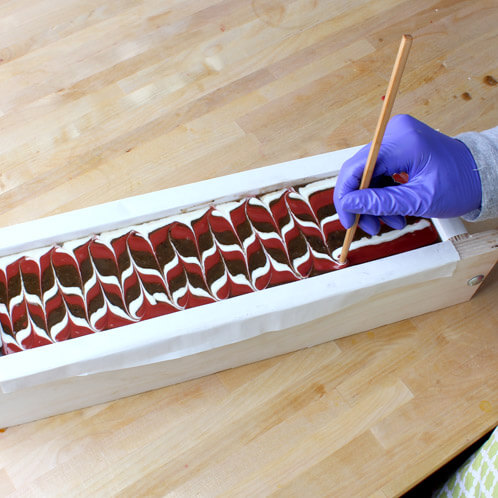
TWELVE: Without removing your chopstick or dowel from the soap, start the next phase of the swirl by dragging down the length of the mold, perpendicular to the “S” curves you just created. When you reach the end of the mold, swoop around and start heading down the length of the mold in the opposite direction. Finally, create a looping pattern with your chopstick across the linear swirl you just created, looping down the length of the mold and then swooping back. Repeat until the entire surface of the soap is swirled.
THIRTEEN: Spray with 91% Isopropyl (Rubbing) Alcohol to prevent soda ash. Cover and insulate for 24 hours, and unmold after 1-3 days. Cut the loaf and allow to cure for 4-6 weeks. Enjoy!