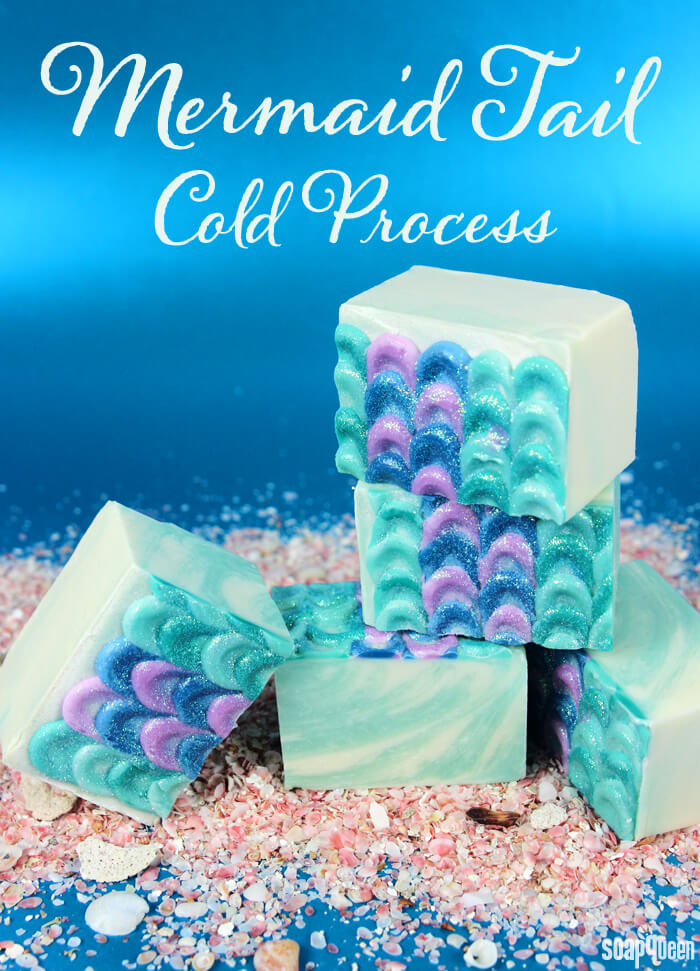
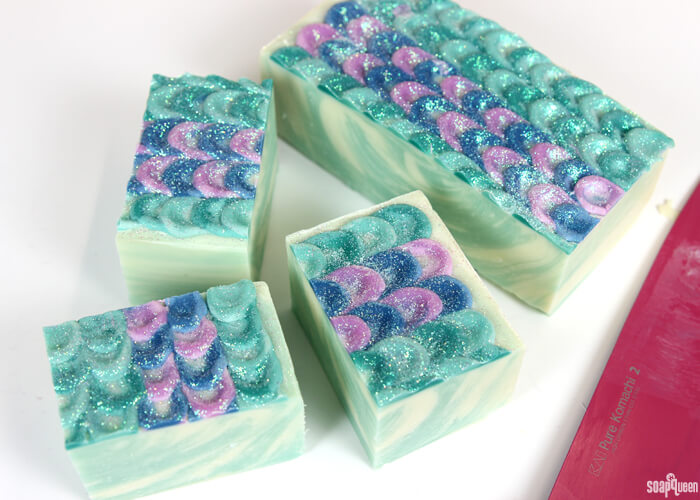
Mysterious and beautiful, mermaids are universally appealing. Mermaids appear in various folklore stories from a wide range of cultures, and became extremely popular by Hans Christian Andersen’s fairy tale, “The Little Mermaid.” This cold process soap was inspired by scales of a mermaid’s tail. The base features a simple blue and white in-the-pot swirl to mimic waves of the ocean. Iridescent glitter gives this soap plenty of sparkle and shine, while Crisp Cotton Fragrance Oil adds a fresh, clean scent.
To create the scale effect, this project uses the petal technique introduced by Erica Pence in the Artisan Soapmaker Ezine and made popular by Kenna of Modern Soap Making. The petal technique takes a steady hand and a bit of practice. First, small dots of soap are squeezed in a row. A spoon is pressed into the dot to spread the soap and create a petal/scale shape. Before attempting a large batch, you may want to practice the technique on parchment paper to get a feel for the movement. Once you get the hang of it, it’s surprisingly simple.
What You’ll Need:
Base
7.3 oz. Coconut Oil
8.7 oz. Olive Oil
5.8 oz. Palm Oil
4.4 oz. Meadowfoam Oil
1.5 oz. Rice Bran Oil
1.4 oz. Jojoba Oil
3.8 oz. Sodium Hydroxide Lye
9.6 oz. Distilled Water
2 oz. Crisp Cotton Fragrance Oil
Titanium Dioxide Pigment
Neon Blue Raspberry Colorant
6″ Silicone Slab Mold
Scales/Petals
2.5 oz. Coconut Oil
3 oz. Olive Oil
2 oz. Palm Oil
1.5 oz. Meadowfoam Oil
.5 oz. Rice Bran Oil
.5 oz. Jojoba Oil
1.3 oz. Sodium Hydroxide Lye
3.3 oz. Distilled Water
Ultramarine Blue Pigment
Hydrated Chrome Green Pigment
Neon Blue Raspberry Colorant
Radiant Plum Colorant
Aqua Pearl Mica
Iridescent Glitter
4 Squeeze Bottles

If you’ve never made Cold Process soap before, stop here! I highly recommend checking out our FREE four part SoapQueen.tv series on Cold Process Soapmaking, especially the episode on lye safety. And if you’d rather do some reading, Bramble Berry carries a wide range of books on the topic, including my newest book, Soap Crafting. You can also checkout the digital downloads for that instant gratification factor.
SAFETY FIRST: Suit up for safe handling practices! That means goggles, gloves and long sleeves. Make sure kids, pets, and other distractions and tripping hazards are out of the house or don’t have access to your soaping space. Always soap in a well-ventilated area.
COLOR PREP: To ensure that the Titanium Dioxide blends smoothly into the soap batter, we recommend micronizing it before dispersing it in oil. Please note this is an optional tip but it does help with the titanium dioxide clumping in the soap =) To micronize colorant, simply use a coffee grinder to blend the colorant to break up any clumps of color and prevent streaks of white from showing in the final soap. We like to use a coffee grinder that has a removable, stainless steel mixing area for easy cleaning. Then, disperse 1 teaspoon of the colorant into 1 tablespoon of sunflower or sweet almond oil (or any other liquid oil). Finally, disperse 1 teaspoon Neon Blue Raspberry Colorant into 1 tablespoon of light liquid oil. Use a mini mixer to get the clumps of color worked out smoothly.
ONE: Slowly and carefully add the lye to the water and gently stir until the lye has fully dissolved and the liquid is clear. Set aside to cool.
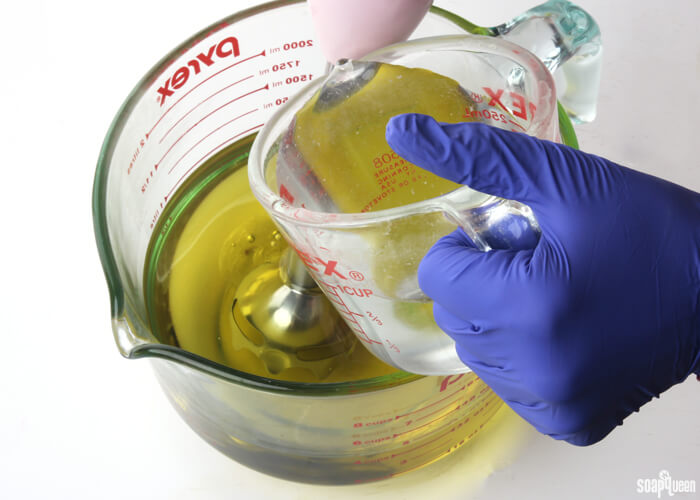
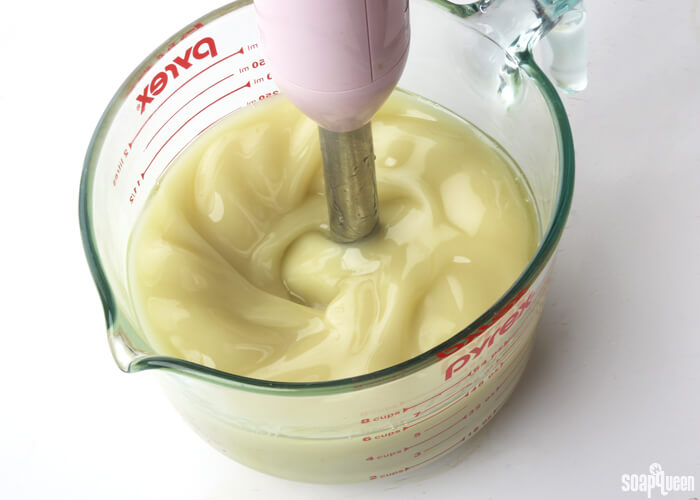
TWO: Combine the coconut oil, olive oil, meadowfoam oil, rice bran oil, jojoba oil and palm oils (remember to fully melt then mix your entire container of palm oil before portioning). Once the lye water and the oils have cooled to 130 degrees or below (and are ideally within 10 degrees of each other), add the lye water to the oils and stick blend until thin trace. If you’d like a harder bar of soap that releases faster from the mold, you can add sodium lactate to the cooled lye water. Use 1 teaspoon of sodium lactate per pound of oils in the recipe. For this recipe, you’d add about 2 tsp. sodium lactate.
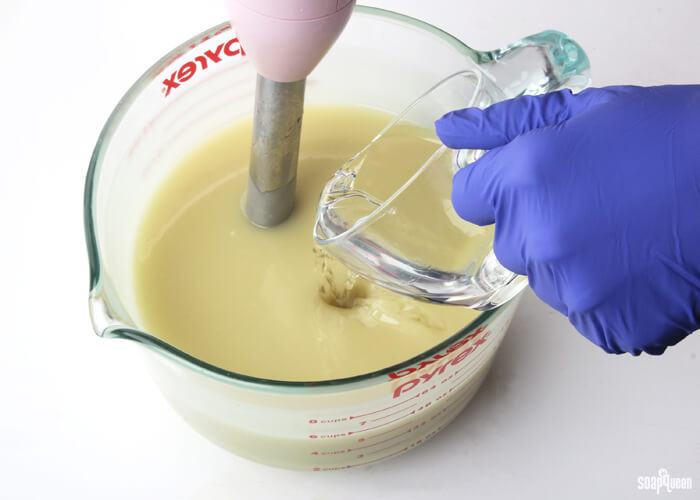
 THREE: Add the Crisp Cotton Fragrance Oil and whisk in.
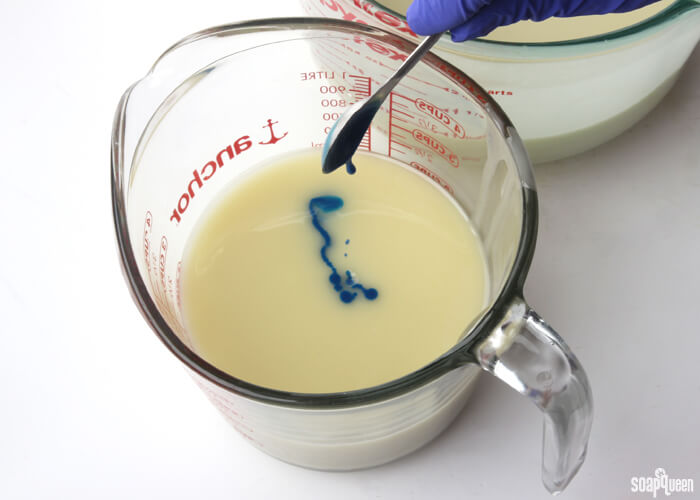
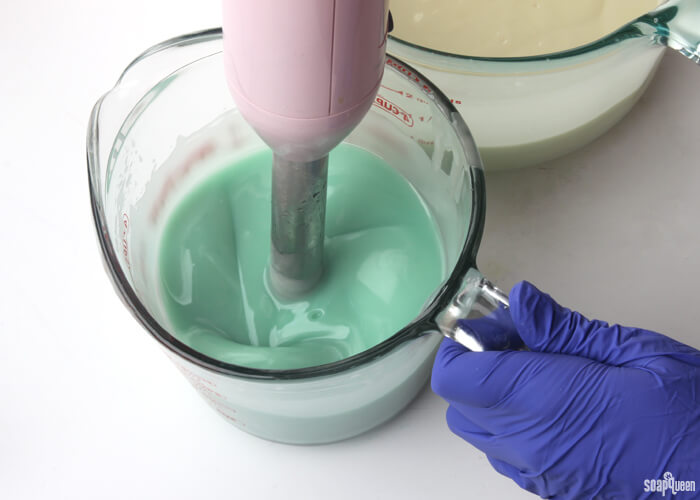
 FOUR: Split the batch into two containers: the first container should contain about 2 cups, while the other should hold about 4 cups. To the small container, add 1 tsp. dispersed Neon Blue Raspberry Colorant and whisk in to incorporate.
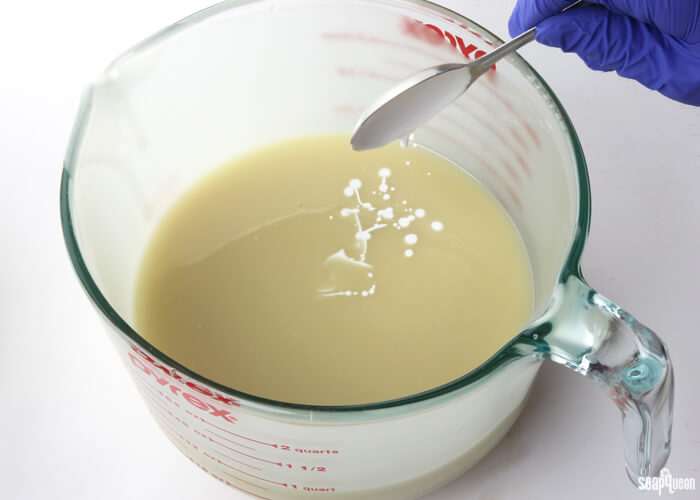
 FIVE: To the large container, add 1 Tbs. dispersed titanium dioxide. Whisk in to fully incorporate.
 SIX: If the soap is still at a thin trace, pulse both containers with the the stick blender to thicken to a medium trace.
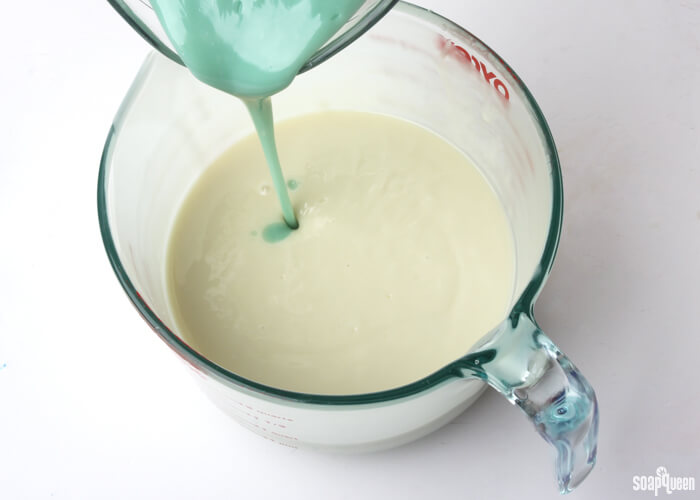
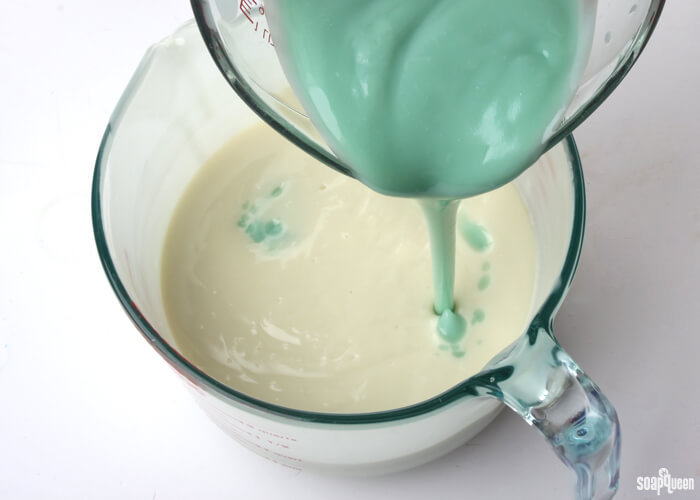
 SEVEN: Once you have reached the texture of a thin pudding, it’s time to make the in-the-pot swirl! Pour the blue soap into the white soap in four places: 12 o’clock, 3 o’clock, 6 o’clock and 9 o’clock. Pour steadily from a high point to get the color all the way to the bottom of the container.
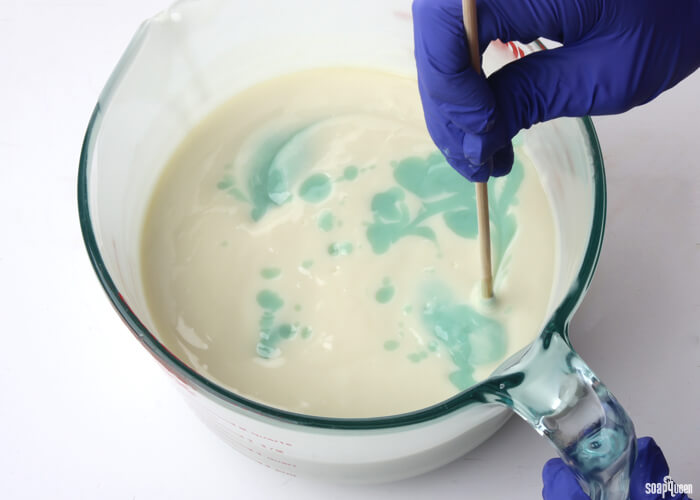
 EIGHT: Run a chopstick or dowel twice through the soap, hitting each entry point.
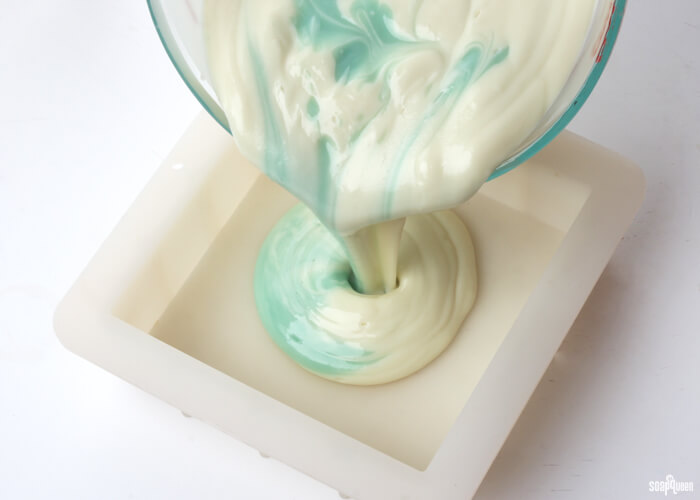
 NINE: Pour the soap into the center of the mold until completely full. This recipe fills the mold to the very tip-top; doing so makes it easier to create the scales on top. If you have a little extra soap, have a small mold nearby to pour the extra soap. Once all the soap has been poured into the mold, firmly tap the mold onto the counter to release any air bubbles.
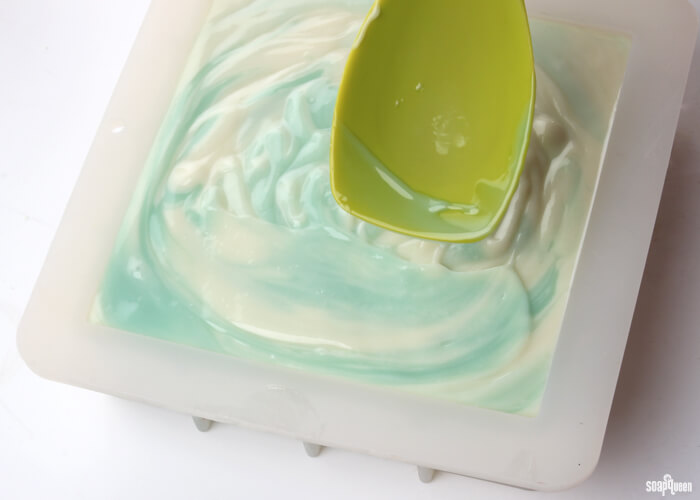
 TEN: Use a spatula or spoon to create a flat top. The smoother the better! This helps create an even surface to create your scales on. Set soap aside while you make the soap for the scale detailing.
Create the Scales/Petals
Now that the base has been created, it’s time to make the “scales.” This technique involves using squeeze bottles to make small dots of various colors. A spoon is then used to lightly press on the dots. This creates a petal, or scale shaped detail. The key is achieving the right trace consistency. The soap should be thin enough that it can be squeezed out of the bottles, yet thick enough that it holds its shape. To simplify this process, the petals are not fragranced. This recipe does make more soap that what you will most likely need. Making a slightly larger batch fills the bottles more, which makes creating the dots easier. Have a small mold on hand to use up the leftover soap.
If you’ve never made Cold Process soap before, stop here! I highly recommend checking out our FREE four part SoapQueen.tv series on Cold Process Soapmaking, especially the episode on lye safety. And if you’d rather do some reading, Bramble Berry carries a wide range of books on the topic, including my newest book, Soap Crafting. You can also checkout the digital downloads for that instant gratification factor.
SAFETY FIRST: Suit up for safe handling practices! That means goggles, gloves and long sleeves. Make sure kids, pets, and other distractions and tripping hazards are out of the house or don’t have access to your soaping space. Always soap in a well-ventilated area.
COLOR PREP: Disperse 1 teaspoon each of the Ultramarine Blue Colorant, Hydrated Chrome Green Colorant, Radiant Plum Colorant, Neon Blue Raspberry Colorant and Aqua Pearl Mica into 1 tablespoon each of sunflower or sweet almond oil (or any other liquid oil). Use a mini mixer to get the clumps of color worked out smoothly.
ONE: Slowly and carefully add the lye to the water and gently stir until the lye has fully dissolved and the liquid is clear. Set aside to cool.
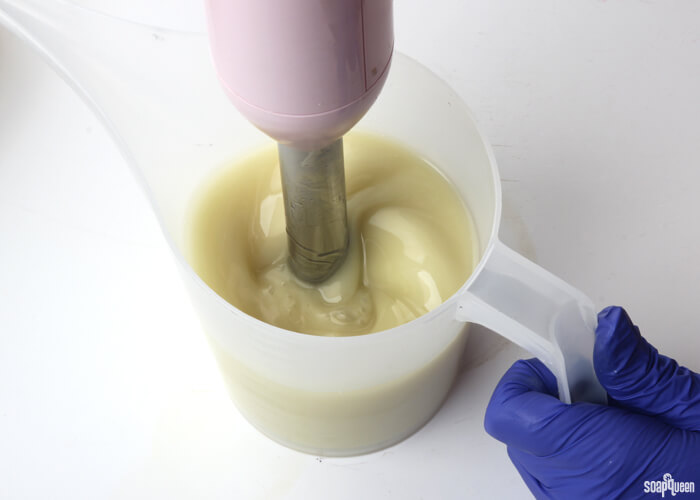
TWO: Combine the coconut oil, olive oil, meadowfoam oil, rice bran oil, jojoba oil and palm oils (remember to fully melt then mix your entire container of palm oil before portioning). Once the lye water and the oils have cooled to 130 degrees or below (and are ideally within 10 degrees of each other), add the lye water to the oils and stick blend until thin trace. If you’d like a harder bar of soap that releases faster from the mold, you can add sodium lactate to the cooled lye water. Use 1 teaspoon of sodium lactate per pound of oils in the recipe. For this recipe, you’d add about .5 tsp. sodium lactate.
TIP: Because you are working with a very small amount of soap, using a small, tall container prevents air bubbles.
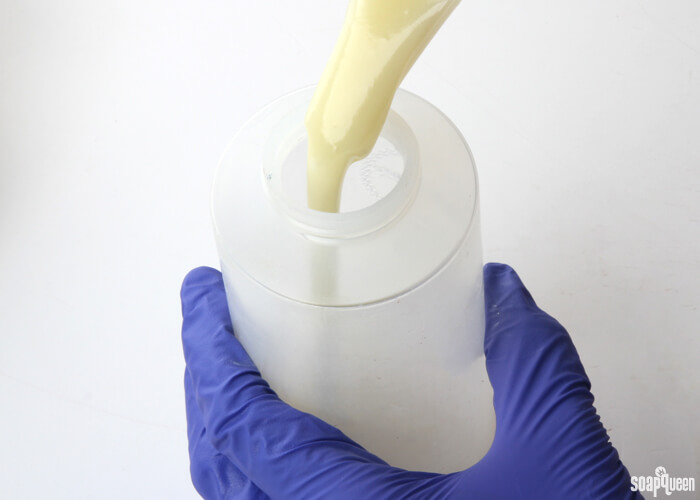
 THREE: Once the soap has reached a thin trace, evenly disperse the soap into four squeeze bottles. It’s okay to eyeball it!
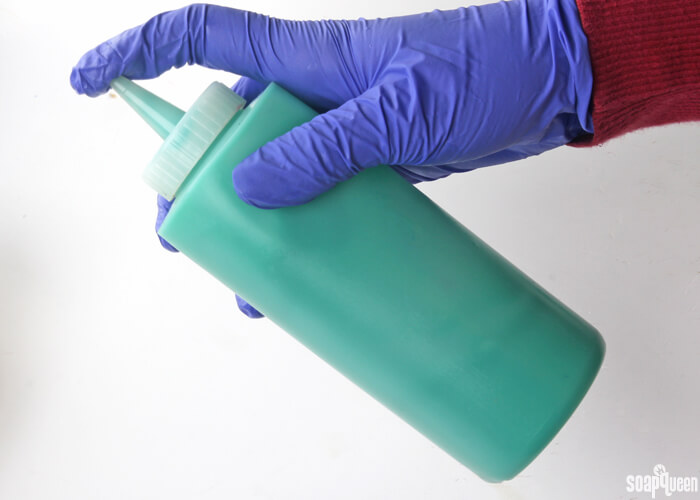
 FOUR: Now it’s time to mix your colors! Add the colorants listed below into each individual squeeze bottle. Twist on the cap, and cover the opening with your finger. Shake the bottle rigorously until the color is completely dispersed.
-
- Bottle A: 1/2 tsp. dispersed Ultramarine Blue + 1/2 tsp. dispersed Hydrated Chrome Green = Dark Blue
- Bottle B: 1 tsp. dispersed Hydrated Chrome Green = Teal
- Bottle C: 1/2 tsp. dispersed Aqua Pearl = Light Blue
- Bottle D: 1/4 tsp. dispersed Radiant Plum + 1/8 tsp. dispersed Neon Blue Raspberry = Purple
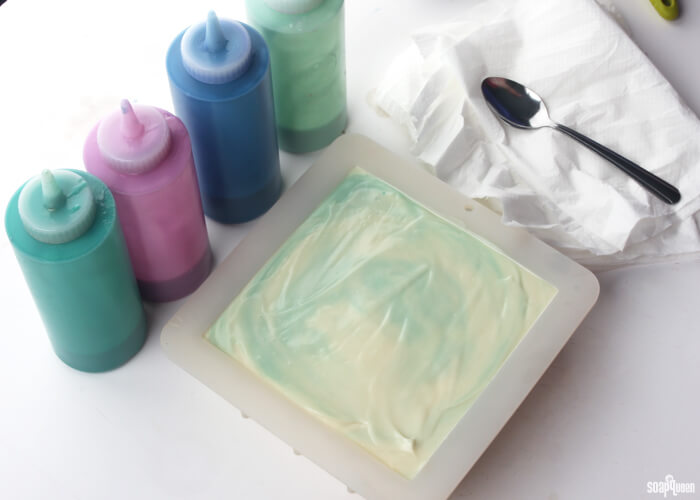
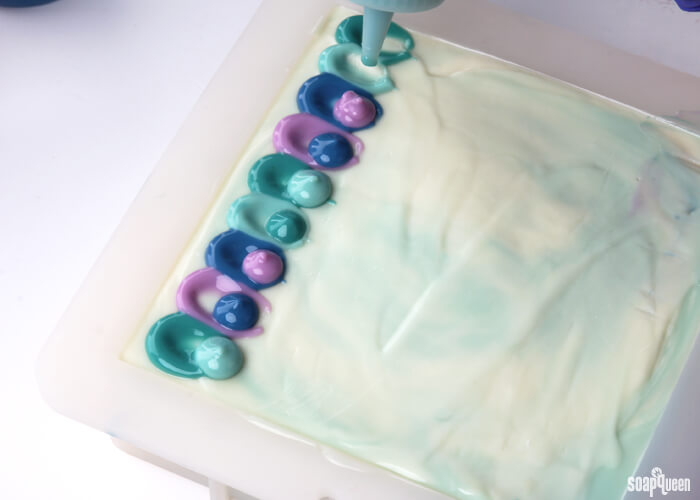
FIVE: Set the bottles of soap aside to thicken. While it thickens, place the soap in the center of your work space. Grab plenty of paper towels, or a dishrag. Have your spoon handy. The best spoon is one with a small curve on the head. Make sure your spoon is not aluminum, which reacts with the lye and creates toxic fumes. Squeeze a small amount of each color on a piece of paper or on your paper towels to test the trace. If it’s too thin, keep shaking the soap to thicken. Be patient, it may take several minutes for the soap to reach the correct consistency. Line up the squeeze bottles in the order of use. The order we used was: teal, purple, dark blue and light blue.
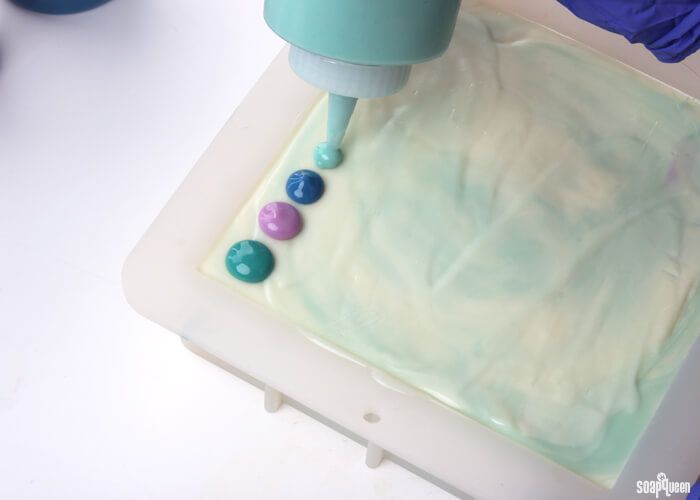
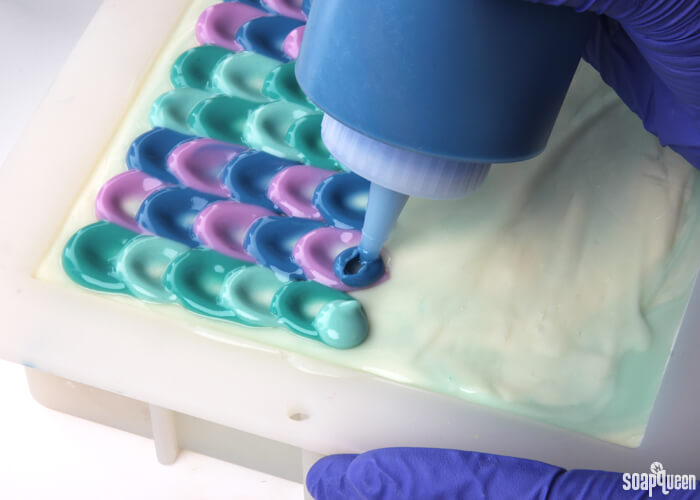
 SIX: Once the soap has reached a medium trace that holds its shape, make small dots going across the soap lengthwise using the color order: teal, purple, dark blue and light blue. Once you have made four dots, start the color order over again, starting with the teal color. Try to make the dots the same size, and evenly spaced. The dots should almost touch. The amount of dots will depend slightly on their size; our rows contained nine dots.
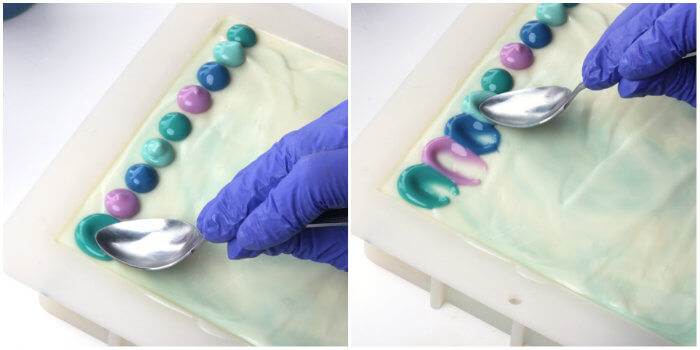
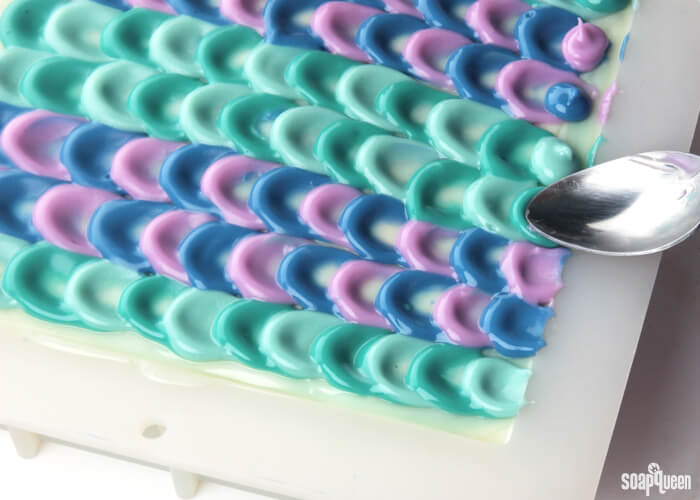
 SEVEN: Use the spoon to gently press each dot of color, sliding the spoon toward you. The base layer should be firm enough that each movement with the spoon will not disrupt the base. Between each color, clean off the spoon on the paper towel or rag. Continue creating petal shapes down the entire row of dots. Watch the video below to see this technique in action!
 NINE: Continue the process of squeezing dots down the entire row, and using the spoon to gently press the dots to create the scale/petal shape. Don’t forget to clean the spoon off in between each color! Continue alternating the color order from teal, purple, dark blue, light blue, and light blue, dark blue, purple and teal. Alternating the color order creates the row of colors in the end. Keeping your squeeze bottles in order on your counter space helps keep them straight!
 TEN: Once you reach the bottom of the mold, use the spoon to create a petal/scale that touches the edge of the mold.
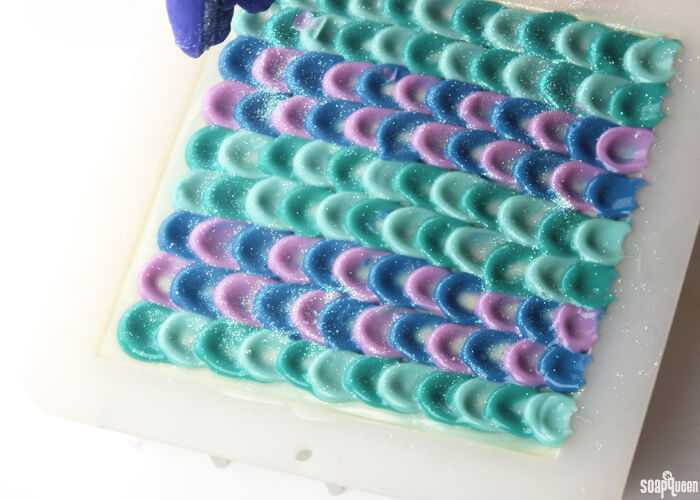
 ELEVEN: Spray the soap with 99% isopropyl alcohol to prevent soda ash. Sprinkle the top with Iridescent Glitter. Allow soap to sit in the mold for 3-4 days. Because this is a loaf silicone mold, the soap may take a little longer than usual to set up. Be patient and give it time, you don’t want to ruin all that hard work!
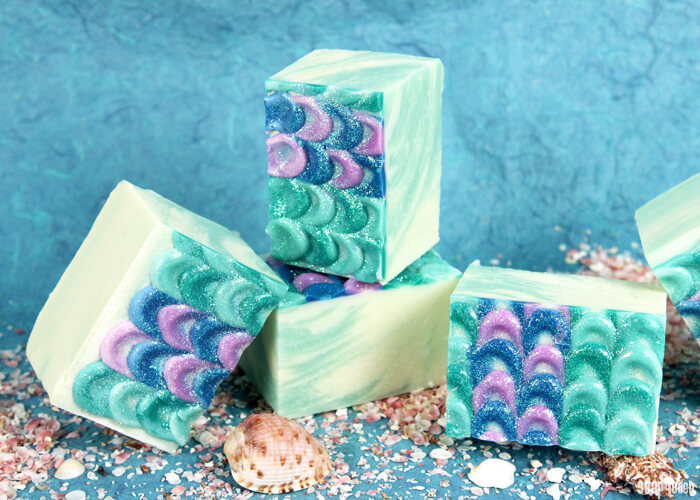
 Once the soap has been removed, cut the soap down the center of the mold. Then, cut each half into three bars.
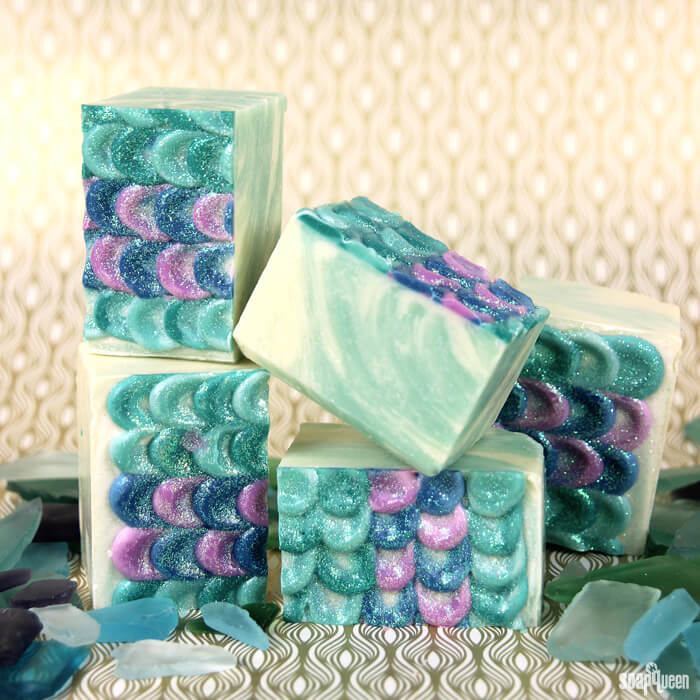
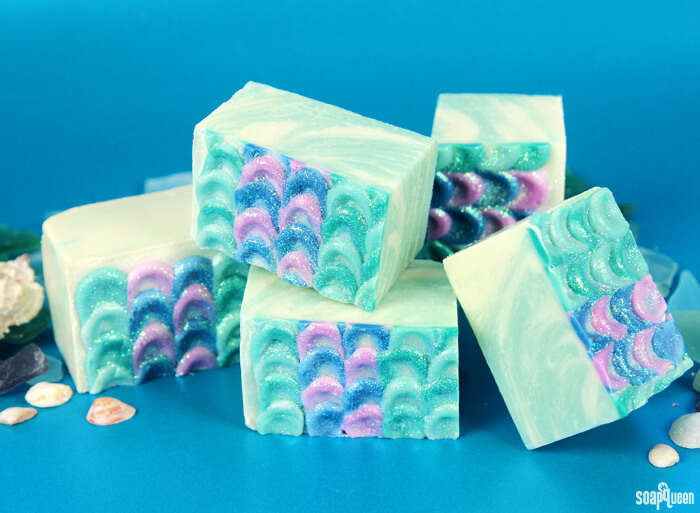
Have you tried this petal technique before? I was a little uncertain, but it’s actually easier than it seems. Just takes some practice =)
Mermaid Tail Cold Process Soap
Ingredients
Base
- 7.3 oz. Coconut Oil
- 8.7 oz. Olive Oil
- 5.8 oz. Palm Oil
- 4.4 oz. Meadowfoam Oil
- 1.5 oz. Rice Bran Oil
- 1.4 oz. Jojoba Oil
- 3.8 oz. Sodium Hydroxide Lye
- 9.6 oz. Distilled Water
- 2 oz. Crisp Cotton Fragrance Oil
- Titanium Dioxide Pigment
- Neon Blue Raspberry Colorant
- 6 ″ Silicone Slab Mold
Scales/Petals
- 2.5 oz. Coconut Oil
- 3 oz. Olive Oil
- 2 oz. Palm Oil
- 1.5 oz. Meadowfoam Oil
- .5 oz. Rice Bran Oil
- .5 oz. Jojoba Oil
- 1.3 oz. Sodium Hydroxide Lye
- 3.3 oz. Distilled Water
- Ultramarine Blue Pigment
- Hydrated Chrome Green Pigment
- Neon Blue Raspberry Colorant
- Radiant Plum Colorant
- Aqua Pearl Mica
- Iridescent Glitter
- 4 Squeeze Bottles
Instructions
SAFETY FIRST: Suit up for safe handling practices! That means goggles, gloves and long sleeves. Make sure kids, pets, and other distractions and tripping hazards are out of the house or don’t have access to your soaping space. Always soap in a well-ventilated area.
COLOR PREP: To ensure that the Titanium Dioxide blends smoothly into the soap batter, we recommend micronizing it before dispersing it in oil. Please note this is an optional tip but it does help with the titanium dioxide clumping in the soap =) To micronize colorant, simply use a coffee grinder to blend the colorant to break up any clumps of color and prevent streaks of white from showing in the final soap. We like to use a coffee grinder that has a removable, stainless steel mixing area for easy cleaning. Then, disperse 1 teaspoon of the colorant into 1 tablespoon of sunflower or sweet almond oil (or any other liquid oil). Finally, disperse 1 teaspoon Neon Blue Raspberry Colorant into 1 tablespoon of light liquid oil. Use a mini mixer to get the clumps of color worked out smoothly.
- Slowly and carefully add the lye to the water and gently stir until the lye has fully dissolved and the liquid is clear. Set aside to cool.
- Combine the coconut oil, olive oil, meadowfoam oil, rice bran oil, jojoba oil and palm oils (remember to fully melt then mix your entire container of palm oil before portioning). Once the lye water and the oils have cooled to 130 degrees or below (and are ideally within 10 degrees of each other), add the lye water to the oils and stick blend until thin trace. If you’d like a harder bar of soap that releases faster from the mold, you can add sodium lactate to the cooled lye water. Use 1 teaspoon of sodium lactate per pound of oils in the recipe. For this recipe, you’d add about 2 tsp. sodium lactate.
- Add the Crisp Cotton Fragrance Oil and whisk in.
- Split the batch into two containers: the first container should contain about 2 cups, while the other should hold about 4 cups. To the small container, add 1 tsp. dispersed Neon Blue Raspberry Colorant and whisk in to incorporate.
- To the large container, add 1 Tbs. dispersed titanium dioxide. Whisk in to fully incorporate.
- If the soap is still at a thin trace, pulse both containers with the the stick blender to thicken to a medium trace.
- Once you have reached the texture of a thin pudding, it’s time to make the in-the-pot swirl! Pour the blue soap into the white soap in four places: 12 o’clock, 3 o’clock, 6 o’clock and 9 o’clock. Pour steadily from a high point to get the color all the way to the bottom of the container.
- Run a chopstick or dowel twice through the soap, hitting each entry point.
- Pour the soap into the center of the mold until completely full. This recipe fills the mold to the very tip-top; doing so makes it easier to create the scales on top. If you have a little extra soap, have a small mold nearby to pour the extra soap. Once all the soap has been poured into the mold, firmly tap the mold onto the counter to release any air bubbles.
- Use a spatula or spoon to create a flat texture on top. The smoother the better! This helps create a smooth even surface to create your scales. Set soap aside while you make the soap for the scale detailing.
Scale Detailing
SAFETY FIRST: Suit up for safe handling practices! That means goggles, gloves and long sleeves. Make sure kids, pets, and other distractions and tripping hazards are out of the house or don’t have access to your soaping space. Always soap in a well-ventilated area.
COLOR PREP: Disperse 1 teaspoons of the Ultramarine Blue Colorant, Hydrated Chrome Green Colorant, Radiant Plum Colorant, Neon Blue Raspberry Colorant and Aqua Pearl Mica into 1 tablespoons of sunflower or sweet almond oil (or any other liquid oil). Use a mini mixer to get the clumps of color worked out smoothly.
- Slowly and carefully add the lye to the water and gently stir until the lye has fully dissolved and the liquid is clear. Set aside to cool.
- Combine the coconut oil, olive oil, meadowfoam oil, rice bran oil, jojoba oil and palm oils (remember to fully melt then mix your entire container of palm oil before portioning). Once the lye water and the oils have cooled to 130 degrees or below (and are ideally within 10 degrees of each other), add the lye water to the oils and stick blend until thin trace. If you’d like a harder bar of soap that releases faster from the mold, you can add sodium lactate to the cooled lye water. Use 1 teaspoon of sodium lactate per pound of oils in the recipe. For this recipe, you’d add about .5 tsp. sodium lactate. TIP: Because you are working with a very small amount of soap, using a small, tall container prevents air bubbles.
- Once the soap has reached a thin trace, evenly disperse the soap into four squeeze bottles. It’s okay to eyeball it!
- Now it’s time to mix your colors! Add the colorants listed below into each individual squeeze bottle. Twist on the cap, and cover the opening with your finger. Shake the bottle rigorously until the color is completely dispersed.
Bottle A: .5 tsp. dispersed Ultramarine Blue + .5 tsp. dispersed Hydrated Chrome Green = Dark Blue
Bottle B: 1 tsp. dispersed Hydrated Chrome Green = Teal
Bottle C: 1/2 tsp. dispersed Aqua Pearl = Light Blue
Bottle D: 1/4 tsp. dispersed Radiant Plum + 1/8 tsp. Neon = Purple - Set the bottles of soap aside to thicken. While it thickens, place the soap in the center of your work space. Grab plenty of paper towels, or a dishrag. Have your spoon handy. The best spoon is one with a small curve on the head. Make sure your spoon is not aluminum, which reacts with the lye and creates toxic fumes. Squeeze a small amount of each color on a piece of paper or on your paper towels to test the trace. If it’s too thin, keep shaking the soap to thicken. Be patient, it may take several minutes for the soap to reach the correct consistency. Line up the squeeze bottles in the order of use. The order we used was: teal, purple, dark blue and light blue.
- Once the soap has reached a medium trace that holds its shape, make small dots going across the soap lengthwise using the color order: teal, purple, dark blue and light blue. Once you have made four dots, start the color order over again, starting with the teal color. Try to make the dots the same size, and evenly spaced. The dots should almost touch. The amount of dots will depend slightly on their size; our rows contained nine dots.
- Use the spoon to gently press each dot of color, sliding the spoon toward you. The base layer should be firm enough that each movement with the spoon will not disrupt the base. Between each color, clean off the spoon on the paper towel or rag. Continue creating petal shapes down the entire row of dots.
- Using the colors in opposite order (light blue, dark blue, purple and teal) squeeze small dots onto the bottom of the petal above it. Each dot should cover any white space, yet should not cover the top of the petal above it when pressed with the spoon. Continue creating dots on the entire row of petals. Use the spoon to gently press the dots as shown in step seven.
- Continue the process of squeezing dots down the entire row, and using the spoon to gently press the dots to create the scale/petal shape. Don’t forget to clean the spoon off in between each color! Continue alternating the color order from teal, purple, dark blue, light blue, and light blue, dark blue, purple and teal. Alternating the color order creates the row of colors in the end. Keeping your squeeze bottles in order on your counter space helps keep them straight!
- Once you reach the bottom of the mold, use the spoon to create a petal/scale that touches the edge of the mold.
- Spray the soap with 99% isopropyl alcohol to prevent soda ash. Sprinkle the top with Iridescent Glitter. Allow soap to sit in the mold for 3-4 days. Because this is a loaf silicone mold, the soap may take a little longer than usual to set up. Be patient and give it time, you don’t want to ruin all that hard work!