Our Soap Crafting Club had a little bit more of a challenge than we planned for this week. When reports of failing batches came in on the private Soap Crafting forum, we knew something was wrong. After all, the recipe that we were making (Tie Dye from the Soap Crafting Book) had been made at least 8 times and gone through 2 photo shoots and 1 video shoot. It was designed to be fail-safe. We tracked down the culprit to a mis-manufactured fragrance oil that was sent out to the entire group of soapers. Oh dear, chaos, sturm und drang.
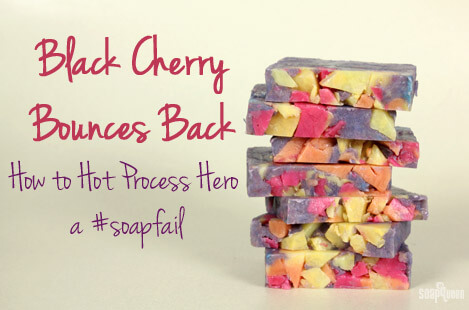
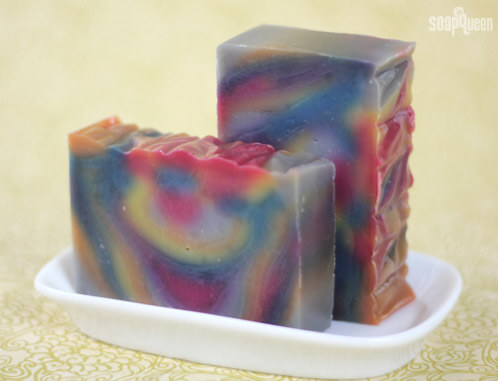
Let’s use this experience to turn lemons into lemonade; soap alongside me as I show you how to Hot Process Hero this crazy batch of soap into something usable, and dare I say, even uniquely lovely? To start, this is what we were after:
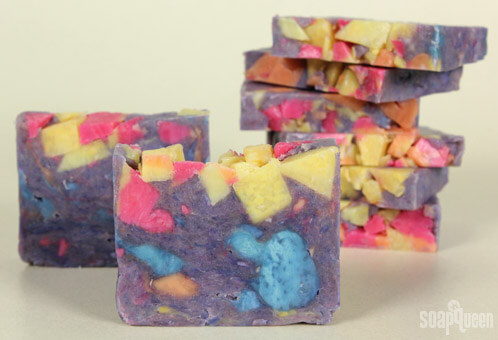
And this is what we got…
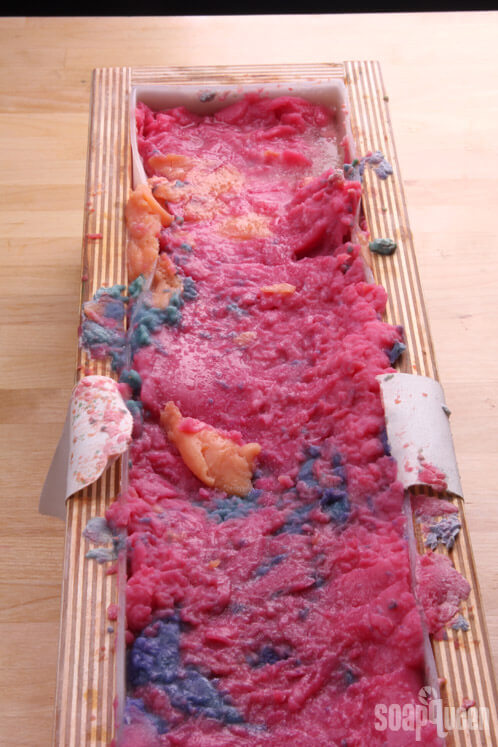
ONE: Clearly that batch is in serious need of some help. Despite its appearance, the soap and the culprit fragrance are totally soap and skin-safe. Let’s get started! Wearing all your safety equipment in a well-ventilated area, drain off any extra oils that have pooled on top of the soap into a stainless steel pot. Then unmold the soap.
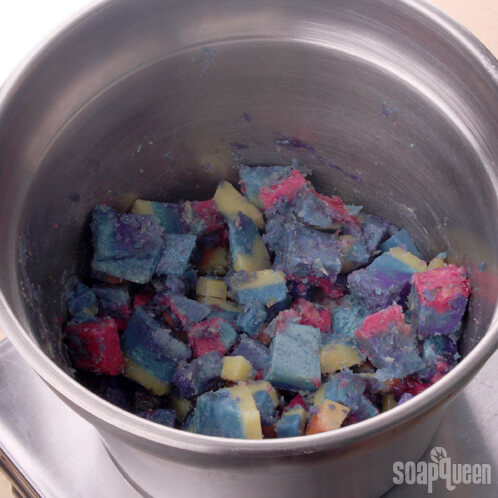
TWO: Chop the soap into small chunks. You might also want to cover your work surface with cardboard to absorb any extra oil from the soap. Though this recipe does not have any extra lye present, not all recipes have the same variables. This recipe is just oozing a teensy bit of oil and looks a little rough.
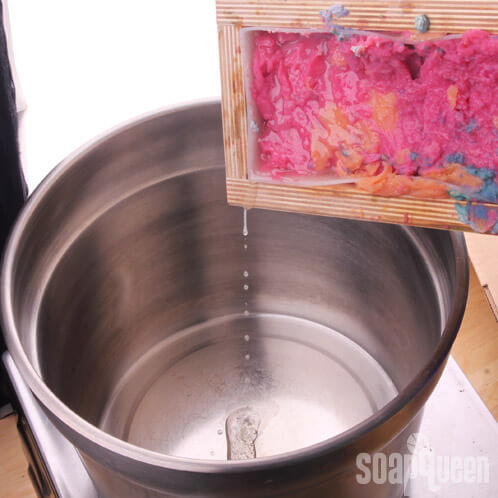
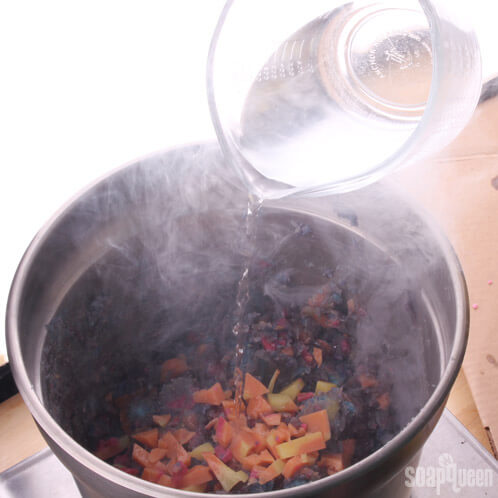
THREE: Turn your burner on a medium setting and begin adding the soap. I added just a few ounces at a time. Your pot must be 3x larger than the batch size because you need a lot of head space for this process.
Tip: Can you use a cooking pan for this? Technically, you can. After all, this is actually soap. It’s real-deal, fully-reacted soap. It’s like putting soap in your pot. Now, do you want to use a cooking pan for this? Meh, probably not. The fragrance oil can work its way into the small etchings in pots and your batches of rice and pasta will taste like fragrance oil for a few cook-throughs. I know this from experience!
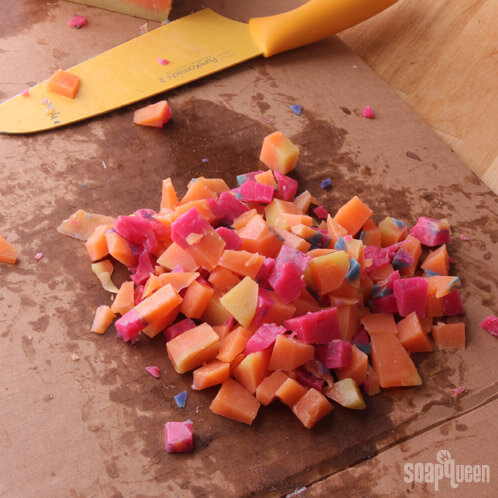
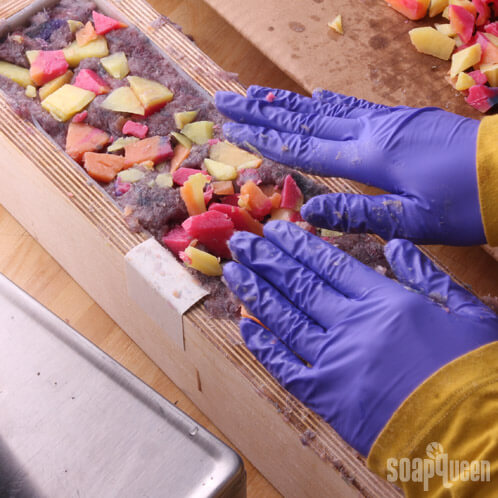
FOUR: Save a few colorful chunks to press into the top later to add interest and drama to your soap.
FIVE: Stir the pot while you slowly add the remaining soap chunks. If the mixture gets too dry, add 2 – 4 oz. of distilled water. If the soap starts smoking, you can decrease the heat or add a bit more water.
SIX: Keep stirring and cooking the soap down. After about 20 minutes, the soap will start to thicken into a gloppy oatmeal-like texture. That’s what you want. You want to keep your soap hydrated, so you may need to add a little extra water if you notice any cracking or if the mixture turns to a clay-like consistency. Keep in mind that the more liquid you add, the softer the soap will be, and the more difficult to pop out of the mold. I recommend adding water 2 ounces at a time.
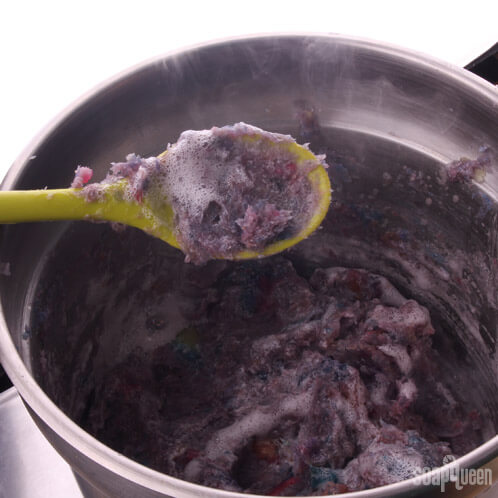
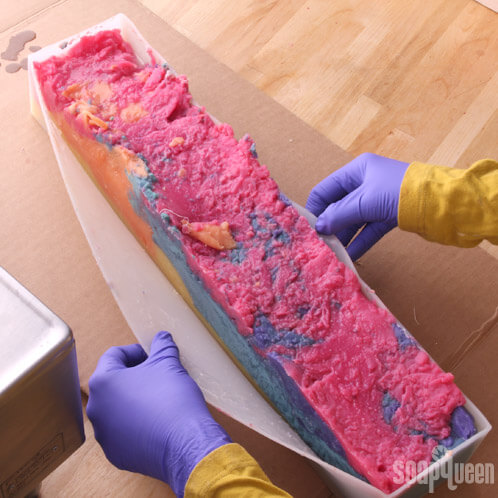
SEVEN: When the entire batch is mostly consistent in texture and color (no oil leaking, no strange looking globby spots), you are ready to glop. Use gloved hands or place wax paper down on the soap to press a flat top.
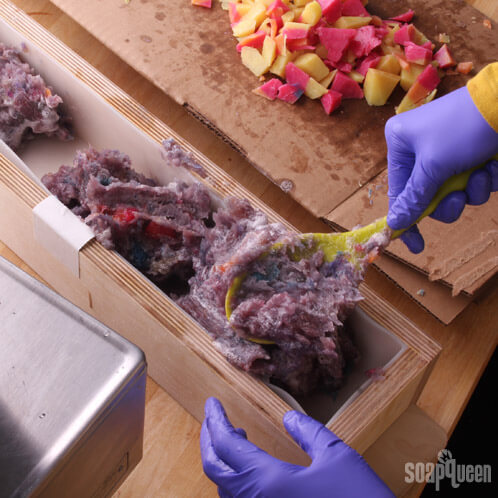
EIGHT: Press chunks of colorful soap (from Step Four) into the soap.
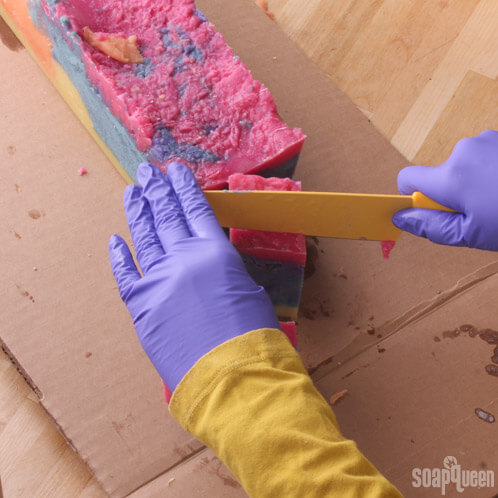
NINE: Allow the soap to harden for 1 – 2 days. After that, it is ready to cut and use right away since it’s gone through a full hot process phase — no need to wait the traditional 4 to 6 weeks! Keep in mind, this technique works for any failed batch of soap! No matter how far gone you think a soapy project may be, there is almost always a way to fix it =)
Bonus: We took Instagram videos of the entire process. Check them out!