• March 31, 2015

Nourishing Nail Polish Tutorial
Nail polish is an easy way to add color and personality to your look. Nail art has recently flourished, and there are now more nail polish options than ever before. While nail polish is fun, it can take a toll on your nails. This Nourishing Nail Polish Formula contains skin-loving argan oil to help care for your nails while adding color. Mixing the colorant in the oil before adding it to the Suspending Nail Polish Base also makes the blending process easier.

For this recipe, I use argan oil, but any lightweight liquid oil would work. Sweet almond oil, chia seed oil, green tea seed oil, avocado oil or hazelnut oil would all be great choices. While slightly more oil could be added to the mixture, adding too much can prevent the polish from drying. If you’d like to add more oil, make a small test batch first to make sure the polish dries and hardens. This technique also works with other colors. The Radiant Plum Colorant used in this tutorial gives a gorgeous vibrant purple hue.

Nourishing Nail Polish
Keep in mind that nail polish base is extremely flammable; do not make or store your polish near an open flame. Because nail polish can be hard to clean, you may want to cover your counter space with newspaper in case of a spill. If you prefer to mix the polish, oils and colorants in a separate container before pouring it into the bottle, use a nail polish-safe, disposable container.

What You’ll Need:
Six 15 mL Nail Polish Bottles
3 oz. Suspending Nail Polish Base
Six Nail Polish Mixing Balls
1 tsp. Radiant Plum Colorant
1 tsp. Argan Oil
Optional: Droppers

Click here to add everything you need for this project to your Bramble Berry shopping cart!
ONE: In a small container, mix together the argan oil and Radiant Plum Colorant. If necessary, use a mini mixer to remove any clumps.

ONE
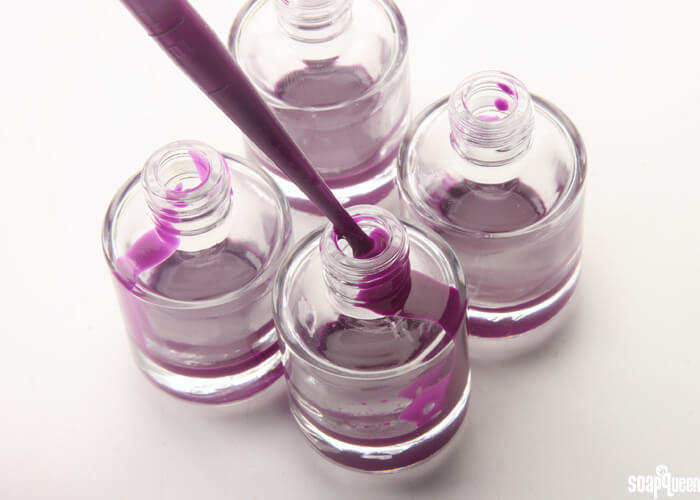
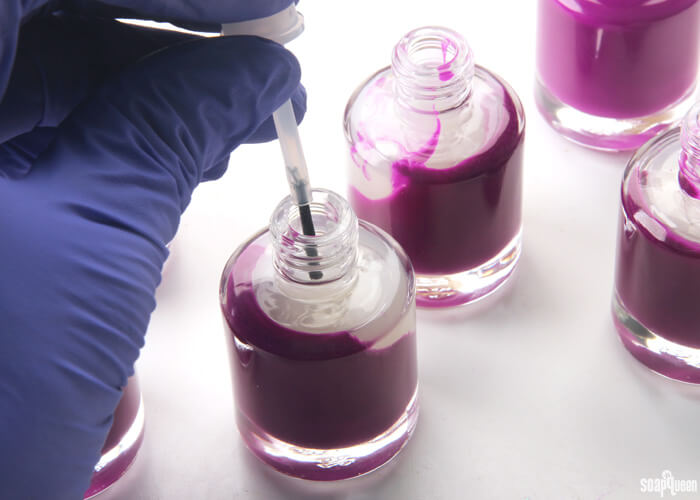
TWO: Place a nail polish mixing ball into each nail polish bottle. Add 2.5 mL of the color mixture into each bottle.

TWO
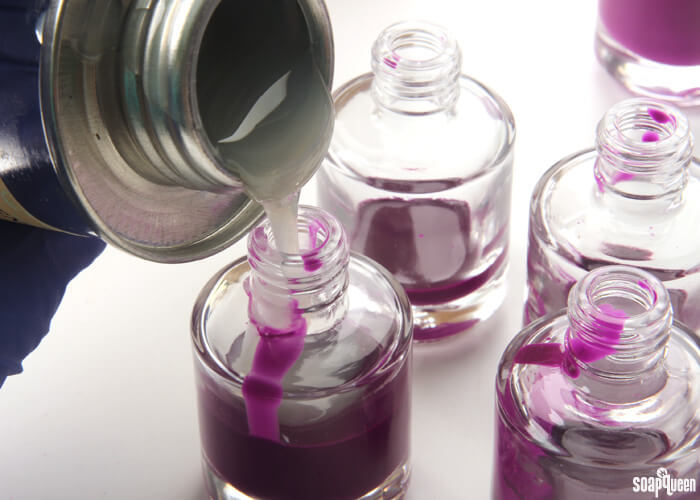
THREE: Slowly and carefully, pour the Nail Polish Base into each bottle. Fill each bottle to the neck.

THREE

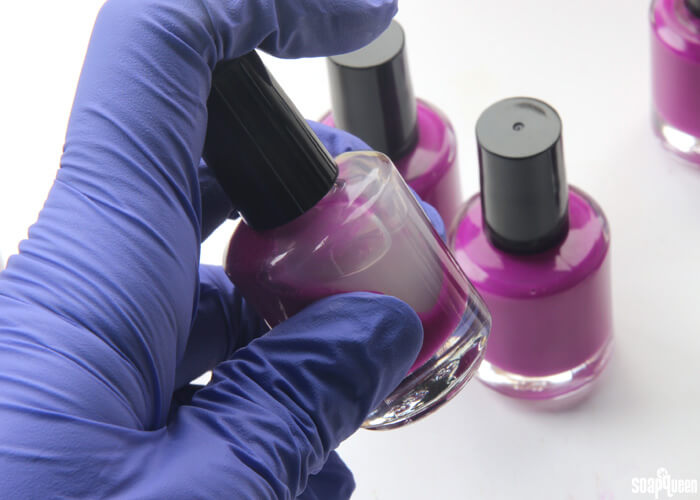
FOUR: Place a brush into each bottle. Screw the cap onto each bottle; doing so will adhere the cap to the brush.

FOUR

FIVE: Shake the bottles to thoroughly mix the nail polish base and colorant mixture. Once fully combined, the nail polish is ready to use!

FIVE

Nourishing Nail Polish 1
Do you love nail polish as much as I do? If so, what colors are you excited to use this spring and summer?


Nourishing Nail Polish Formula

Soap Queen
Made with argan oil this nail polish recipe provides nails with skin-loving properties.
4 from 1 vote
Recipe type Cosmetics

Ingredients
  

  • Six 15 mL Nail Polish Bottles
  • 3 oz. Suspending Nail Polish Base
  • Six Nail Polish Mixing Balls
  • 1 tsp. Radiant Plum Colorant
  • 1 tsp. Argan Oil
  • Optional: Droppers

Instructions
 

  • In a small container, mix together the argan oil and Radiant Plum Colorant. Use a mini mixer if necessary to remove any clumps.
  • Place a nail polish mixing ball into each nail polish bottle. Add 2.5 mL of the color mixture into each bottle.
  • Slowly and carefully, pour the Nail Polish Base into each bottle. Fill each bottle to the neck.
  • Place a brush into each bottle. Screw the cap onto each bottle; doing so will adhere the cap to the brush.
  • Shake the bottles to thoroughly mix the nail polish base and colorant mixture. Once fully combined, the nail polish is ready to use!
Tried this recipe?Let us know how it was!


You may also like these

Become an email subscriber

Enter your email address below and you will receive all our new posts directly in your email inbox.

  1. I just wanted to try out a small sample of this method to see if I like it and if it helps my nails. I currently only have 5 ml bottles on hand. Any suggestions on how many drops of oil would go into one 5 ml bottle?

    1. Hi Sarah!

      I would recommend starting out with just one or two drops of the color and oil mixture. Then, add the nail polish base and mix well. When it’s all mixed, you can test it on your nail or a piece of paper. If you want it more pigmented, you can add a couple more drops. Have fun giving this polish a try! 🙂

      -Kelsey with Bramble Berry

  2. Made this last night and it looks great, but is it really 2.5ml per bottle of pigment and oil? I didn’t have enough pigment/oil mixture to fill 6 nail polish bottles. Unless my measuring needs work, there are approx. 5ml per tsp. So, I’m not sure how the tsp of each the pigment and oil would be enough for 6 bottles.

    1. Hi Sheila!

      In our tests, we found that 2.5 mL of colorant per bottle filled up all six bottles. Using droppers really helps keep your measurements accurate: https://www.brambleberry.com/Droppers-With-Suction-Bulb-P3802.aspx

      You can make a larger mixture of oil and pigment if you like! You can mix 1 Tbsp. of Radiant Plum Colorant into 1 Tbsp. of argan oil. Just make sure not to add more than 2.5 mL of color per bottle, otherwise the oil can slow down the drying time of the nail polish. 🙂

      -Kelsey with Bramble Berry

  3. This is a really intriguing idea to me, as I love, love, love nail polish but nail polish remover totally dries my nails out into a crumbling mess. I’m curious how the staying power is though. I find I have to wait a day or so after moisturizing my nails before repainting them or else the polish comes off much faster. I know the nail to nail polish bond can be a personal thing, but did you find this stayed on comparable to polish made without the oil?

    1. Hi JD!

      I totally understand! I polish my nails a lot and the nail polish remover can really take a toll on them. That’s why I love the added argan oil in this polish. 🙂

      I didn’t notice any difference in the staying power between nail polish with the oil and without. Both stayed on really well! Mine lasted about three days before chipping (which is a bit of a miracle considering how much soaping I do!), and I left it on for about a week before removing it. However, the nail polish with the oil did take a couple more minutes to dry. Hope that helps!

      -Kelsey with Bramble Berry

  4. 4 stars
    What a creative idea. I believe this is the first time I seen a DIY project on this blog with nail polish. I will pass it along to my significant other 😉

    1. Hi Carlos!

      So glad you like the tutorial! It’s fun to make, and the color looks great. Have fun making it. 🙂

      -Kelsey with Bramble Berry

Comments are closed.

{"email":"Email address invalid","url":"Website address invalid","required":"Required field missing"}

The Latest from Soap Queen TV

Inspired by Gems & Crystals

All About Essential Oils

The Power of Charcoal

Create Your Own Clay Face Mask

DIY Bath Bombs

Cold Process Soap Tips & Tricks

Learn the Basics of Cold Process Soapmaking

Learn the Basics of Melt & Pour Soapmaking

Want to Start Your Own Soap Business?

Soap Business Success Stories

Soap Queen TV Favorites

Ingredient Spotlight

Disclosure

Unless stated otherwise, all images are original material and are copyrighted. If you'd like to use an image, please be a friend and credit the photo and link back to Soap Queen. Feel free to share, tweet and pin to your hearts content.