The first time I saw lace soap was while browsing Auntie Clara’s blog. Clara Lindberg of Auntie Clara’s Handcrafted Cosmetics is an extremely talented soapmaker, and generously shared how she created her stunning lace-topped soap in this tutorial. After months of gawking, I finally tried the technique myself.
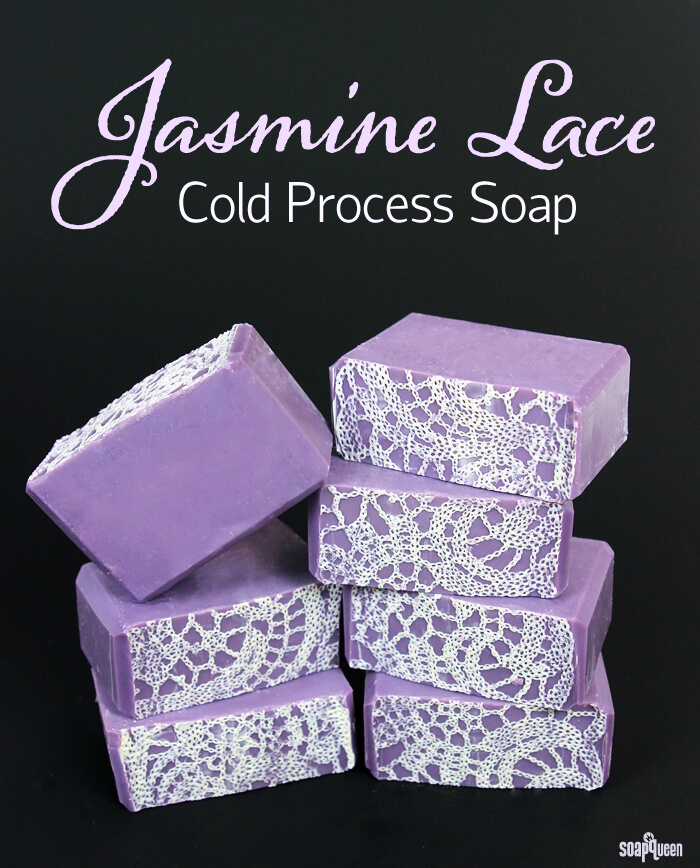
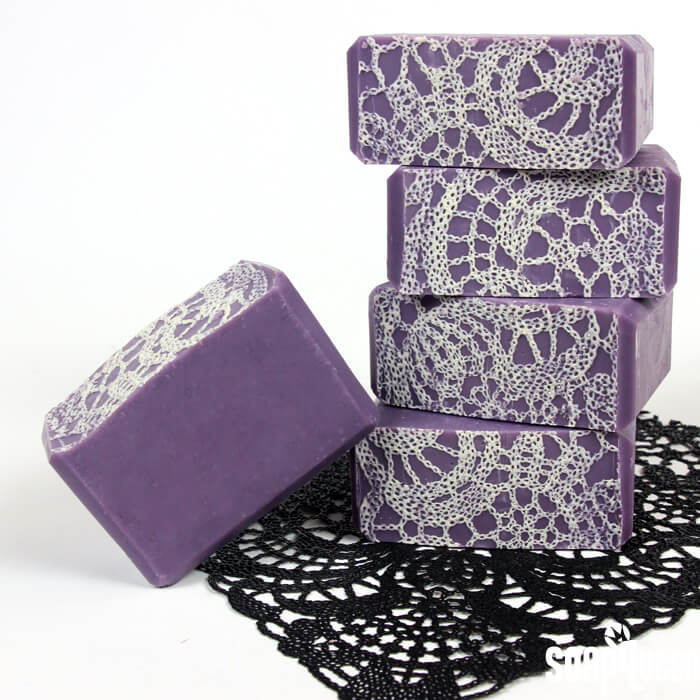
To achieve the lace pattern on the top, pourable silicone and lace are used to create a mat that sits on the bottom of the mold. Soap is then poured into the grooves of the lace silicone mat, and topped with a contrasting color. Once the silicone mat is pulled away, the lace pattern is revealed. To create my silicone mat, I used vinyl placemats with a lace design. Once you make the mat, you can use it over and over again to create various color combinations.
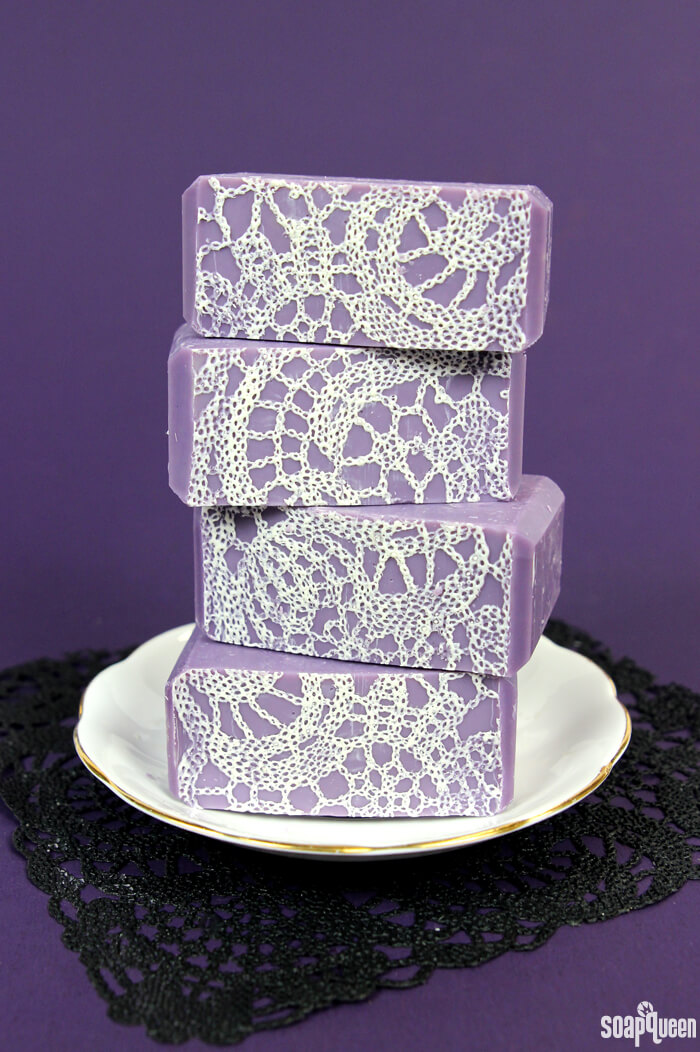
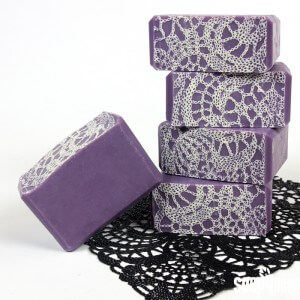
This project uses a combination of colorants including Radiant Plum Colorant to create a deep and rich purple. Plenty of titanium dioxide is used in the lace layer to help it pop. Scented with Jasmine Dreams Fragrance Oil, this soap smells wonderfully feminine.
Make the Lace Silicone Mat
The first step of this project is to make the silicone mat with the lace imprint. I used the technique made popular by the amazing Clara of Auntie Clara’s Handcrafted Cosmetics. I followed her instructions found in this blog post which is full of tips and helpful information. This project uses the pourable silicone to create a flexible mat that fits perfectly into the 5 pound Wood Mold with Sliding Bottom. Real lace can be used, but I used vinyl lace placemats. You can find them here. For more in depth instructions on how to use pourable silicone, the Making Silicone Molds E-Book by Amanda Griffin of Lovin Soap is full of tips and information. You can also purchase both the pourable silicone and the e-book together in this DIY Pourable Silicone Kit with E-Book.
What You’ll Need:
Pourable Silicone (600 grams Part A + 60 grams Part B)
Vinyl Lace Placemat, or lace
Packing Tape
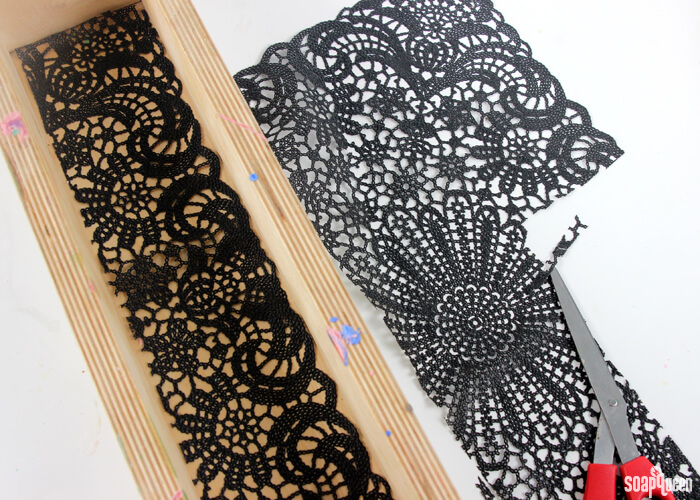
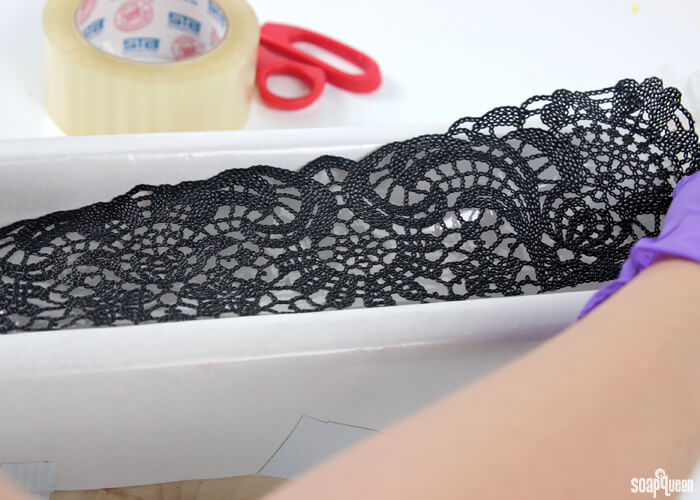
ONE: Measure and cut your lace to fit in the bottom of your mold. For this project I used the 5 Pound Mold with Sliding Bottom, but you can also use other molds if you prefer.
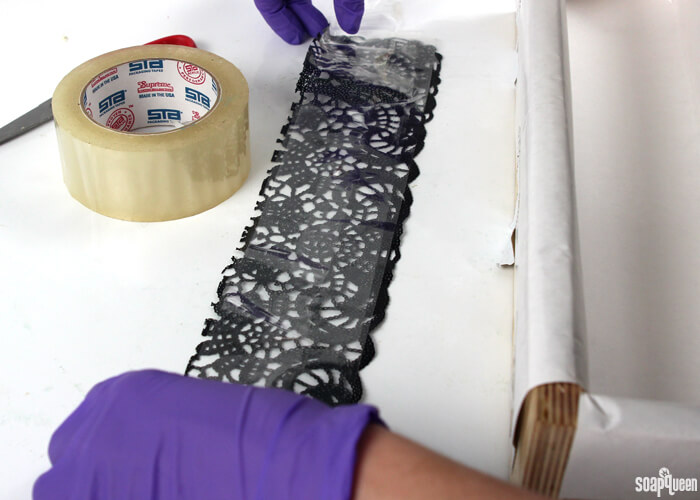
TWO: To make sure you are able to remove the lace from the silicone once poured, cover the back of your lace mat (the flat and smooth side) with packaging tape. Other types of tape may work as well, you just want to make sure the tape is very sticky and fairly durable. This prevents the silicone from moving under the lace, which would fully embed the lace into the silicone.
 THREE: Once the back of the lace is fully covered, place it into the mold tape side down. Your mold should be lined with freezer paper to ensure the pourable silicone does not stick to the wood. If you are using a plastic lace mat like I did, make sure the textured part of the lace is facing up. Now it’s time to mix the pourable silicone!
NOTE: In our tests the pourable silicone did not stick to the waxy coating of freezer paper. Normally for lining molds for cold process soapmaking, we recommend freezer paper because it is more durable and able to withstand cold process soaping temperatures better. Because this process does not involve heat, you don’t need to worry about parchment paper melting. In Clara’s tutorial, she specifies that she uses baking parchment paper.
 To mix the pourable silicone, make sure you have a suitable container. Plastic containers work well; after the silicone is poured you can allow any leftover silicone in the container to harden. The silicone can then be peeled off the container to reuse. I also recommend using a plastic mixing tool so the silicone can be peeled off once it hardens. Other good mixing tools include disposable items, such as crafts sticks or paint stirrers.
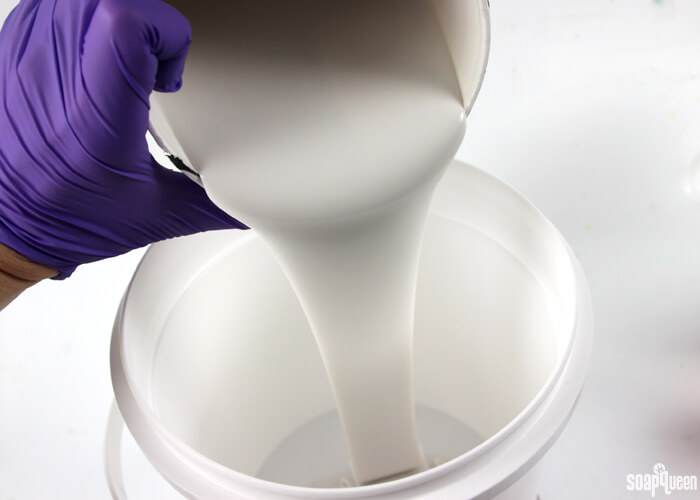
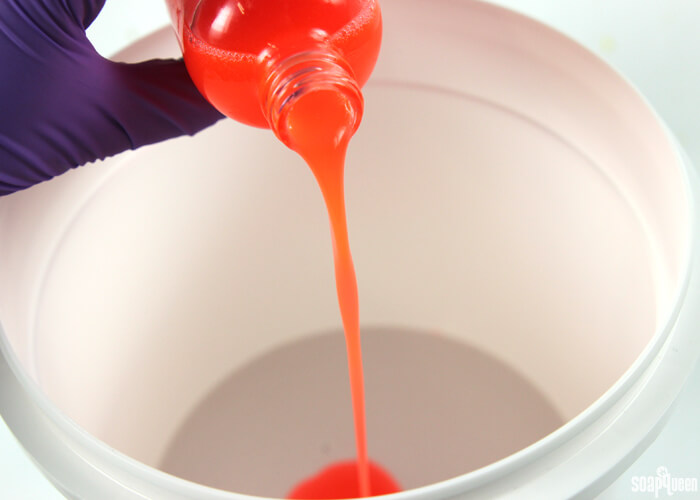
The pourable silicone consists of two parts: Part A and Part B. Part A is a thicker white liquid, while Part B is a thinner bright orange liquid. Once mixed together, they create a light pink silicone liquid. This pink liquid will remain liquid for about 30-45 minutes, and then will harden into flexible and hard silicone. I recommend having your mold completely prepped before mixing the pourable silicone, as it does start to thicken before hardening.
The mixing ratio of Part A and Part B is 10A:1B. This means for every one part of B, you need 10 times the amount of Part A. For example, if you are using 100 grams of Part A, you need 10 grams of Part B. The amount of each will depend on how big your mold is. For this project, I used 600 grams of part A, and 60 grams of part B. I had a very small amount of pourable silicone leftover. If you’d like more in depth instructions and tips for how to use the pourable silicone, the Making Silicone Molds E-Book includes 24 pages of step by step photos and instructions.
FOUR: Pour 600 grams of part A into your mixing container.
 FIVE: Thoroughly shake the bottle of Part B until the mixture is completely homogeneous. Then pour 60 grams of Part B into the container.
 SIX: Begin mixing the two together until there are no streaks. This may take a few minutes, and requires a little elbow grease =)
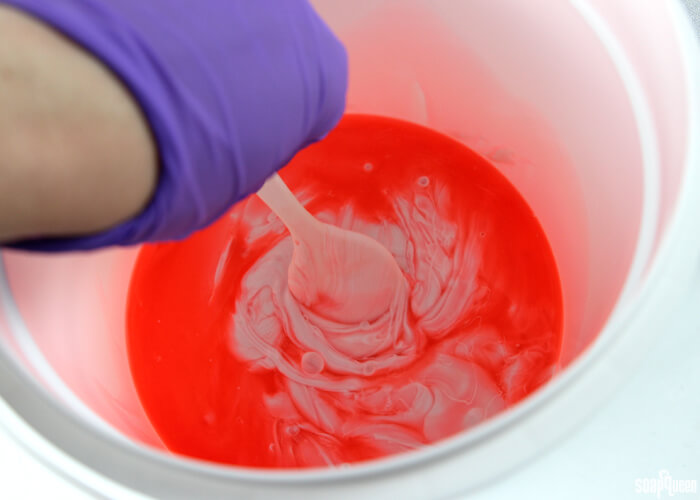
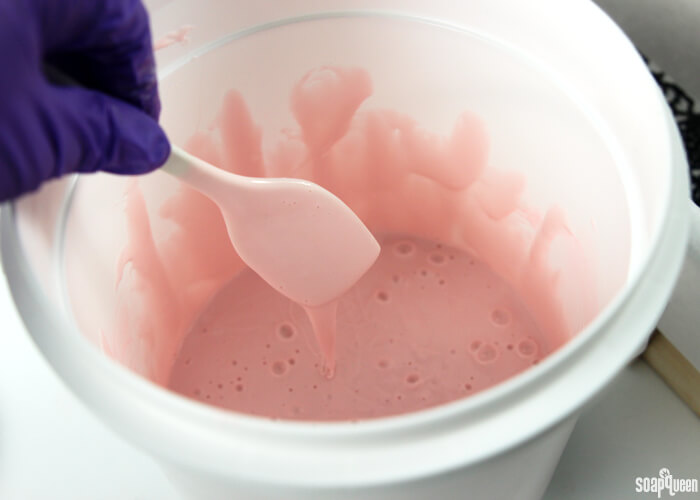 SEVEN: Once the silicone contains no streaks and is a uniform pink color throughout, begin to slowly pour the silicone into the mold on top of the lace mat.
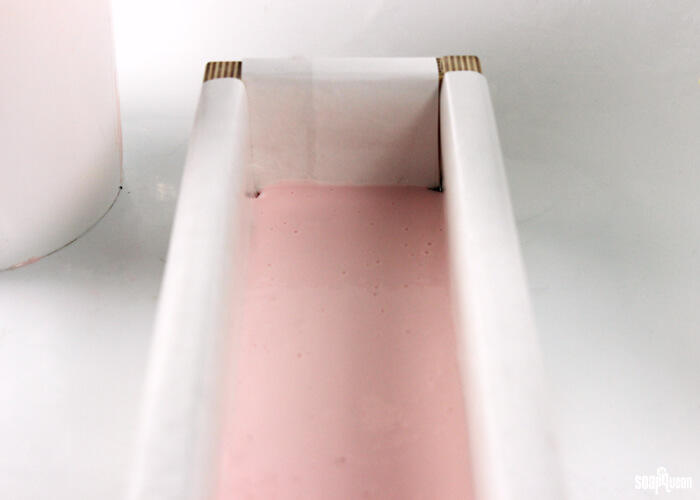
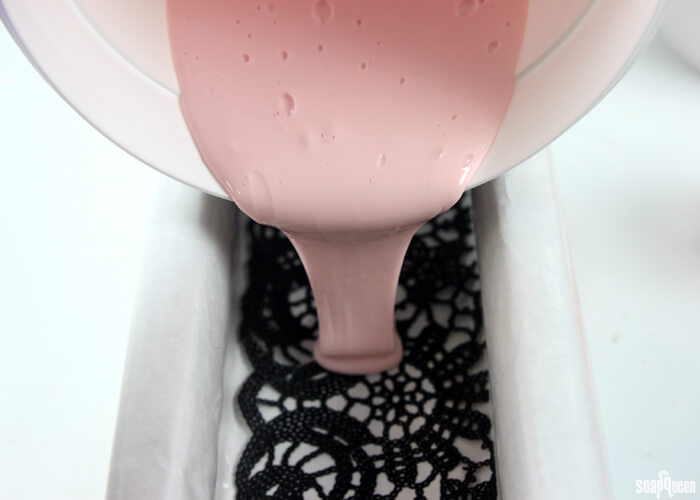 EIGHT: Continue to pour until the entire lace mat is covered with a thin layer of silicone. Our mat was about .5 centimeters tall. Tap the mold firmly on the counter to help bubbles rise to the top. Set the mold aside and allow the silicone to harden for 24 hours. After 24 hours, remove the silicone from the mold and gently peel away the lace mat from the bottom of the mold. Now that the lace mat is made, it’s time to make our soap!
Make the Soap
What You’ll Need:
5 Pound Mold with Sliding Bottom
Silicone Liner for 5 lb Wood Mold
Pourable Silicone for Lace Silicone Mat (instructions above)
2.6 oz. Avocado Butter
2.6 oz. Avocado Oil
10.2 oz. Canola Oil
12.8 oz. Coconut Oil
10.2 oz. Olive Oil
12.8 oz. Palm Oil
7.2 oz. Sodium Hydroxide Lye
16.9 oz. Distilled Water
3.7 oz. Jasmine Dreams Fragrance Oil
Black Oxide
Radiant Plum Colorant
Titanium Dioxide
Ultramarine Blue Pigment
Super Pearly White Mica

Click here to add everything you need for this project to your Bramble Berry shopping cart!
If you’ve never made Cold Process soap before, stop here! I highly recommend checking out our FREE four part SoapQueen.tv series on Cold Process Soapmaking, especially the episode on lye safety. And if you’d rather do some reading, Bramble Berry carries a wide range of books on the topic, including my newest book, Soap Crafting. You can also checkout the digital downloads for that instant gratification factor.
SAFETY FIRST: Suit up for safe handling practices! That means goggles, gloves and long sleeves. Make sure kids, pets, and other distractions and tripping hazards are out of the house or don’t have access to your soaping space. Always soap in a well-ventilated area.
COLOR PREP: To ensure that the Titanium Dioxide blends smoothly into the soap batter, we recommend micronizing it before dispersing it in oil. Please note this is an optional tip but it does help with the titanium dioxide clumping in the soap. =) To micronize colorant, simply use a coffee grinder to blend the colorant to break up any clumps of color and prevent streaks of white from showing in the final soap. We like to use a coffee grinder that has a removable, stainless steel mixing area for easy cleaning. Then, disperse 1 teaspoon of the colorant into 1 tablespoon of sunflower or sweet almond oil (or any other liquid oil). In a separate container disperse 1 teaspoon black oxide in 1 tablespoon light weight liquid oil. Then, in separate containers disperse 3 teaspoons Radiant Plum Colorant and into 3 tablespoons liquid oil. Finally, disperse 1 teaspoon Ultramarine Blue Pigment into 1 tablespoon lightweight liquid oil. Use a mini mixer to disperse any clumps. Measure out 1 teaspoon Super Pearly White Mica in a small container and set aside, do not disperse in oil.
FRAGRANCE PREP: In a glass, fragrance safe container, measure out 3.7 ounces of Jasmine Dreams Fragrance Oil and set aside.
MOLD PREP: Place the silicone liner into the mold. Then, place the silicone lace mat into the bottom of the silicone liner, with the lace pattern facing up. You may need to slightly trim the silicone lace mat to ensure it lays flat within your silicone liner and mold.
ONE: Slowly and carefully add the lye to the water and gently stir until the lye has fully dissolved and the liquid is clear. Set aside to cool.
TWO: Combine the coconut oil, olive oil, canola oil, palm oil, avocado oil and avocado butter (remember to fully melt then mix your entire container of palm oil before portioning). Once the lye water and the oils have cooled to 130 degrees or below (and are ideally within 10 degrees of each other), add the lye water to the oils and stick blend until you reach a light trace. If you’d like a harder bar of soap that releases faster from the mold, you can add sodium lactate to the cooled lye water. Use 1 teaspoon of sodium lactate per pound of oils in the recipe. For this recipe, you’d add about 3.5 tsp. sodium lactate.

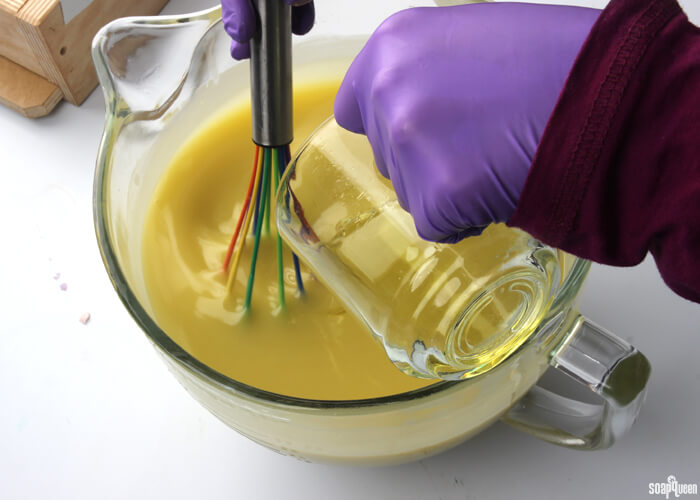
 THREE: Once you have reached a thin trace, add the Jasmine Dreams Fragrance Oil and use a whisk to thoroughly mix in.
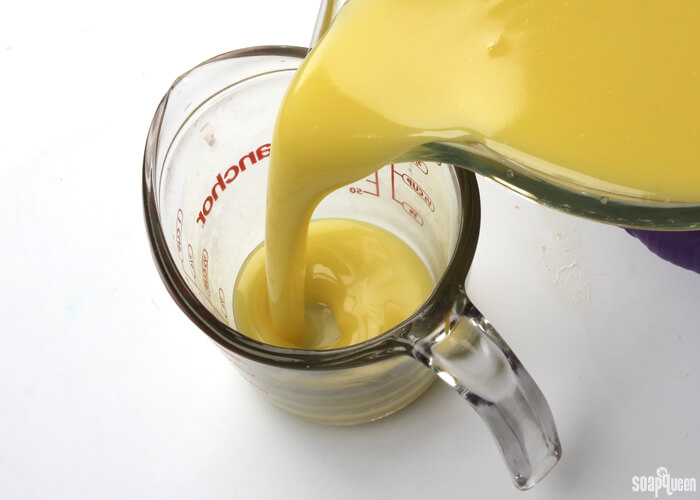
 FOUR: Pour off about 1/4 of a cup of soap into a small container. This will be the soap used to create the lace pattern. Because such a small amount of soap is actually needed for the lace, you may want to have a small mold nearby to pour the remaining white soap into.
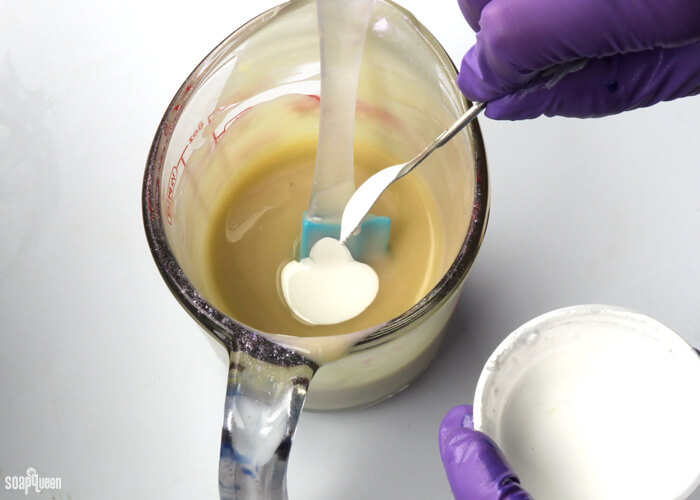
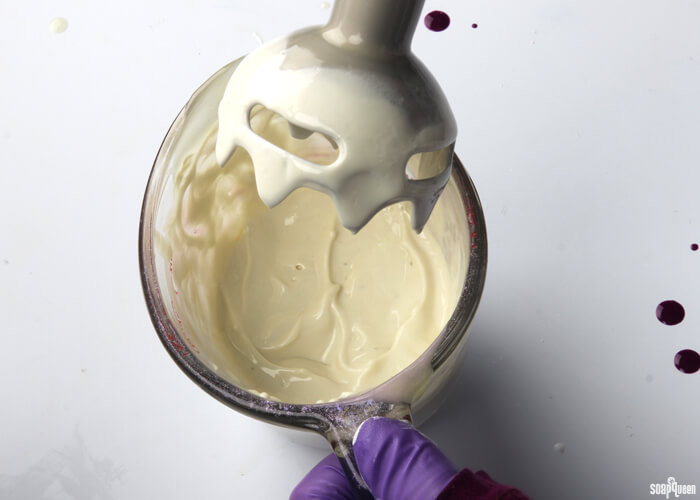
 FIVE: Add all the undispersed Super Pearly White Mica powder into the soap and use a spoon or small whisk to thoroughly mix in. The mica adds just a hint of sparkle to the lace. Because mica is so fine, it does not need to be dispersed for this project. Add 1 teaspoon dispersed Titanium Dioxide and use a spoon to fully mix in. Set aside.
Note: The Sparkle Violet Mica previously used in this step will be discontinued when supplies run out. It has been replaced with Super Pearly White Mica.
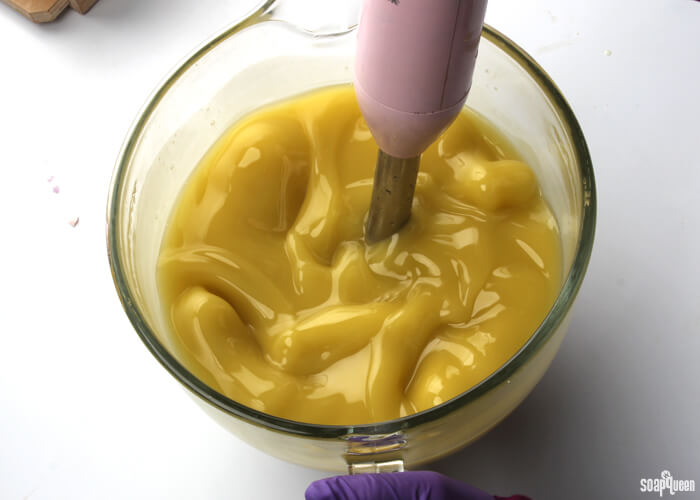
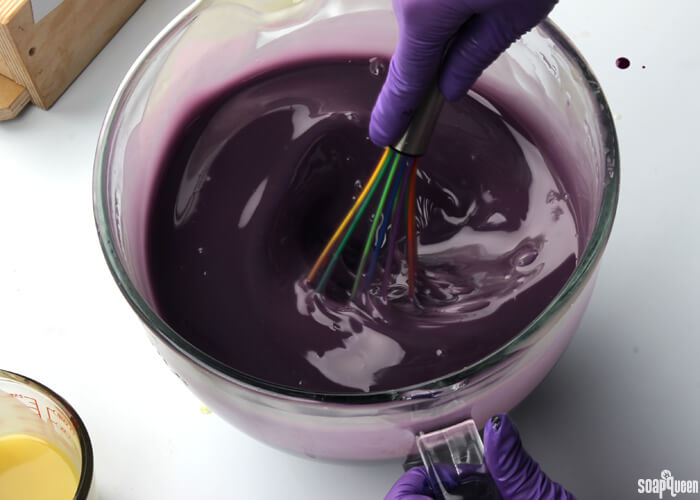
 SIX: Add all the dispersed Radiant Plum Colorant to the remaining large container of soap. Then, add 2.5 teaspoons of the dispersed Ultramarine Blue Pigment and .5 teaspoons of the dispersed Black Oxide. Use a whisk to thoroughly mix in the colorants and set aside.
 SEVEN: If the white soap is still fairly thin, pulse with the stick blender until you reach a thick trace. Give the purple soap a stir with a whisk to ensure it stays fluid and workable.
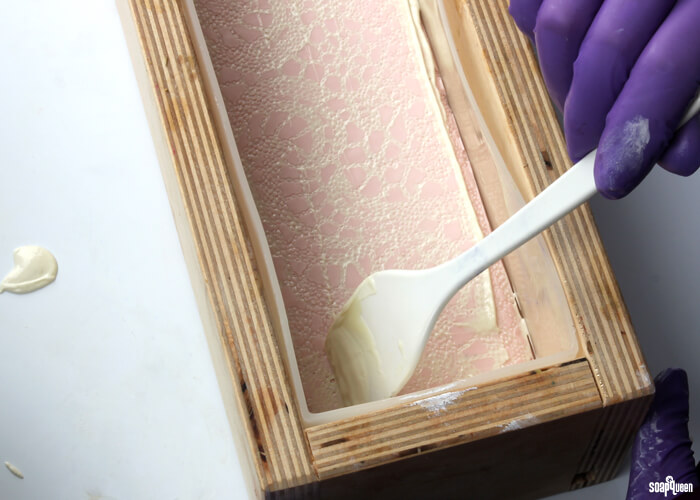
 EIGHT: Place several spoon fulls of the white soap into the silicone mold. Use a spatula to spread the white soap on the silicone lace mat, making sure that the white soap is filling in the lace details.
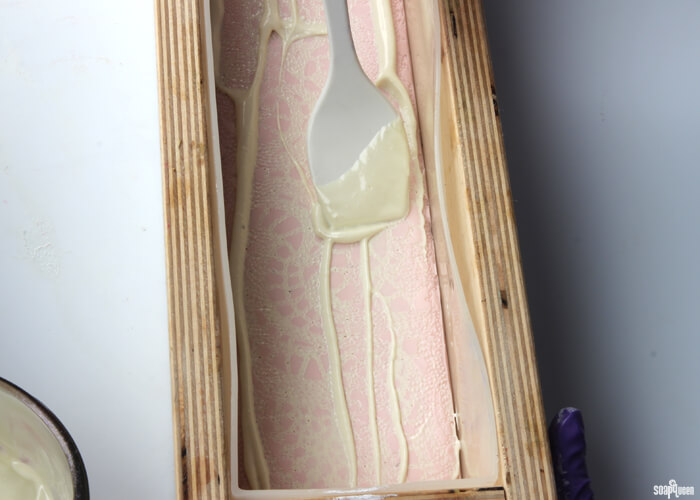 NINE: Scrape away any excess soap from the mat, and place the soap back into the container of white soap. You want the pattern of lace filled with soap, but the spaces between the lace clean of soap. The cleaner the spaces between the lace details, the more defined they will look in your final bars. I found these small white spatulas were a great tool for this!
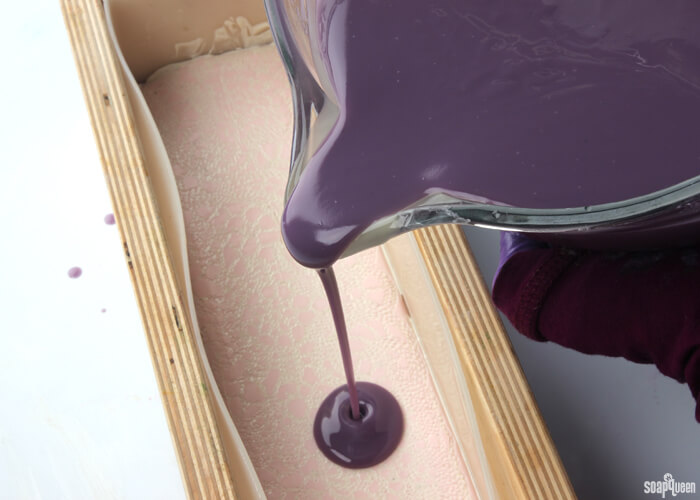
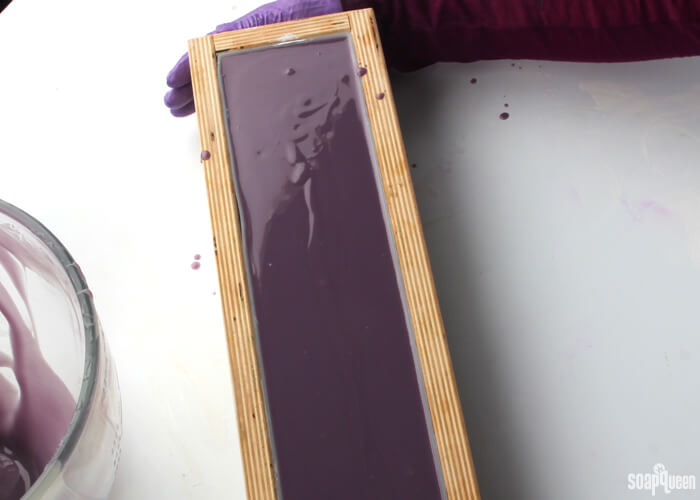
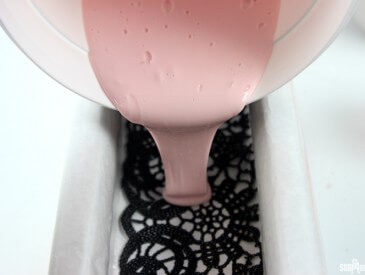
TEN: Slowly pour the purple soap into the mold, on top of the lace silicone mat.
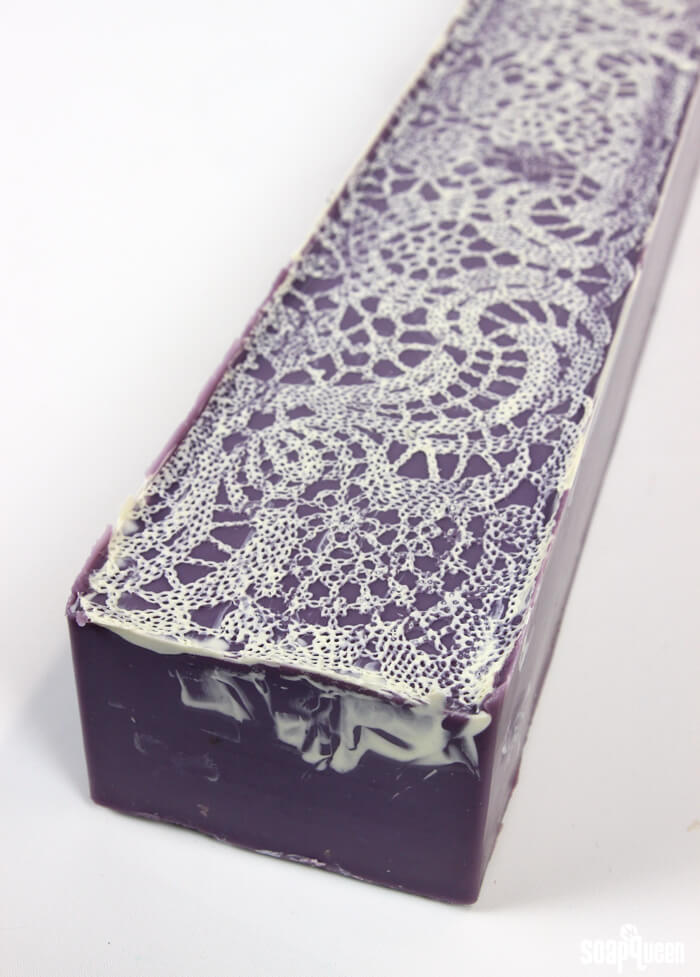
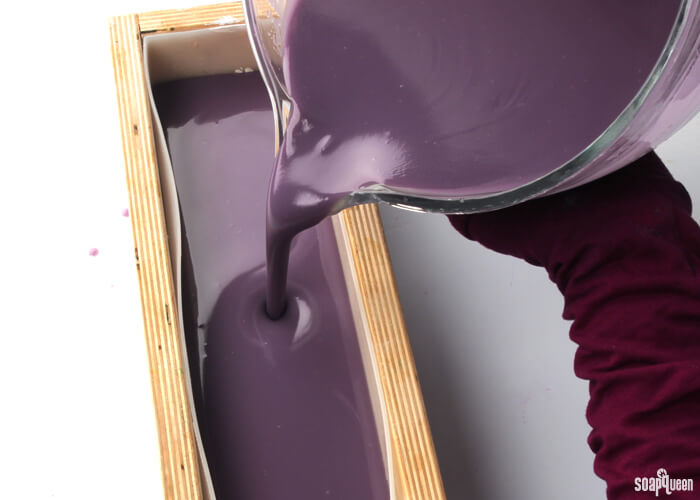 ELEVEN: Once the mold has been filled to the top, tap the mold firmly on the counter to help release any bubbles. Depending on how thick your silicone mat is, you may have a small amount of soap leftover. Pour any excess into a small mold. Spritz with 99% isopropyl alcohol to prevent soda ash. Insulate the soap for 24 hours to help prevent gel phase. Allow the soap to stay in the mold for 3-4 days before unmolding. To unmold the soap, slide out the bottom. Gently remove the silicone liner. Then, carefully peel away the silicone lace mat. The top of the soap then becomes the bottom. Cut into bars, and allow them to cure for 4-6 weeks. Enjoy!
Note: I found that this soap took a little more “finishing” than most projects. My lace silicone mat caused the lace edges to curve up. I used a knife to cut off the top edges, and a beveller to smooth the remaining edges. Because the top of the soap becomes the bottom once unmolded, the bottom may not be completely straight. I used a sharp knife to carefully level the bottom of each bar.
Is there a technique that you are currently inspired by?
Jasmine Lace Cold Process Tutorial (Silicone Mat)
Ingredients
- Pourable Silicone 600 grams Part A + 60 grams Part B
- Vinyl Lace Placemat or lace
- Packing Tape
Instructions
- Measure and cut your lace to fit within the bottom of your mold. For this project I used the 5 Pound Mold with Sliding Bottom, but you can also use other molds if you prefer.
- Once the back of the lace is fully covered, place it into the mold tape side down. Your mold should be lined with freezer paper to ensure the pourable silicone does not stick to the wood. If you are using a plastic lace mat like I did, make sure the textured part of the lace is facing up. Now it's time to mix the pourable silicone!
- NOTE: In Clara's tutorial, she specifies that she uses baking parchment paper. In our tests the pourable silicone did not stick to the waxy coating of freezer paper. Normally for lining molds for cold process soapmaking, we recommend freezer paper because it is more durable and able to withstand cold process soaping temperatures better. Because this process does not involve heat, you don't need to worry about parchment paper melting.
- Once the back of the lace is fully covered, place it into the mold. Your mold should be lined with parchment paper to ensure the pourable silicone does not stick to the wood. You can also use the silicone liner if you prefer not to line the mold yourself. If you are using a plastic lace mat like I did, make sure the textured part of the lace is facing up. Now it’s time to mix the pourable silicone!
- Pour 600 grams of part A into your mixing container.
- Thoroughly shake the bottle of Part B until the mixture is completely homogeneous. Then pour 60 grams of Part B into the container.
- Begin mixing the two together until there are no streaks. This may take a few minutes, and requires a little elbow grease =)
- Once the silicone contains no streaks and is a uniform pink color throughout, begin to slowly pour the silicone into the mold on top of the lace mat.
- Continue to pour until the entire lace mat is covered with a thin layer of silicone. Our mat was about half a centimeter tall. Tap the mold firmly on the counter to help bubbles rise to the top. Set the mold aside and allow the silicone to harden for 24 hours. After 24 hours, remove the silicone from the mold and gently peel away the lace mat from the bottom of the mold. Now that the lace mat is made, it’s time to make our soap!
Jasmine Lace Cold Process Tutorial
Ingredients
- 5 Pound Mold with Sliding Bottom
- Silicone Liner for 5 lb Wood Mold
- Pourable Silicone for Lace Silicone Mat See Instructions Above
- 2.6 oz. Avocado Butter
- 2.6 oz. Avocado Oil
- 10.2 oz. Canola Oil
- 12.8 oz. Coconut Oil
- 10.2 oz. Olive Oil
- 12.8 oz. Palm Oil
- 7.2 oz. Sodium Hydroxide Lye
- 16.9 oz. Distilled Water
- 3.7 oz. Jasmine Dreams Fragrance Oil
- Black Oxide
- Radiant Plum Colorant
- Titanium Dioxide
- Ultramarine Blue Pigment
- Super Pearly White Mica
Instructions
SAFETY FIRST: Suit up for safe handling practices! That means goggles, gloves and long sleeves. Make sure kids, pets, and other distractions and tripping hazards are out of the house or don’t have access to your soaping space. Always soap in a well-ventilated area.
COLOR PREP: To ensure that the Titanium Dioxide blends smoothly into the soap batter, we recommend micronizing it before dispersing it in oil. Please note this is an optional tip but it does help with the titanium dioxide clumping in the soap =) To micronize colorant, simply use a coffee grinder to blend the colorant to break up any clumps of color and prevent streaks of white from showing in the final soap. We like to use a coffee grinder that has a removable, stainless steel mixing area for easy cleaning. Then, disperse 1 teaspoon of the colorant into 1 tablespoon of sunflower or sweet almond oil (or any other liquid oil). In a separate container disperse 1 teaspoon black oxide in 1 tablespoon light weight liquid oil. Then, in separate containers disperse 3 teaspoons Radiant Plum Colorant and into 3 tablespoons liquid oil. Finally, disperse 1 teaspoon Ultramarine Blue Pigment into 1 tablespoon lightweight liquid oil. Use a mini mixer to disperse any clumps. Measure out 1 teaspoon Super Pearly White Mica in a small container and set aside, do not disperse in oil.
FRAGRANCE PREP: In a glass, fragrance safe container, measure out 3.7 ounces of Jasmine Dreams Fragrance Oil and set aside.
MOLD PREP: Place the silicone liner into the mold. Then, place the silicone lace mat into the bottom of the silicone liner, with the lace pattern facing up. You may need to slightly trim the silicone lace mat to ensure it lays flat within your silicone liner and mold.
- Slowly and carefully add the lye to the water and gently stir until the lye has fully dissolved and the liquid is clear. Set aside to cool.
- Combine the coconut oil, olive oil, canola oil, palm oil, avocado oil and avocado butter (remember to fully melt then mix your entire container of palm oil before portioning). Once the lye water and the oils have cooled to 130 degrees or below (and are ideally within 10 degrees of each other), add the lye water to the oils and stick blend until you reach a light trace. If you’d like a harder bar of soap that releases faster from the mold, you can add sodium lactate to the cooled lye water. Use 1 teaspoon of sodium lactate per pound of oils in the recipe. For this recipe, you’d add about 3.5 tsp. sodium lactate.
- Once you have reached a thin trace, add the Jasmine Dreams Fragrance Oil and use a whisk to thoroughly mix in.
- Pour off about 1/4 of a cup of soap into a small container. This will be the soap used to create the lace pattern. Because such a small amount of soap is actually needed for the lace, you may want to have a small mold nearby to pour the remaining white soap into.
- Add 1 teaspoon of the undispersed Super Pearly White powder into the soap and use a spoon or small whisk to thoroughly mix in. The mica adds just a hint of sparkle to the lace. Because mica is so fine, it does not need to be dispersed for this project. Add 1 teaspoon dispersed Titanium Dioxide and use a spoon to fully mix in. Set aside. Note: The Sparkle Violet Mica previously used in this step will be discontinued when supplies run out. It has been replaced with Super Pearly White Mica.
- Add all the dispersed Radiant Plum Colorant to the remaining large container of soap. Then, add 2.5 teaspoons of the dispersed Ultramarine Blue Pigment and .5 teaspoons of the dispersed Black Oxide. Use a whisk to thoroughly mix in the colorants and set aside.
- If the white soap is still fairly thin, pulse with the stick blender until you reach a thick trace. Give the purple soap a stir with a whisk to ensure it stays fluid and workable.
- Place several spoon fulls of the white soap into the silicone mold. Use a spatula to spread the white soap on the silicone lace mat, making sure the white soap is fills in the lace details.
- Scrape away any excess soap from the mat, and place the soap back into the container of white soap. You want the pattern of lace filled with soap, but the spaces between the lace clean of soap. The cleaner the spaces between the lace details, the more defined they will look in your final bars. I found these small white spatulas were a great tool for this!
- Slowly pour the purple soap into the mold, on top of the lace silicone mat.
- Once the mold has been filled to the top, tap the mold firmly on the counter to help release any bubbles. Depending on how thick your silicone mat is, you may have a small amount of soap leftover. Pour any excess into a small mold. Spritz with 99% isopropyl alcohol to prevent soda ash. Insulate the soap for 24 hours to help prevent gel phase. Allow the soap to stay in the mold for 3-4 days before unmolding. To unmold the soap, slid out the bottom. Gently remove the silicone liner. Then, carefully peel away the silicone lace mat. The top of the soap then becomes the bottom. Cut into bars, and allow them to cure for 4-6 weeks. Enjoy!