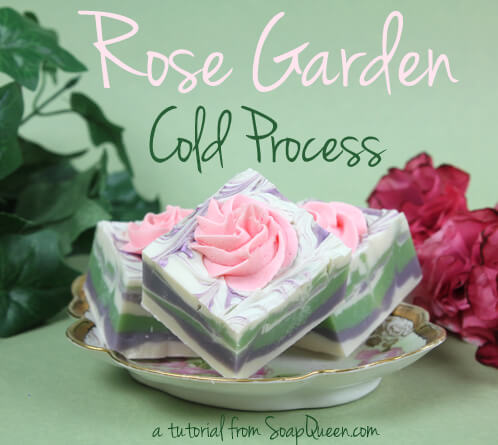
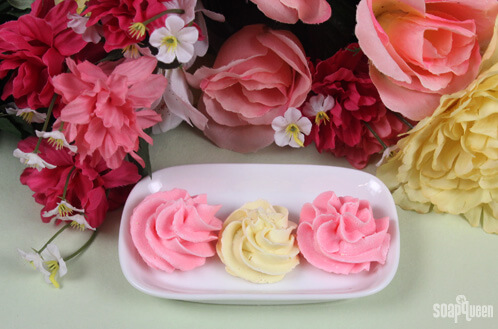
Two weeks of deals, sales and tutorials ends today with this beautiful Rose Garden Cold Process tutorial. This is a two-part recipe so it is more time intensive than other cold process recipes, but the flowery result is worth it.
The first part is making the soapy roses out of cold process frosting, and the second part is creating the beautifully swirled base and topping it all off with exquisite mica painting. This tutorial combines several advanced soaping skills, including soap frosting, working with rose water lye and the hanger swirl technique, so it’s great for anyone looking to expand their soapy repertoire. This is a multi-day project; you need at least a day for the roses to be set up enough to move.
If you’ve never made Cold Process soap before, stop here! I highly recommend checking out our FREE four part SoapQueen.tv series on Cold Process Soapmaking, especially the episode on lye safety. And if you’d rather do some reading, Bramble Berry carries a wide range of books on the topic, including my newest book, Soap Crafting. You can also checkout the digital downloads for that instant gratification factor.
SAFETY FIRST: Suit up for safe handling practices! That means goggles, gloves and long sleeves. Make sure kids, pets, and other distractions and tripping hazards are out of the house or don’t have access to your soaping space. Always soap in a well-ventilated area.

Click here to add everything you need to make the roses and the loaf to your Bramble Berry shopping cart!
To make the soapy roses:
2.8 oz. Avocado Oil
5.6 oz. Coconut Oil
5.6 oz. Palm Oil
2 oz. Sodium Hydroxide
4.6 oz. distilled water
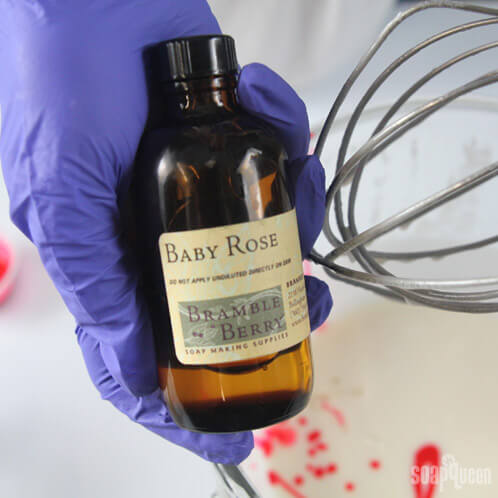
1 oz. Baby Rose Fragrance Oil
Stand Mixer with 5 Quart Glass Bowl
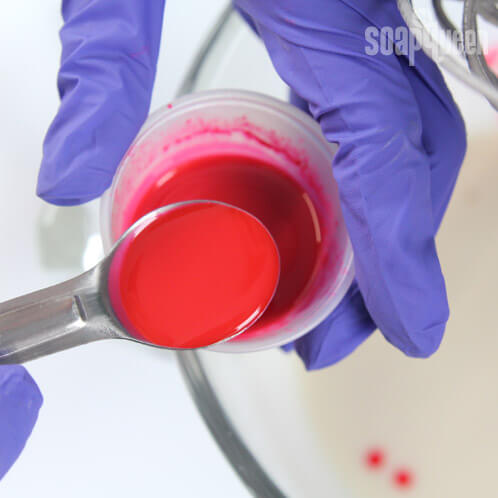
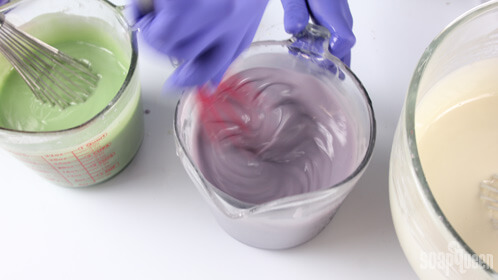
COLOR PREP: Disperse 1 teaspoon of Fired Up Fuchsia into 1 tablespoon of light liquid oil. We use Sweet Almond or Sunflower oil. Use a mini mixer to get the clumps of color worked out smoothly.
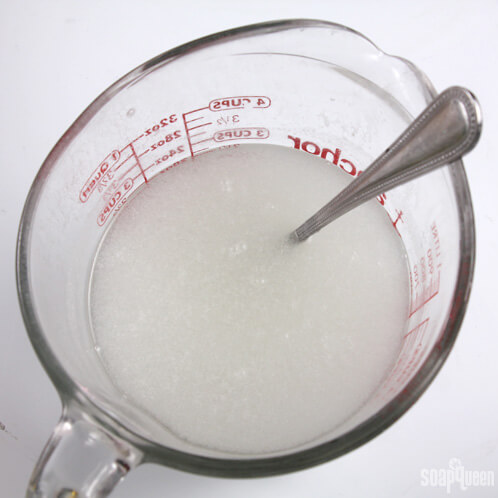
LYE & OIL PREP: In order to get soapy frosting to actually look like frosting, the lye and oils must be very cold. We recommend making the lye water a full day ahead of time, clearly labeling it and keeping it in a refrigerator not used for food. If you must use a food refrigerator, be sure to put a sign on the outside of the fridge clearly letting everyone know there is lye inside. The lye should be around 60 degrees F before adding it to the oils. Additionally, you want your oils to be around 70 degrees F. You can even refrigerate them for several hours too! They should be semi-solid at this temperature.

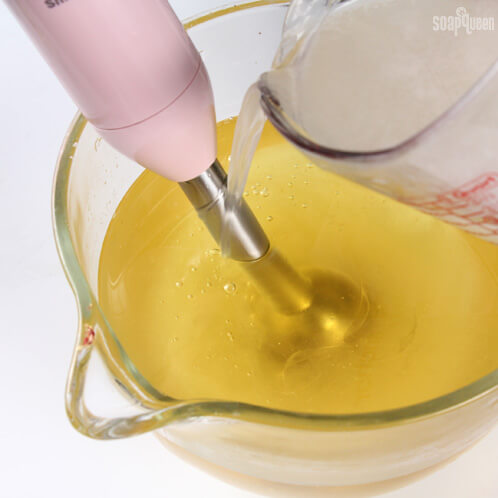
ONE: With a hand mixer (or a Kitchen Aid Stand Mixer), whip the oils for 1 – 2 minutes. Occasionally take a break to scrape the bowl and sides of the container to incorporate all the oils. You want the oils to be nice and fluffy before adding the lye.
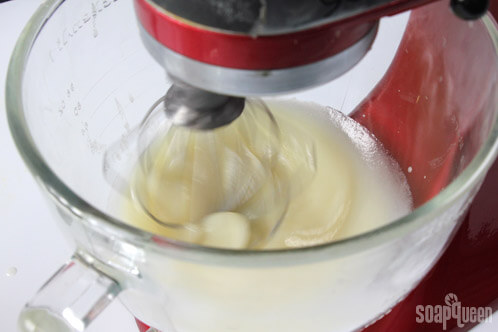
TWO: When your oils have thickened, turn off the mixer and slowly add the lye water. Swirl the batter around with a spatula or whisk before turning the mixer on a low setting. Scrap any batter that has splattered on the side of the container and then turn the mixer to a medium setting. Continue to whip for another 3 – 7 minutes.
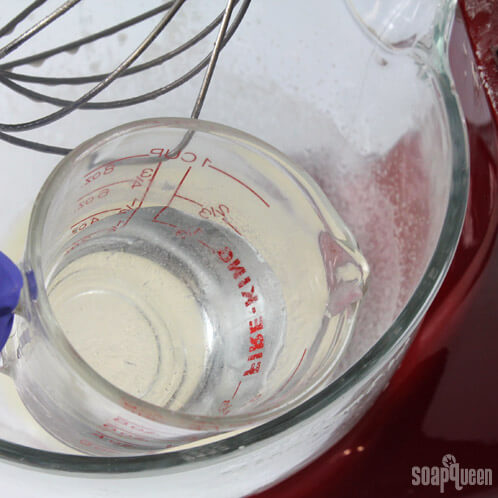
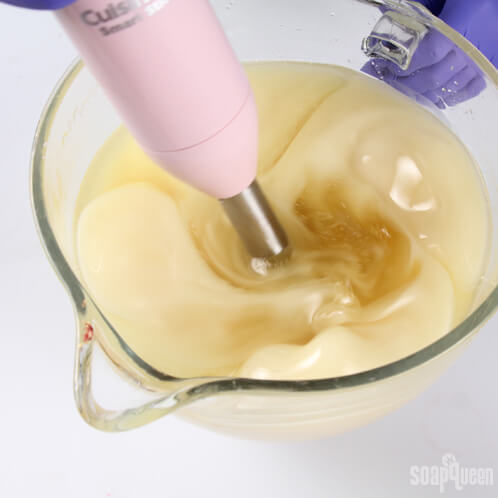
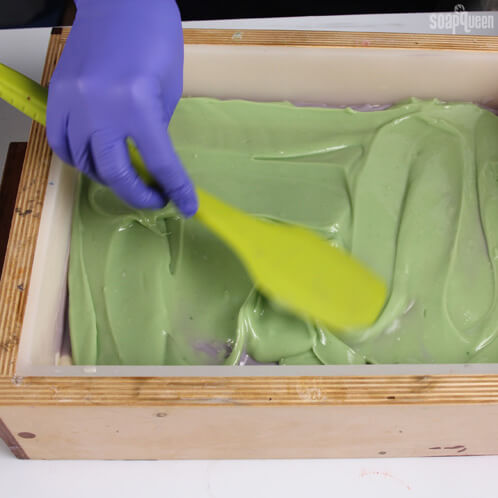
THREE: When the lye is fully mixed and the batter has thickened, add 1 teaspoon dispersed Fired Up Fuchsia. Whip the colorant into the batter.
FOUR: When the pink coloring is even, add 1 oz. of Baby Rose Fragrance Oil. Whip the batter until it can form stiff peaks. Don’t be surprised when the fragrance oil thins out the frosting considerably and you find yourself whipping for a few more minutes again.
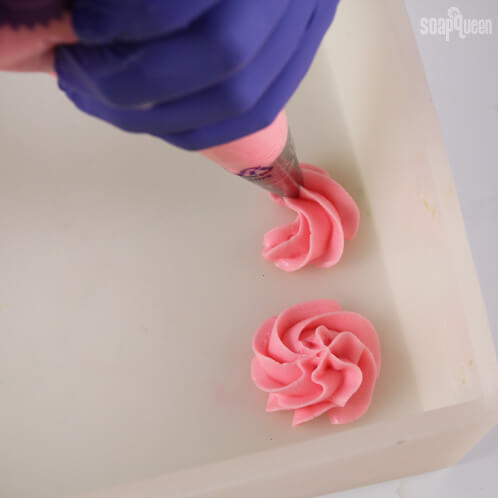
FIVE: Cut off about a half inch from the tip of the frosting bag and push the tip through. Then, if your frosting can hold shape, scoop it into the bag. Lay down a piece of parchment paper (we used a clean 18-bar Birchwood Silicone Liner) and then start making the roses. Start on the outside and work your way into the middle, keeping your movements small and tight. Our roses were about 1.5 inches in diameter. Work quickly! After about 10 – 15 minutes, the frosting will start to harden and you’ll begin to notice more and more air bubbles in your roses. That’s not necessarily a bad thing, they just won’t look as smooth.
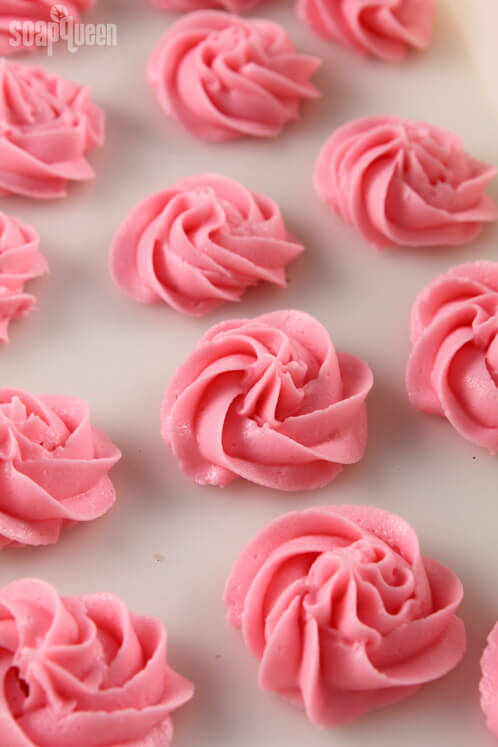
Allow the roses to harden for 24 hours before moving on and making the base.
Check out this Instagram video on the full process below!
To make the base:
16.5 oz. Canola Oil
16.5 oz. Coconut Oil
16.5 oz. Palm Oil
9.9 oz. Rice Bran Oil
6.6 oz. Shea Butter
9.1 oz. Sodium Hydroxide
21.7 oz. Rose Water
4 oz. Rosehip Jasmine Fragrance Oil
18 Bar Birchwood Mold with Silicone Liner
COLOR PREP: Disperse 1 teaspoon of Ultramarine Violet and Green Chrome into 1 tablespoon of light liquid oil each. We use Sweet Almond or Sunflower oil. Disperse 2 teaspoons of Amethyst Purple Mica and Titanium Dioxide into 2 tablespoons of liquid oil each. Use a mini mixer to get the clumps of color worked out smoothly.
ONE: Slowly and carefully add the lye to the rose water and gently stir. You’ll notice the lye might do some strange things! If any floaty chunks appear or if the lye doesn’t go clear, that’s okay. Still for 1 – 2 minutes to dissolve the lye as best you can, but keep in mind it will not clear up like regular lye water. Set aside to cool to 100 – 110 degrees F.
TWO: Combine the Canola, Coconut, Rice Bran, Shea and Palm oils (remember to fully melt then mix your entire container of Palm Oil before portioning). Once the lye water and the oils have cooled to 120 degrees or below (and are ideally within 10 degrees of each other), add the lye water to the oils and stick blend until light to medium trace. If you’d like a harder bar of soap that releases faster from the mold, you can add Sodium Lactate to the cooled lye water.
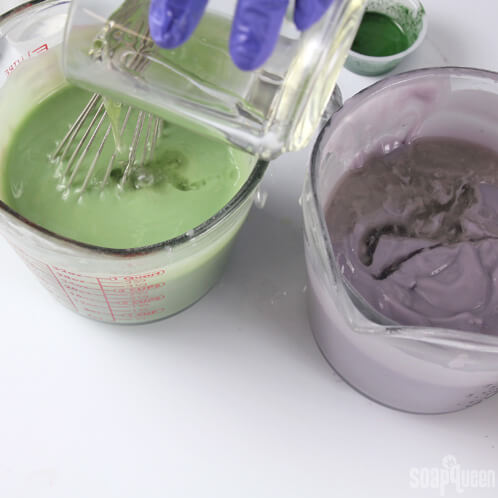
THREE: When you’ve reached a light to medium trace, split a portion of the batter into two separate containers. Split off about 3 cups of batter into the two additional containers. Whisk in the following dispersed colors:
- Add the entirety of the dispersed Titanium Dioxide (2 tablespoons total) to the original large container.
- Add 3 teaspoons dispersed Ultramarine Violet to one of the 3 cup containers.
- Add 2 teaspoons of dispersed Green Chrome to the second 3 cup container.
FOUR: Split the Rosehip Jasmine Fragrance Oil between the three containers and whisk.
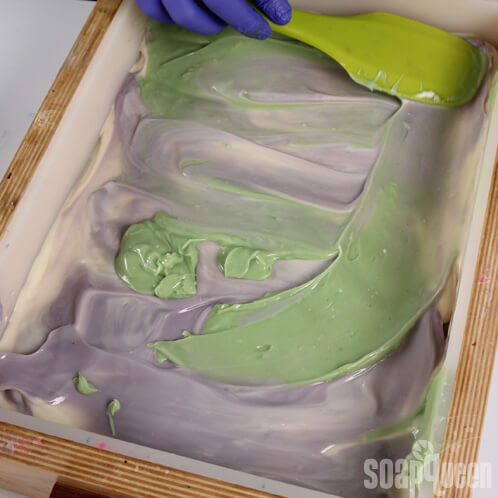
FIVE: Pour a layer of white batter into the mold. Pour just enough to cover the bottom of the mold entirely.
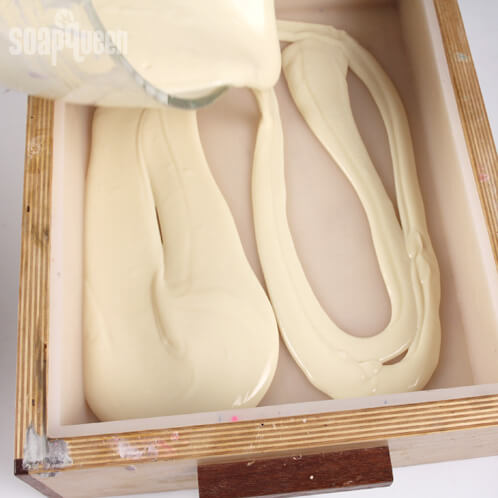
SIX: Next, pour most of the purple batter (a half cup or so left behind is okay). At this point your batter might be getting thick, so use a spatula to spread it over the white layer, almost as if you were frosting a cake.
SEVEN: Repeat step 6 with the green batter.
EIGHT: Pour a second layer of white batter. Be sure to leave yourself about a half cup or so to finish off the top. Spread the white batter over the green batter with a spatula.

NINE: Scrape the sides of your containers and empty all the purple and green batters for the next layer. Smooth them over with a spatula.
TEN: With the remaining half cup of white batter, pour a final layer. The soap may be very thick at this point, so be sure to tamp the mold on the table several times to release any air bubbles.
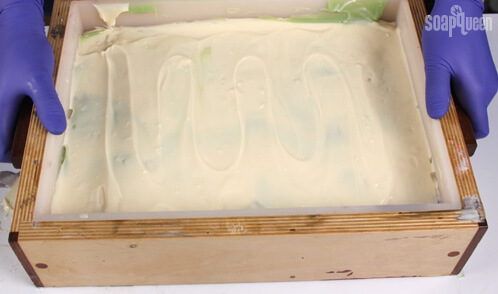
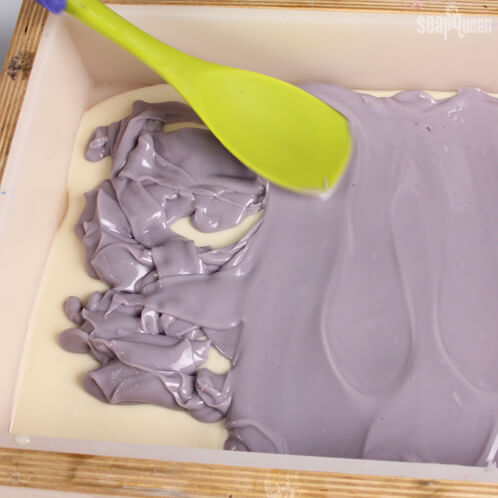
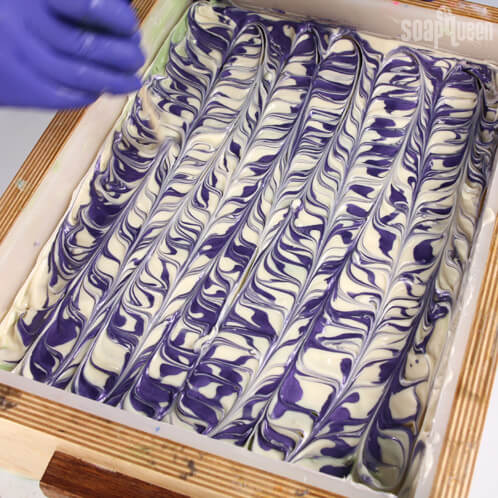
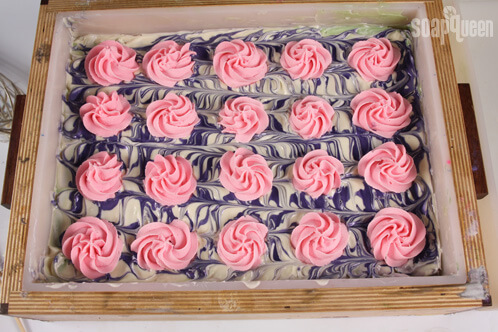
ELEVEN: Now for the fun part! This technique is called a Hanger Swirl, and to achieve it we bent one of our reeds to fit into the 18 Bar Birchwood Mold. If you don’t have a reed, you can use the item from which this technique gets its name — a bent metal hanger! Starting at one end of the mold, push the ‘hanger’ straight down to the bottom of the mold. While it’s still in the soap, drag it along the bottom of the mold about an inch through the soap before pulling it up and out. With the tool above the soap, move it up another inch up, and then push it back down. Repeat this process, slowly inching the tool up and out, until you reach the end of the mold.
TWELVE: Because your soap will be thick at this point, it’s very important to tamp it hard on your work surface. This will ensure the soap will fill in the gaps left by your hanger tool. You can also carefully smooth the white soap over with a spatula if it becomes uneven. Once you’re satisfied with the white soap, use a dropper to drizzle dispersed Amethyst Purple mica in a zig-zag pattern horizontally on top of the mold.
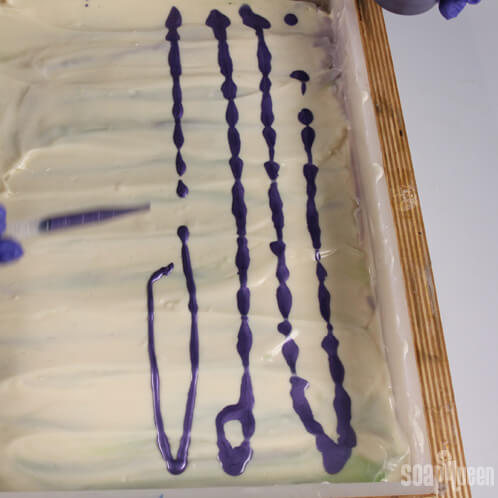
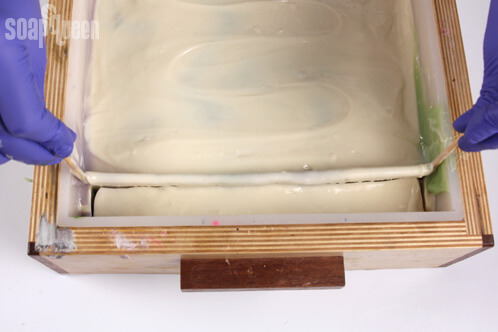
THIRTEEN: Insert a chopstick or dowel about 1/4 inch into the soap and drag it in a zig-zag pattern vertically until you reach the other end of the mold.
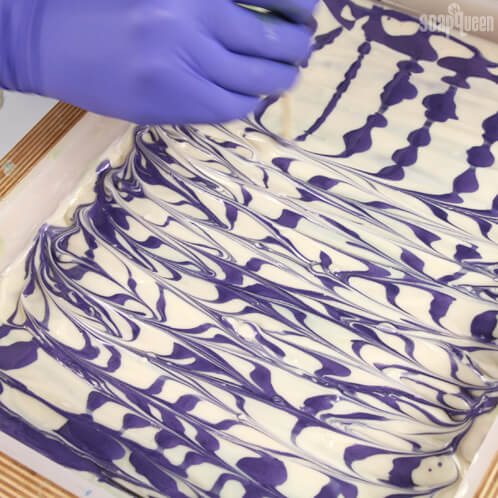
FOURTEEN: When you’ve reached the other end of the mold, make the same zig-zag pattern horizontally across the mold. You may need to tamp down the mold several more times to fill in any gaps left by the swirl tool.
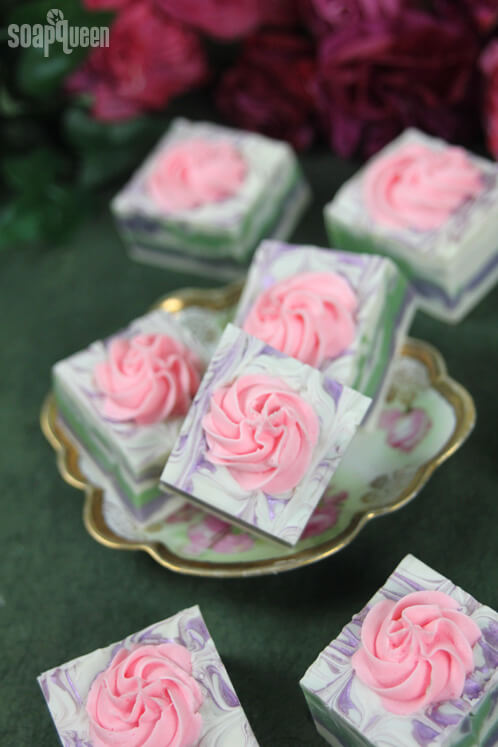
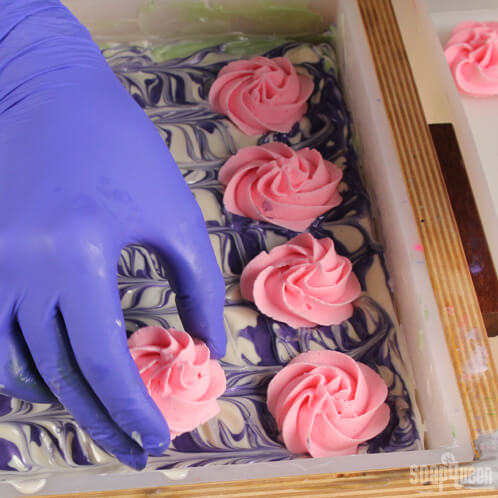
FIFTEEN: When you’re satisfied with your swirl, place your soapy roses four across the mold. We had enough space for 20 roses on top (five rows of four), but it may vary depending on the size of your roses.
Allow the soap to harden for 2 – 3 days before unmolding. After unmolding, cut the soap into rows formed by the roses, and then again so that each bar has its own rose. Allow it to cure for 4 – 6 weeks and enjoy!