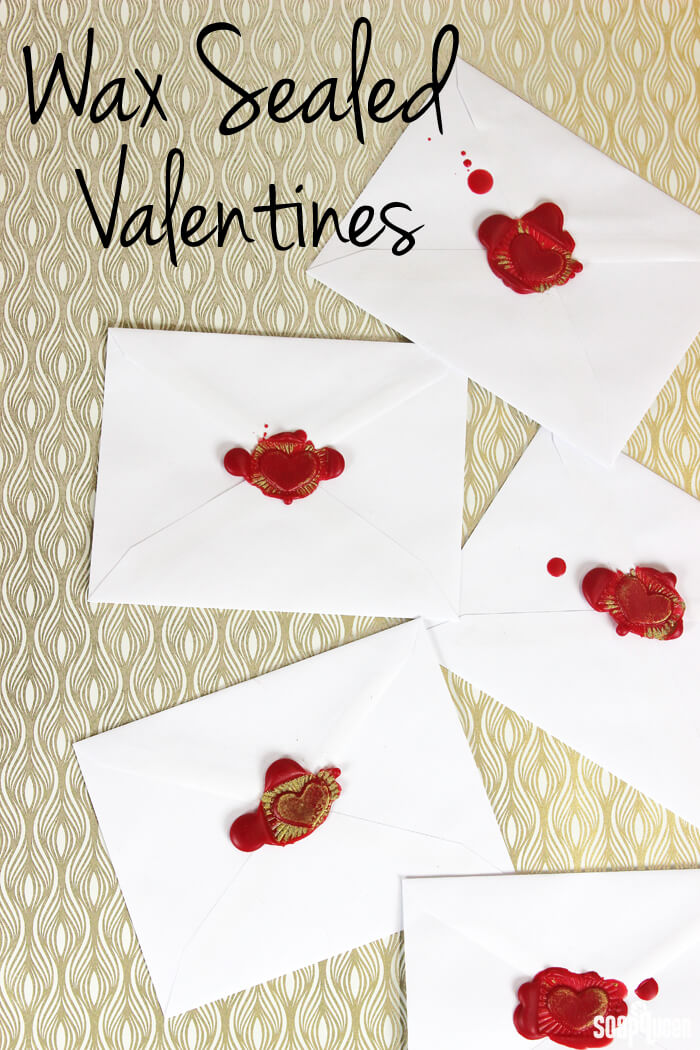
With Valentine’s Day quickly approaching, now is the time to start creating gifts for your loved ones. Handwritten valentines are an excellent way to show love and appreciation; I’m a firm believer in the power of a well written card! This year, make your love note one to remember with a dramatic wax seal.
Sealant wax is commonly comprised of beeswax and resin to create an incredibly hard, sticky wax. Without resin, this combination of waxes is not as hard and brittle as traditional sealant wax, but it’s perfect for adding a decorative touch to your letters.
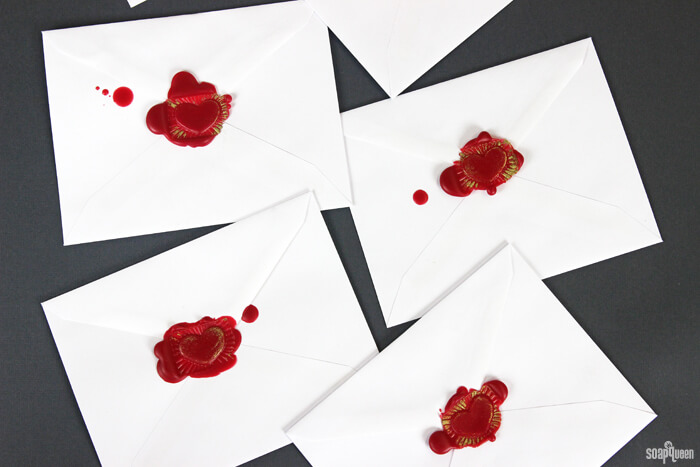
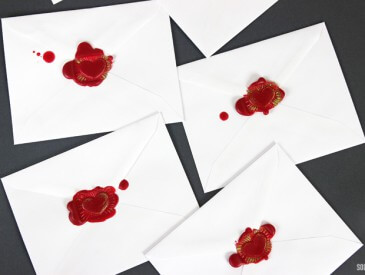
Because these seals are slightly delicate, they may not survive transit. Instead, I recommend delivering these Valentines in person. A touch of Heavy Metal Gold Mica adds a bit of shimmer and really helps the stamp design pop. The mica also helps the stamp release easily from the wax, rather than sticking or pulling the wax off the paper. I can’t wait to use this technique for other occasions, such as thank you and birthday cards.
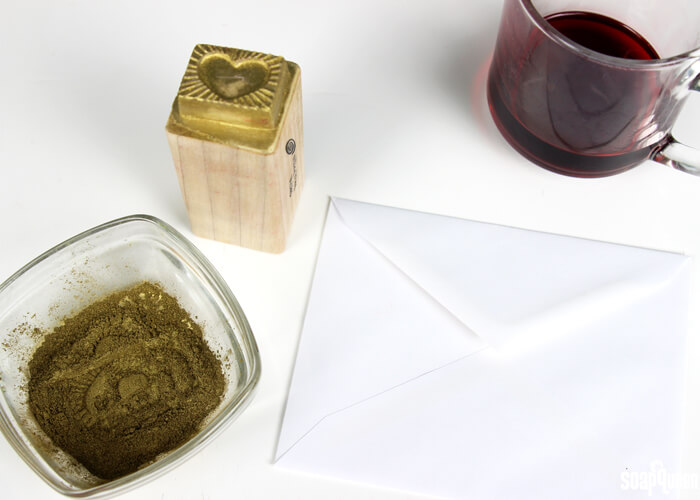
What You’ll Need:
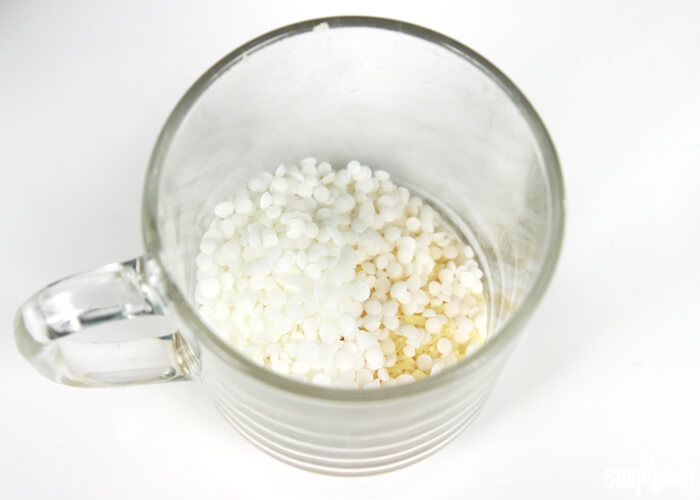
1 oz. Candelilla Wax
.5 oz. Cera Bellina Wax
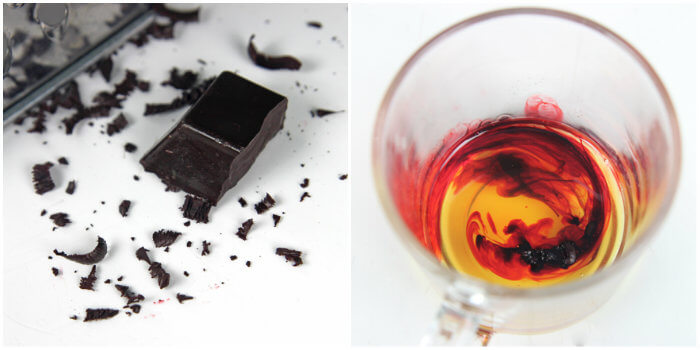
Red Wax Dye Block
Heavy Metal Gold Mica
Heart Stamp (discontinued)

Click here to add everything you need for this project to your Bramble Berry shopping cart!
ONE: Place the cera bellina wax and candelilla wax into a heat safe container, and melt in the microwave using 45 second bursts. Once fully melted, be careful hen removing from the microwave, as the container will be very hot.
 TWO: Shave off approximately 1/2 tsp. of Red Wax Dye Block, and add to the melted wax. Use a spoon to thoroughly incorporate the color. If you’d like a lighter or darker red color, use can use more or less red colorant.
 THREE: Place a small amount of Heavy Metal Gold Mica into a small dish. Spray the stamp with isopropyl alcohol, and dip the stamp into the mica. Blow off any excess mica from the stamp. In addition to giving the wax shimmer, the mica also helps the stamp release from the hot wax easily.
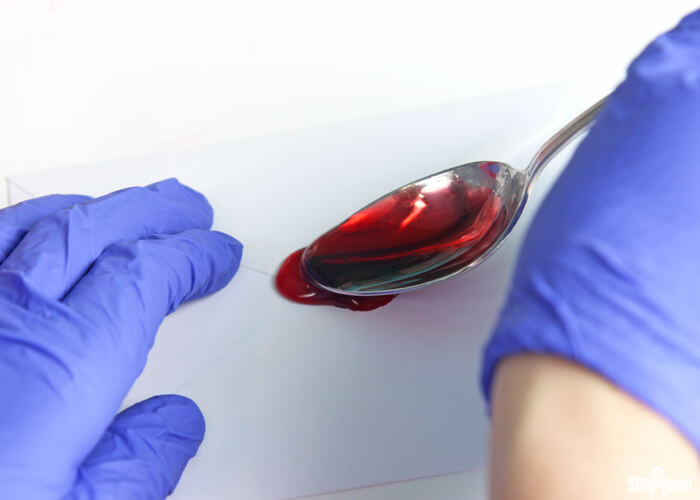
 FOUR: Using a spoon, pour a small amount of the wax into the center of the envelope. This step is easier when the wax has cooled slightly; if the wax is extremely hot, it may run off the envelope instead of pooling in the center.
Note: The Heart Stamp has been discontinued. Find more stamps here.
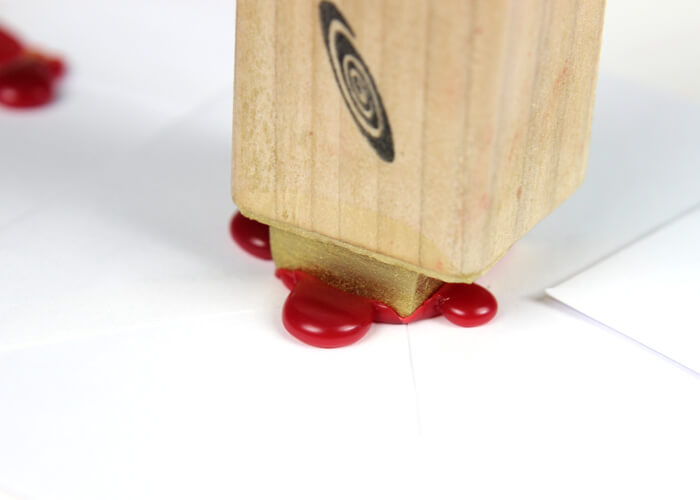
 FIVE: Place the stamp into the hot wax, and allow the wax to cool around the stamp. Gently pull the stamp up and out of the wax. Set aside and allow to fully cool.
Note: A small percentage of the seals may come off the paper. If this happens can be “glued” back on with a small drop of hot wax.
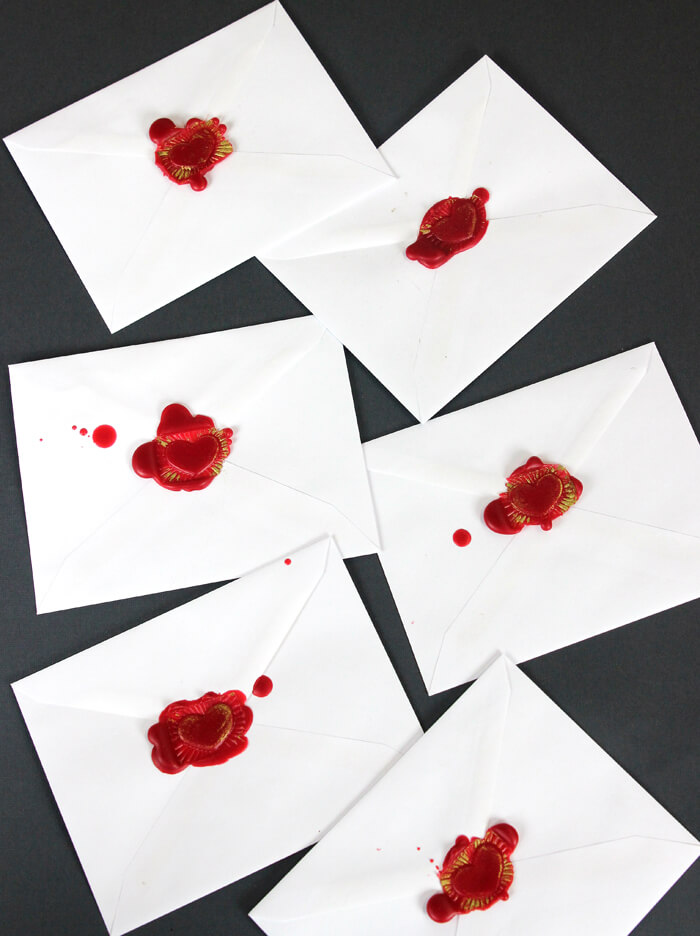
How are you planning on showing your love this Valentine’s Day?
Wax Sealed Valentines DIY
Ingredients
- 1 oz. Candelilla Wax
- .5 oz. Cera Bellina Wax
- Red Wax Dye Block
- Heavy Metal Gold Mica
- Heart Stamp
Instructions
- Place the cera bellina wax and candelilla wax into a heat safe container, and melt in the microwave using 45 second bursts. Once fully melted, be careful hen removing from the microwave, as the container will be very hot.
- Shave off 1/2 tsp. of Red Wax Dye Block, and add to the melted wax. Use a spoon to thoroughly incorporate the color.
- Place a small amount of Heavy Metal Gold Mica into a small dish. Spray the stamp with isopropyl alcohol, and dip the stamp into the mica. Blow off any excess mica from the stamp. In addition to giving the wax shimmer, the mica also helps the stamp release from the hot wax easily. NOTE: The Heart Stamp has been discontinued.
- Using a spoon, pour a small amount of the wax into the center of the envelope. This step is easier when the wax has cooled slightly; if the wax is extremely hot, it may run off the envelope instead of pooling in the center.
- Place the stamp into the hot wax, and allow the wax to cool around the stamp. Gently pull the stamp up and out of the wax.