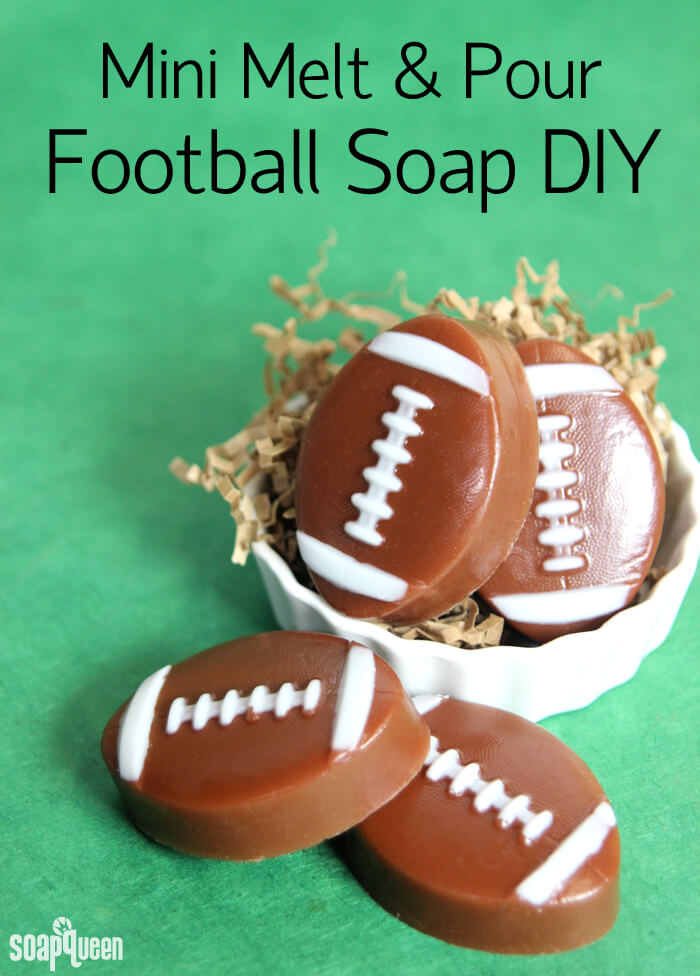
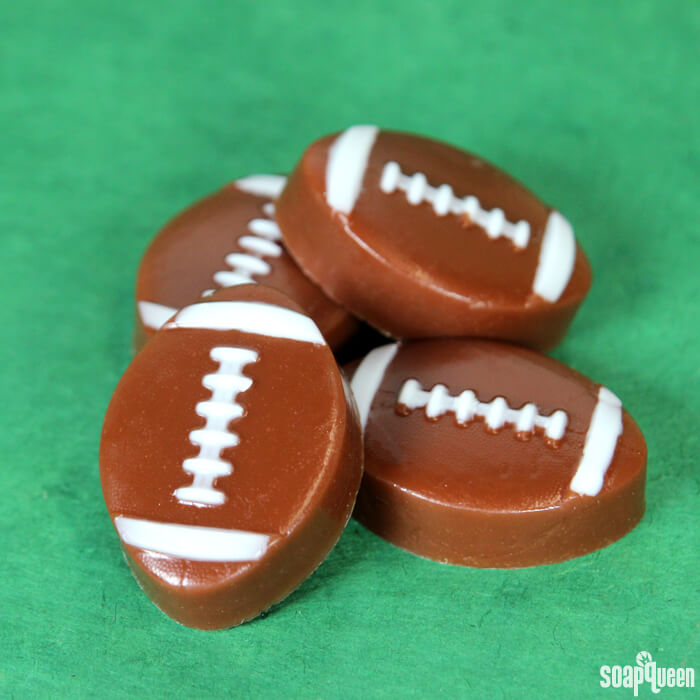
While I’ve never been a person that just has to watch the game (football, baseball, basketball or soccer), I love the social aspect around watching sports. Sports are a great reason to get together with friends and family, eat delicious food and root for your team. In particular, football is one of my favorite sports to watch. It doesn’t hurt that the Seattle Seahawks have been in the Super Bowl two years in a row (Go Hawks!) =) If you’re looking for a fun project to celebrate the end of football season, these Mini Melt and Pour Football Soaps are perfect! The Guest Mini Football Mold creates four adorably small soaps that fit perfectly in the palm of your hand.
This project is straightforward; simply use the Injector Tool to fill in the lace details with white soap, then pour the brown soap on top. Filling in the details does take a little practice and a steady hand. I find spraying the mold with a thin layer of 99% isopropyl alcohol before using the Injector Tool helps small amounts of soap “spread” into the cavity details. I scented these soaps with Grass Stain and Leather Fragrance Oil for a combination that’s both fresh and slightly smoky.

I’m thinking I need to make this project again during a football party. If you have young children, you know watching football is not exactly the most entertaining activity for them. Placing the white soap into the small details would be difficult for children, but mixing and pouring the brown soap would be doable. Then, the kids and your guests have some football soap to take home with them after the game. =)
What You’ll Need:
Guest Mini Football Mold
3 oz. White Melt and Pour Soap
7 oz. Honey Melt and Pour Soap
3 mL Leather Fragrance Oil
3 mL Grass Stain Fragrance Oil
Brown Oxide Color Block
Injector Tool
99% Isopropyl Alcohol
Optional: Clean Up Tool

Click here to add everything you need for this project to your Bramble Berry shopping cart!
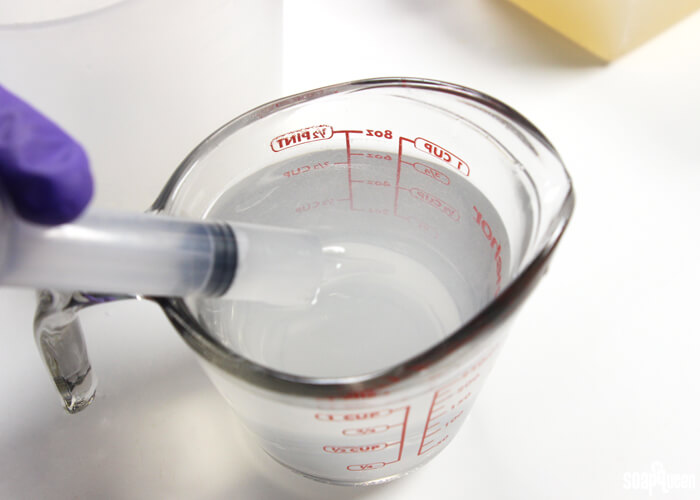
ONE: Chop and melt 3 ounces of White Melt and Pour Soap in the microwave using 5-7 second bursts. Be very careful when melting small amounts of melt and pour, as it is very easy to burn.
TWO: Once the soap is fully melted, use scissors to cut off a very tip of the Injector Tool. You want the opening to be slightly larger, but still small and precise. Lightly spray the mold with 99% isopropyl alcohol. Spraying the mold before filling in the details helps the soap to spread into the details easily. Then, fill the Injector Tool with the melted white soap and carefully fill in the details in each mold.
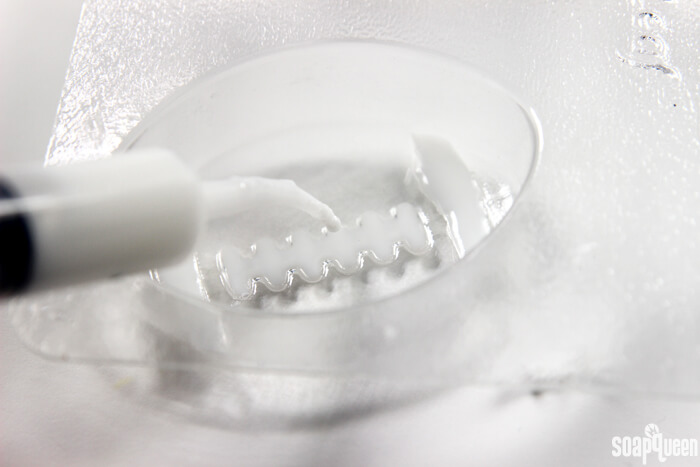 THREE: Filling in the details can take a little patience and a steady hand. If the soap leaks out of the details, allow it to dry and harden, and use the Clean Up Tool to clean up any mistakes.
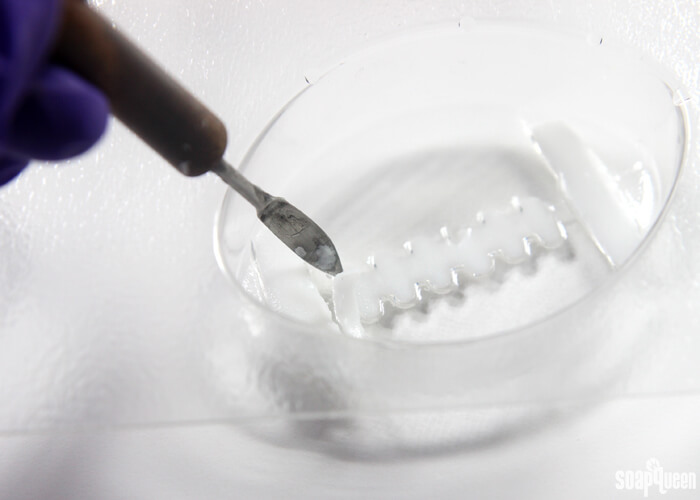 TIP: Have a cup of very hot water nearby when using the Injector Tool. The soap can cool and harden within the tool, which will clog it. Immediately after using the Injector Tool, clear out the tool in the hot water.
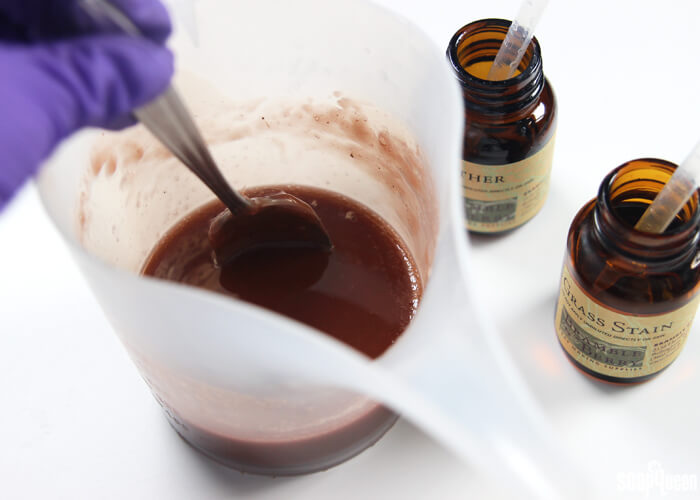
 FOUR: Chop and melt 7 ounces of the Honey Melt and Pour soap in the microwave using 15 second bursts. Once melted, add shavings of the Brown Oxide Color Block and stir until you achieve a rich brown color. Then, add 3 mL of the Leather Fragrance Oil and 3 mL of the Grass Stain Fragrance Oil and use a spoon to thoroughly mix.
 FIVE: Allow the brown soap to reach a temperature of 125 ° F or below. If the soap is too hot when poured, it will melt the white details. Once the soap has cooled, spray the mold with 99% isopropyl alcohol to help the layers stick. Pour the melted brown soap into each cavity and spritz the top with alcohol to help disperse any bubbles.
 Allow the soap to fully cool and harden in the mold. To remove, press the back of each cavity with your palm to release the air lock. Enjoy! Wrap the soap in plastic wrap before use to help prevent glycerin dew. Learn more about glycerin dew and how to prevent it here.
Who will you be cheering for this coming weekend?

Mini Melt and Pour Football Soap Tutorial
Ingredients
- Guest Mini Football Mold
- 3 oz. White Melt and Pour Soap
- 7 oz. Honey Melt and Pour Soap
- 3 mL Leather Fragrance Oil
- 3 mL Grass Stain Fragrance Oil
- Brown Oxide Color Block
- Injector Tool
- 99 % Isopropyl Alcohol
- Optional: Clean Up Tool
Instructions
- Chop and melt 3 ounces of White Melt and Pour Soap in the microwave using 5-7 second bursts. Be very careful when melting small amounts of melt and pour, as it is very easy to burn.
- Once the soap is fully melted, use scissors to cut off a very tip of the Injector Tool. You want the opening to be slightly larger, but still small and precise. Lightly spray the mold with 99% isopropyl alcohol. Spraying the mold before filling in the details helps the soap to spread into the details easily. Then, fill the Injector Tool with the melted white soap and carefully fill in the details in each mold.
- Filling in the details can take a little patience, and a steady hand. If the soap leaks out of the details, allow it to dry and harden, and use the Clean Up Tool to clean up any mistakes.
TIP: Have a cup of very hot water nearby when using the Injector Tool. The soap can cool and harden within the tool, which will clog it. Immediately after using the Injector Tool, clear out the tool in the hot water.
- Chop and melt 7 ounces of the Honey Melt and Pour soap in the microwave using 15 second bursts. Once melted, add shavings of the Brown Oxide Color Block until you achieve a rich brown color. Then, add 3 mL of the Leather Fragrance Oil and 3 mL of the Grass Stain Fragrance Oil and use a spoon to thoroughly mix.
- Allow the brown soap to reach a temperature of 125 ° F or below. If the soap is too hot when poured, it will melt the white details. Once the soap has cooled, spray the mold with 99% isopropyl alcohol to help the layers stick. Pour the melted brown soap into each cavity and spritz the top with alcohol to help disperse any bubbles.
- Allow the soap to fully cool and harden in the mold. To remove, press the back of each cavity with your palm to release the air lock. Enjoy! Wrap the soap in plastic wrap before use to help prevent glycerin dew.