• February 18, 2014

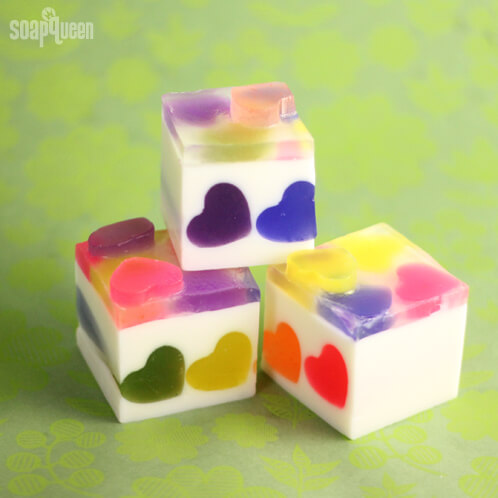
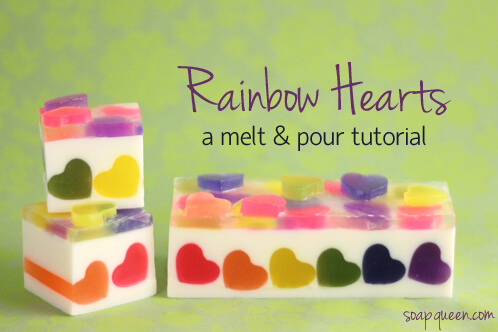
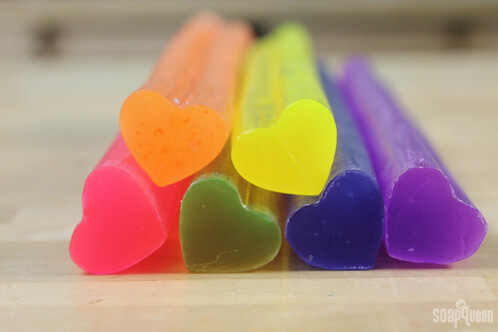
Valentine’s Day may be over, but there is no reason to abandon heart-themed projects quite yet. This tutorial features the watertight Mini Heart Silicone Column Mold, which works wonderfully for both melt & pour and cold process projects. Spread the love with this fun project!

What You’ll Need:

20 oz. Clear Melt & Pour Base

20 oz. Goat Milk Melt & Pour Base

Neon Color Block Sampler Pack

.4 oz. Pink Grapefruit Fragrance Oil

6″ Silicone Slab Mold

6 Mini Heart Silicone Column Molds

Isopropyl Alcohol

Droppers

Click here to add everything you need for this project to your Bramble Berry shopping cart!

ONE: Chop 15 oz of Clear Melt & Pour base into small chunks and melt on 30 second bursts in the microwave. Use 6 different heatsafe containers (we used coffee mugs) and pour 2.5 oz. of soap into each container.

TWO: You will then create a different color in each container. Add shavings of the color blocks as follows:

  • Ultramarine Blue to the first container
  • Tangerine Wow! to the second
  • Fizzy Lemonade to the third
  • 2 parts Electric Bubblegum to 1 part Ultramarine Blue to make purple in the fourth
  • 3 parts Fizzy Lemonade to 2 parts Ultramarine Blue to make green in the fifth
  • Equal parts Fired Up Fuchsia and Electric Bubblegum to make the perfect pink in the last container

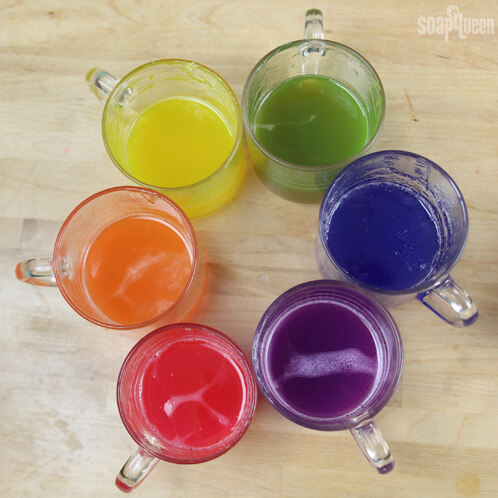
NOTE: The Fizzy Lemonade Color Block looks orange when you first add it to your soap. Be sure to stir it until it’s completely melted to see the true color before you add more.

TIP: Color blocks are what-you-see-is-what-you-get, so add as much or as little color as you like!

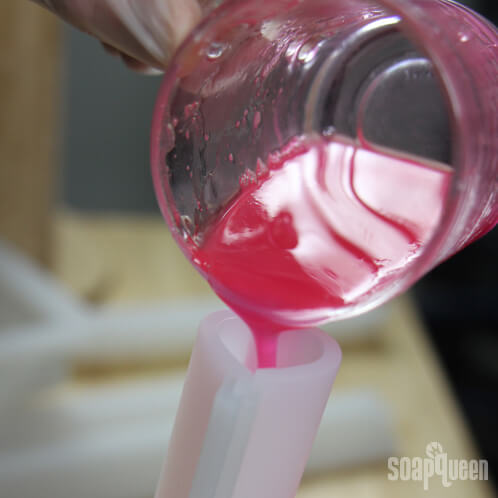
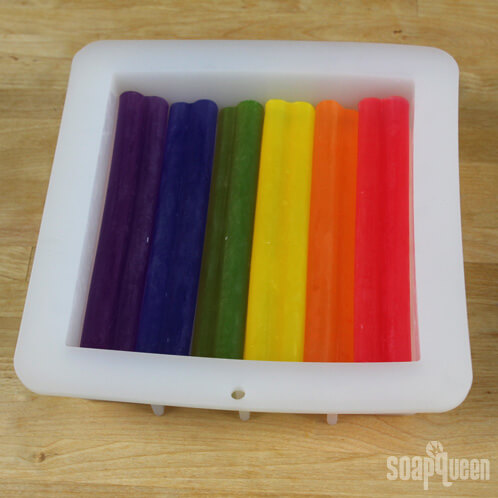
THREE: Each silicone heart mold will be used to create only one color of heart, so pour each color into its own single mold. If you are working with fewer than 6 molds, you can always wait 30 minutes for the soap to set-up, unmold, and then pour the next color. The silicone molds are watertight, but be sure to carefully snap the seal together. You wouldn’t want to end up with a soapy mess.

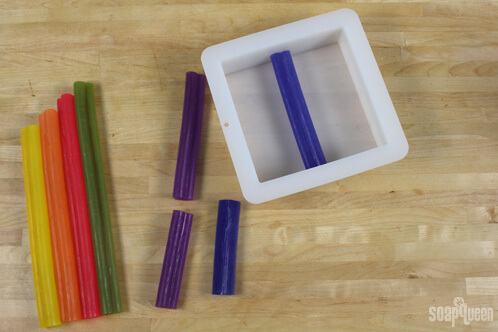
FOUR: Once all of the embeds are made, cut them to fit the 6” slab mold. You should have a little bit leftover. Make sure to save this for the end.

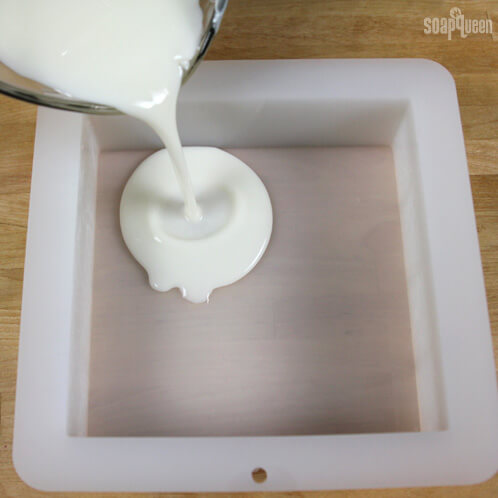
FIVE: Cut and melt 20 oz. of the Goat Milk base. Add 0.4 oz. of Pink Grapefruit fragrance oil. Pour a thin layer into the 6” slab mold. Pour just enough to completely cover the bottom of the mold. Spray with isopropyl alcohol to disperse bubbles.

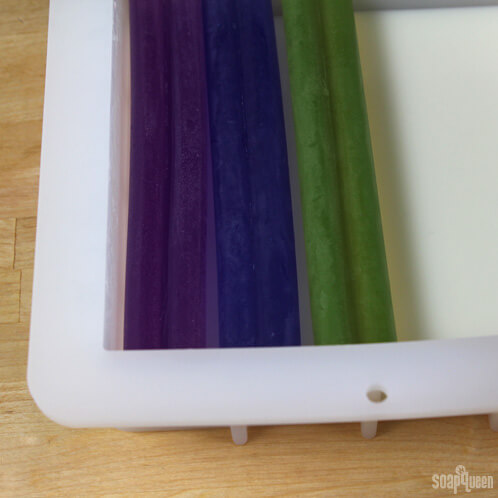
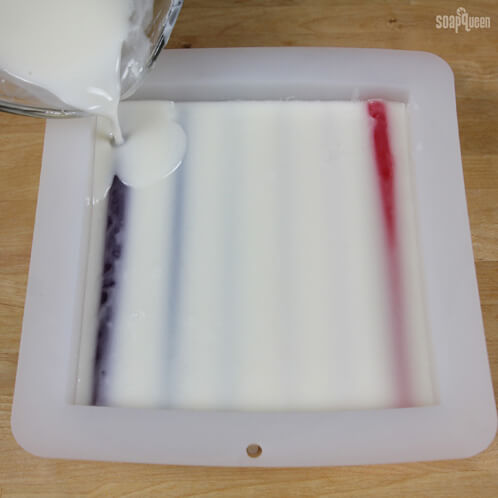
SIX: Wait 5 – 10  minutes for the layer to dry, and then spray it with alcohol. Pour a little more soap in. While the soap is still liquid, immediately spray the embeds with alcohol and place them in the mold. We arranged ours in rainbow color order and angled them to the side so they would all fit.

SEVEN: Spray the hearts with alcohol and pour the remaining Goat Milk soap so it completely covers the hearts. Spray with alcohol again to disperse bubbles.

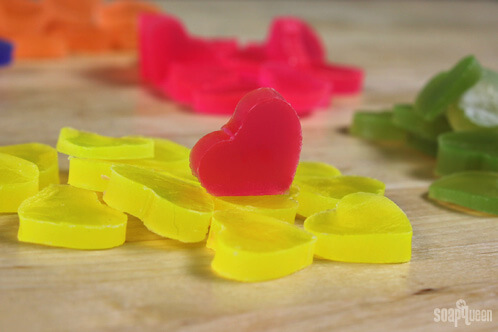
EIGHT: Wait 1 – 2 hours for the Goat Milk soap to harden. While you’re waiting, use a soap cutter to cut the leftover heart embeds into mini hearts that are about ½ centimeter wide.

NINE: When the Goat Milk soap is firm to the touch, arrange your cut heart soaps on top. We randomly arranged ours but you can try a fun pattern!

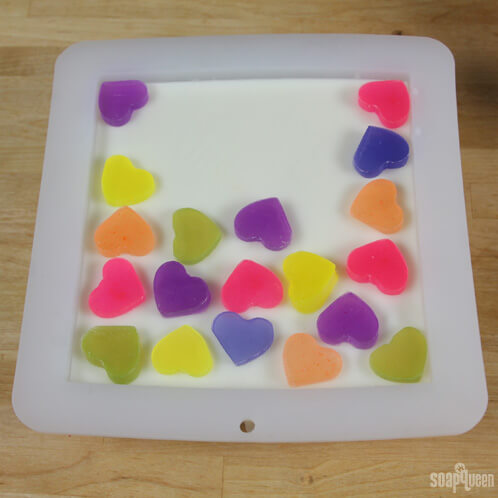
TEN: Cut 4 oz. of Clear Melt and Pour base. Melt it  in a heat-safe container on 10 second bursts. Once it has cooled to 125°F, spray the hearts liberally with alcohol and then pour the melted soap over the hearts. Spray with isopropyl alcohol to disperse bubbles.

Allow the soap to harden for 30 – 60 minutes. Cut into bars with a sharp knife and enjoy!

You may also like these

Become an email subscriber

Enter your email address below and you will receive all our new posts directly in your email inbox.

  1. Hi,
    I made CP soap and used melt & pour embeds on top for decoration.
    When I checked soap next day the embeds had melted into CP soap.
    Is there anyway to prevent this happening?

    1. Hi Julie!

      Oh no, I’m sorry those embeds melted! I’m wondering if the soap got quite hot and melted the soap.

      To prevent that, we recommend storing the soap at room temperature, rather than gelling it. That will keep the soap cool and prevent any melting. We also recommend using LCP (like cold process) bases for embedding on cold process soap. It has less glycerin, so it’s less prone to sweating and warping. 🙂

      LCP bases: https://www.brambleberry.com/Search.aspx?k=lcp

      -Kelsey with Bramble Berry

  2. I make cp soap. I saw the rainbow hearts melt and pour. Decided I would like to try making it. this will be my first time working with melt and pour. If it turns out well I would like to make several batches. I want to order accordingly. Just not sure how much of the Colorants I will need.It calls for 1 neon color pack. Will this be enough?

    Donna

    1. Hi Donna!

      Absolutely! Our color blocks are super concentrated. Just a couple of shavings will give you a nice color, and you can add more if you want a strong color. 🙂

      -Kelsey with Bramble Berry

  3. I recognize you now, but still I’m lucky.
    My english is not very good, melt & pour soap from your website while I did not understand what paint can use your help if you would be happy thank you.
    I live in turkey that causes a lot of shipping from the first time I want to order

  4. Hi Bing!

    I’m so glad to hear that you enjoy the SoapQueen Tv videos, thanks so much for your suggestion! 🙂

    -Amanda with Bramble Berry

  5. Hi there Im Bing 31 years old and I watch your video tutorial in youtube i just want to ask for more tutorial videos of soap and candle making thank you hoping for your response

  6. I tackled this with just one heart mold. It took longer making the individual hearts, but worked. I found that when I made the hearts, it was just enough for to fit the mold, but I didn’t have enough for the extra slices, so I increased the amount from 2.5 oz per heart mold to 3.25 which gave me lots to work with. When I cut the soaps, one of the first cuts started to pull and separate one of the bars so cut carefully so as not to pull at the hearts.

    1. Hi Brenda!

      Thanks so much for your feedback! If you get pictures of your soap, I would love to see pictures on our Facebook page 🙂

      -Amanda with Bramble Berry

  7. Hello Anne, i am new to soap making. i want to make a pure goat milk soap, please how do i go about it, and how do i use your powdered milk when i purchase it. Again, is it possible for me to use the melt and pour goat milk soap directly on my skin or if you have any recipe please do let me know. thanks

    1. Hi Amina!

      I’m so glad that you’re going to give soapmaking a try :). Making milk cold process soap can be a little tricky, so you may want to get a few other recipes under your belt before trying it. But, if you want to jump right in, you may find Anne-Marie’s E-Book “Making Milk Soap from Scratch E-Book” helpful! This book goes into great depth on milk soap making techniques, with step by step instructions and tips.

      Making Milk Soap from Scratch E-Book:
      https://www.brambleberry.com/E-Book-Making-Milk-Soap-from-Scratch-P5257.aspx

      You may also find this Soap Queen TV Episode helpful!

      Goat Milk Soap Recipe:
      https://soapqueen.com/bath-and-body-tutorials/cold-process-soap/goat-milk-soap-tutorial-on-soap-queen-tv/

      If you prefer to use the Goat Milk Melt and Pour, you can certainly use this base on the skin! Melt and Pour is ready for you to use and customize as you want. For more information on getting started with melt and pour, you may find this blog post helpful 🙂

      Beginners Guide to Soapmaking Melt and Pour:
      https://soapqueen.com/bath-and-body-tutorials/melt-and-pour-soap/free-beginners-guide-to-soapmaking-melt-and-pour/

      I hope this helps! 🙂

      -Amanda with Bramble Berry

      1. Than you Amanda for the feedback, for how long is it allowed to cure for? or i can use it immediately.

      2. Thank you Amanda for the feedback, for how long is it allowed to cure for? or i can use it immediately.

        1. Hi Amina!

          If you are working with Melt and Pour, it does not need to cure. As soon as it hardens, it is ready to use! That’s one of my favorite things about working with Melt and Pour 🙂

          -Amanda with Bramble Berry

  8. This soap looks divine and am going to give it a go sometime I am just starting out in the soap making craft so can’t wait. It is so good to get inspiration from seeing what other people make.

Comments are closed.

{"email":"Email address invalid","url":"Website address invalid","required":"Required field missing"}

The Latest from Soap Queen TV

Inspired by Gems & Crystals

All About Essential Oils

The Power of Charcoal

Create Your Own Clay Face Mask

DIY Bath Bombs

Cold Process Soap Tips & Tricks

Learn the Basics of Cold Process Soapmaking

Learn the Basics of Melt & Pour Soapmaking

Want to Start Your Own Soap Business?

Soap Business Success Stories

Soap Queen TV Favorites

Ingredient Spotlight

Disclosure

Unless stated otherwise, all images are original material and are copyrighted. If you'd like to use an image, please be a friend and credit the photo and link back to Soap Queen. Feel free to share, tweet and pin to your hearts content.