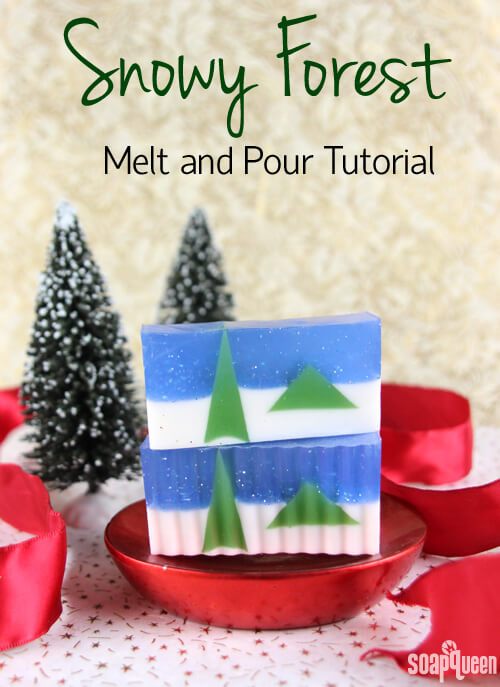
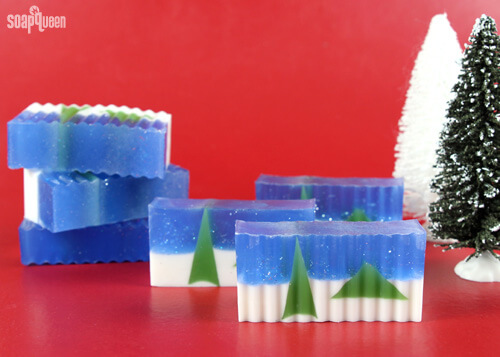
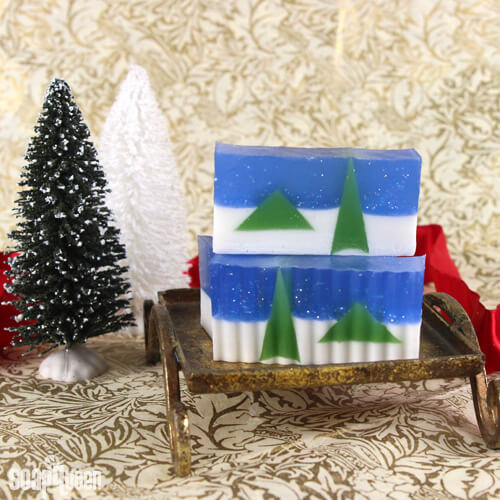
Preparing handmade holiday gifts requires a little bit of planning. That’s why Soap Queen holiday projects have come early this year! This modern holiday melt and pour project features festive layers and embeds to create a snowy forest landscape. With glitter and the piney Christmas Forest Fragrance Oil, this soap is the perfect holiday gift.
When making melt and pour soap in advance, it’s important to store and wrap it properly in order to keep it in tip-top shape. This Packaging Soap Queen Tv Episode shows you how to protect your melt and pour from glycerin dew (aka: sweating) and fading. Storing your melt and pour in a dry, cool place also helps extend the life of your creations.
Ready to kick off your holiday crafting? Now until September 18th at noon, PST, all fragrance oils are 20% off! Use the code: SAVESCENTS during checkout.
What You’ll Need:
10” Silicone Loaf Mold
29 oz. Clear Melt & Pour Base
15 oz. White Melt & Pour Base
4 mL Christmas Forest Fragrance Oil
Chrome Green Color Block
Ultramarine Blue Color Block
1/8 tsp. Iridescent Glitter
Handmade Cardboard Mold

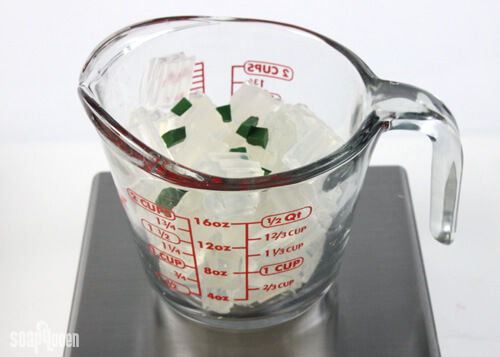
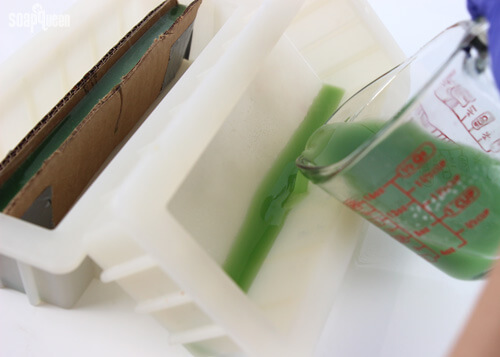
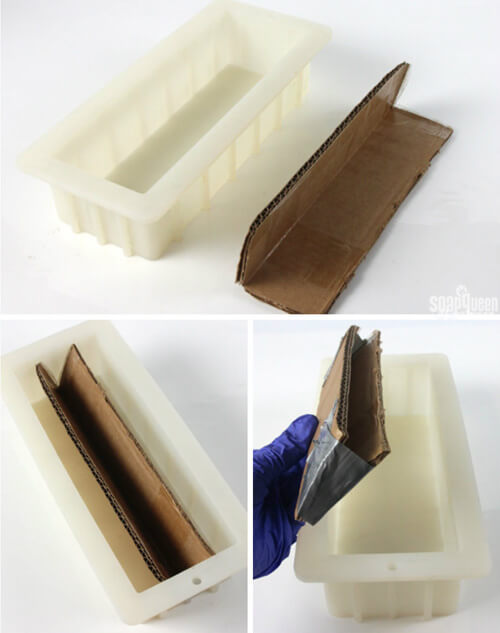 ONE: Cut and melt 10 oz. of Clear Melt and Pour Base in the microwave on 15-20 second bursts. Add pieces of the Chrome Green Color Block and stir until fully combined. Place the V-shaped cardboard into the 10 Inch Silicone Mold, and pour green soap into the cardboard mold until nearly full (you will have soap left over). Spray with rubbing alcohol to disperse bubbles.
 TWO: While the soap in the cardboard cools, balance a 10″ Silicone Mold on its side, and pour the remaining green melt and pour into the corner of the balancing mold. Spray with isopropyl alcohol to disperse any bubbles.
Note: If you don’t have two 10″ Silicone Molds, wait until the soap in the cardboard has fully cooled. Remove the hardened soap from the loaf mold, and use this mold to balance and pour the remaining soap into the corner.
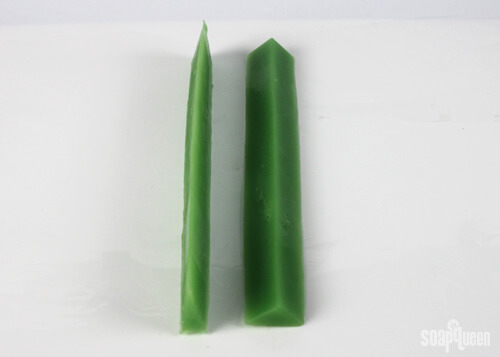
 THREE: Gently remove both embeds from the cardboard and the balancing silicone mold. The embed created from the cardboard will be tall and thin, while the other will be short and wide.
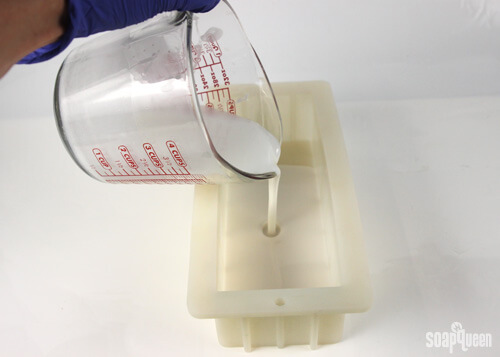
 FOUR: Cut and melt 9 oz. of White Melt and Pour Base in the microwave on 20 second bursts. Add 1mL of Christmas Forest Fragrance Oil, and stir until fully combined. Pour into 10” Silicone Mold and spray with rubbing alcohol to disperse any bubbles.
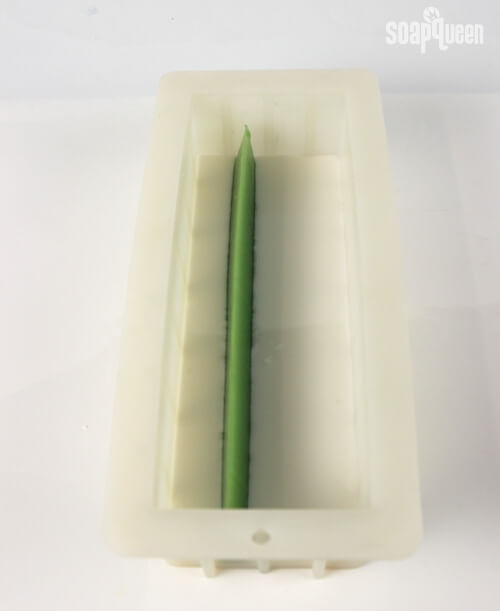
 FIVE: Once the white melt and pour has hardened slightly and has begun to form a thin skin, spritz tree embed with alcohol and place the tall “tree” embed onto the white soap. Spray with isopropyl alcohol generously. Allow the melt and pour to fully harden.
 SIX: Once the first layer of white melt and pour has cooled and hardened, cut and melt 6 oz. White Melt and Pour Base in the microwave on 10-20 second bursts. Add 1mL of Christmas Forest Fragrance Oil and stir until fully incorporated. Once the melted soap has reached approximately 120-125 125 °F, spray the first layer of white soap with 99% isopropyl alcohol, and pour the melted soap evenly over the first layer of white. Gently place second “tree” embed into the second layer of white. Spray with 99% isopropyl alcohol.
 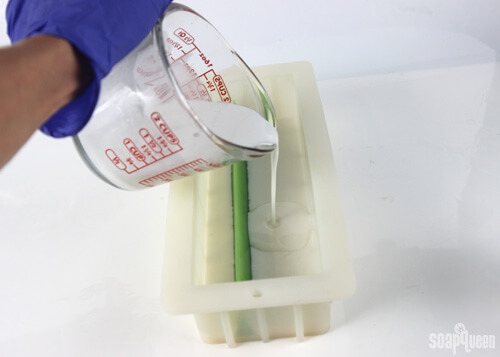 SEVEN: Allow the melt and pour to fully harden and cool.
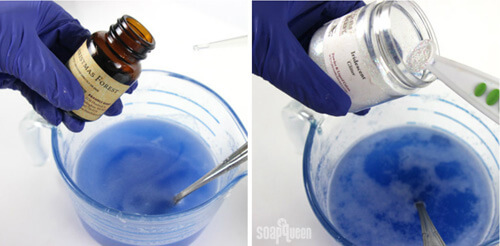
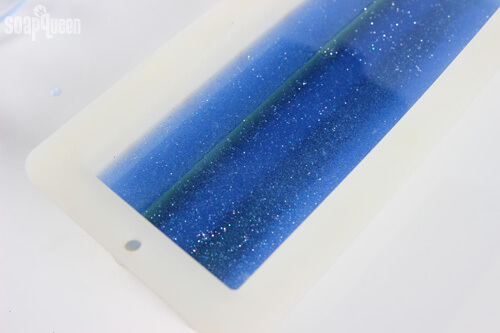
 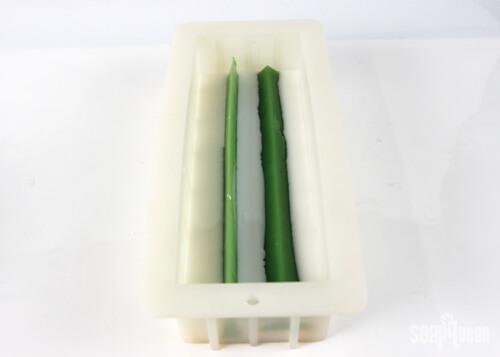 EIGHT: Cut and melt 19 oz of Clear Melt and Pour Base in the microwave on 20 second bursts. Add pieces of Ultramarine Blue Color Block, 2 mL of Christmas Forest Fragrance Oil and 1/8 tsp of Iridescent Glitter. Stir until fully incorporated.
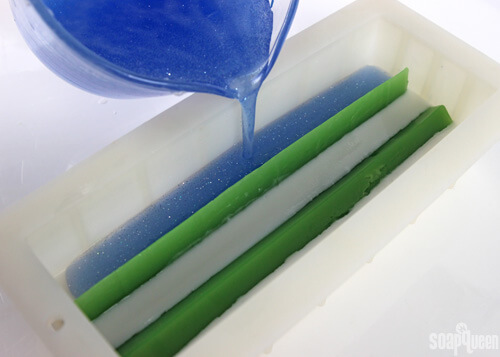
 NINE: Once the blue melt and pour has reached a temperature of approximately 120-125 degrees,spritz the white and green soap with alcohol. Pour the blue soap over all areas of the green and white soap. Be careful to not pour the blue soap too hot, or it may melt the peaks of the green embeds.
 TEN: Spray with isopropyl alcohol to remove any bubbles. Allow the soap to fully harden before removing from the mold and cutting into bars.
What is your favorite handmade gift you have ever received or given?