• September 5, 2013

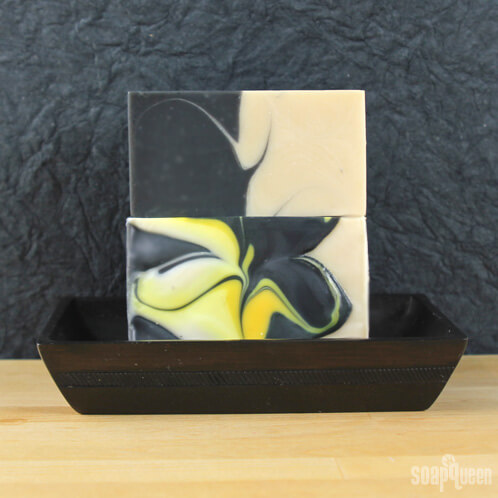
We love a good challenge — especially if it’s a soapy challenge! The Great Cakes Soapworks Soap Challenge is a great way to experiment with new techniques and learn from other soapers, and we had such a great time participating in the Elemental Swirl and Leopard Spots challenges that we didn’t hesitate to enter the Mantra Swirl challenge. For this technique we chose a bold color scheme and a luxurious blend of oils — the Cocoa Butter, Hemp Seed and Argan Oils make this a truly pampering bar of soap.

What You’ll Need:

2.7 oz. Argan Oil

2.75 oz. Deodorized Cocoa Butter

8.25 oz. Coconut Oil

5.5 oz. Hemp Seed Oil

16.5 oz. Olive Oil

11 oz. Palm Oil

8.25 oz. Rice Bran Oil

7.5 oz. Sodium Hydroxide

18.1 oz. distilled water

3.5 oz. Cucumber Oak Fragrance Oil

Fizzy Lemonade Colorant

Black Oxide

Titanium Dioxide

5 lb. Wood Mold with Sliding Bottom and Silicone Liner

Condiment bottles

Click here to add everything you need for this project to your Bramble Berry shopping cart! And remember, you can always remove anything you don’t need.

If you’ve never made Cold Process soap before, stop here! I highly recommend checking out our FREE four part SoapQueen.tv series on Cold Process Soapmaking, especially the episode on lye safety. And if you’d rather do some reading, Bramble Berry carries a wide range of books on the topic, including my newest book, Soap Crafting. You can also checkout the digital downloads for that instant gratification factor.

SAFETY FIRST: Suit up for safe handling practices! That means goggles, gloves and long sleeves. Make sure kids, pets, and other distractions and tripping hazards are out of the house or don’t have access to your soaping space. Always soap in a well-ventilated area.

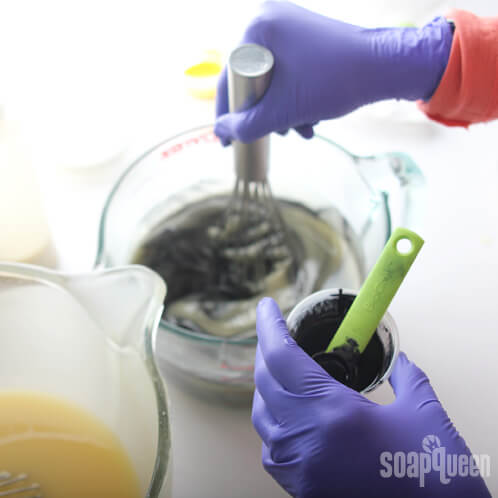
COLOR PREP: Disperse 1 teaspoon of Black Oxide colorant into 1 tablespoon of Sunflower or Sweet Almond Oil (or any other liquid oil), 1 teaspoon Fizzy Lemonade Colorant into 1 tablespoon liquid oil and 2 teaspoons of Titanium Dioxide into 2 tablespoons of liquid oil. Use a mini mixer to get clumps worked out smoothly.

Then, add one color to three separate condiment bottles. We added 3/4 teaspoon dispersed Titanium Dioxide to one, 1 teaspoon dispersed Fizzy Lemonade to another and 1/2 teaspoon Black Oxide to the last. Set the bottles aside.

MOLD PREP: Using cardboard, cut one divider that fits snugly down the center (lengthwise) of the mold. Cardboard brackets on either end can help with stability.

SAFETY FIRST: Suit up for safe handling practices! That means goggles, gloves and long sleeves. Make sure kids, pets, and other distractions and tripping hazards are out of the house or don’t have access to your soaping space. Always soap in a well-ventilated area.

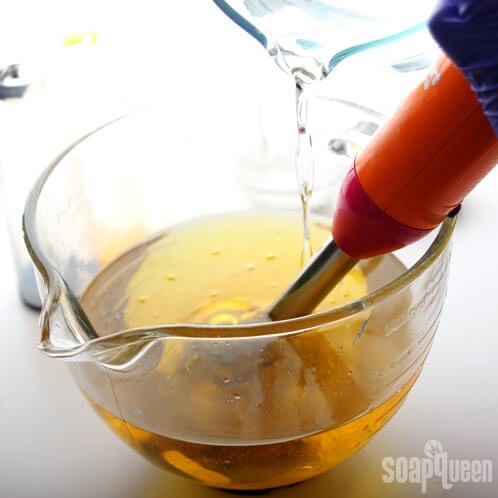
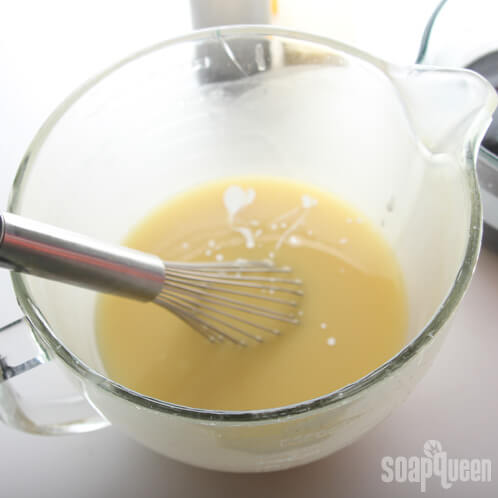
ONE: Slowly and carefully add the lye to the water and gently stir until the lye has fully dissolved and the liquid is clear. Set aside to cool.

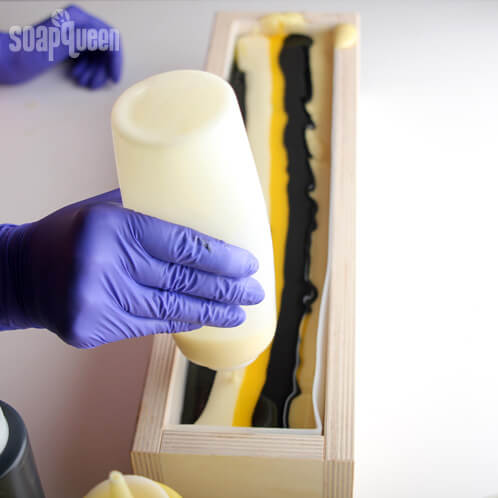
TWO: Combine the Argan, Cocoa Butter, Coconut, Hemp Seed, Olive, Rice Bran and Palm Oils (remember to fully melt then mix your entire container of Palm Oil before portioning). Once the lye water and the oils have cooled to 130 degrees or below (and are ideally within 10 degrees of each other), add the lye water to the oils and stick blend until thin trace. If you’d like a harder bar of soap that lasts longer in the shower and releases faster from the mold, you can add Sodium Lactate to the cooled lye water. Use 1 teaspoon of Sodium Lactate per pound of oils in the recipe.


THREE: Grab your condiment bottles and fill them about 1/4 of the way full with batter. Screw on the tops, plug the hole with your finger, and shake vigorously to mix the colorant and batter. Release your finger with the tip pointing away from your face.

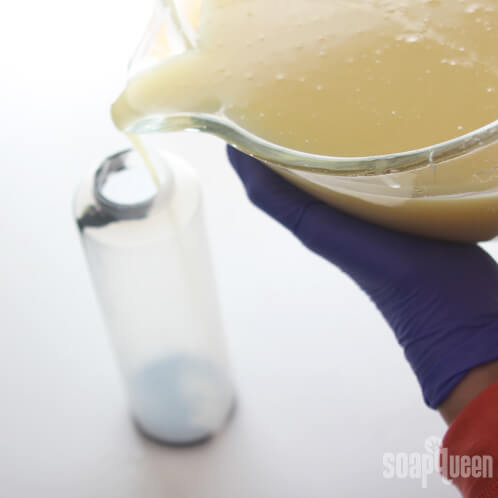
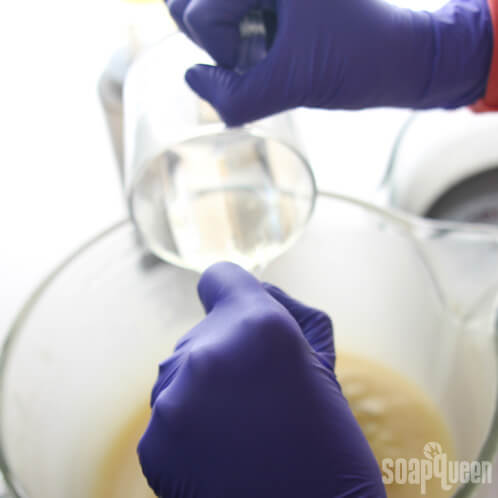
FOUR: Once you’ve filled all three condiment bottles, split the remaining batter in half. Each container should hold about 4 cups of batter.

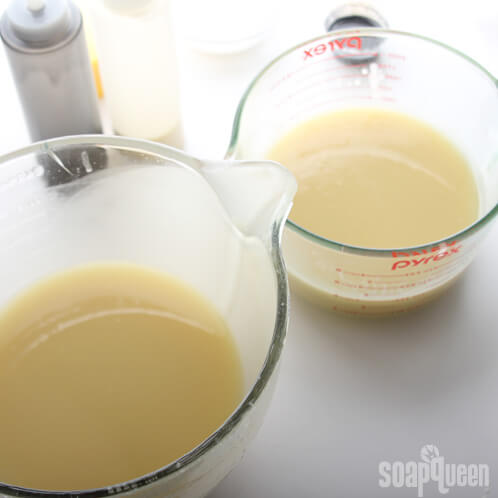
FIVE: To one container, add 1/2 teaspoon of dispersed Black Oxide. To the other container, add 3 teapsoons dispersed Titanium Dioxide. Mix in the colorant with a whisk or spatula so as not to accelerate trace.

SIX: After the colorant has been incorporated, split the fragrance between the two containers. Eyeballing it is okay! Mix in the fragrance oil with a whisk or spatula.

SEVEN: For this part you may need to grab a friend. Make sure your center piece of cardboard is stable, and then get someone to help you simultaneously pour the black and white soap on either side. Tamp the mold on the table several times once all the soap has been poured, and then slowly lift the cardboard straight up and out of the mold.

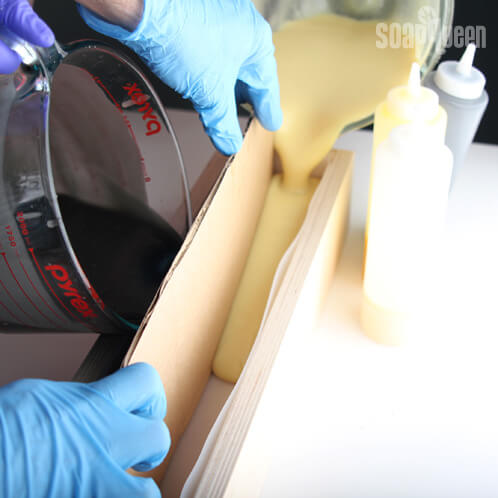
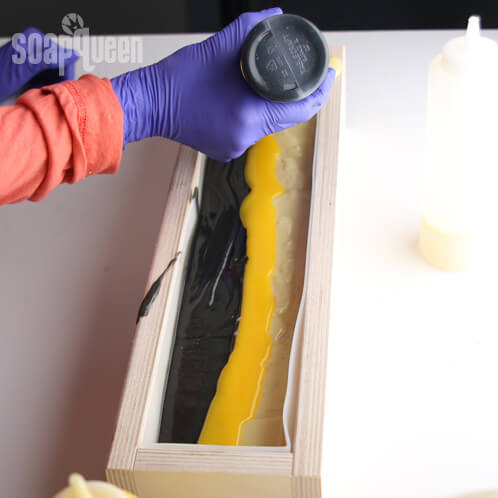
EIGHT: Now use the squirt bottles to make vertical stripes down the length of the mold. We started with a yellow stripe down the center with black and white stripes on the opposing sides (remember, the base of this soap is a black and white split — pour the opposite color over the top for a cool checkered effect!).

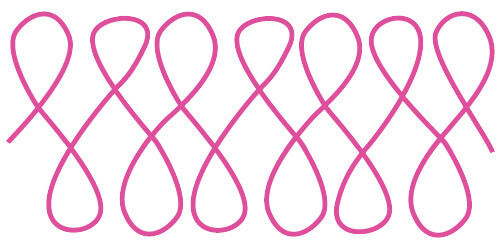
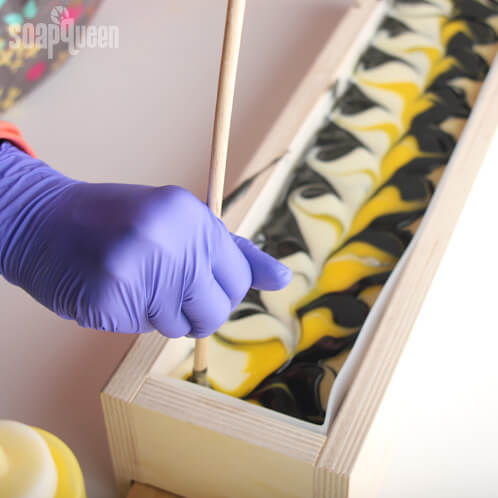
NINE: Using a chopstick or dowel inserted all the way into the soap, swirl the soap in a figure 8 pattern. The tops and bottoms of the “8″s should touch the sides of the soap mold. Here’s a quick illustration of the swirl without soap:

TEN: Allow the soap to sit in the mold for 24-48 hours. For this soap, try cutting a few bars horizontally to emphasize the beautiful swirl on top. Cure for 4-6 weeks and enjoy!

You may also like these

Become an email subscriber

Enter your email address below and you will receive all our new posts directly in your email inbox.

  1. I have been having some mixed results with this lovely soap pattern. I believe i did the swirl (am using the Swirl Recipe Quick Mix with two heavy of a trace and i just didn’t get the beautiful pattern. Should it be done at a very thin trace? And does it make a difference how thick the swirl stick is?? Is it better to use a thicker or thinner dowel? (Also am doing this in the 4″ silicone mold).

    Thanks! Gonna keep trying til i get that beautiful pattern

    1. Hi Arlene!

      For this recipe, you’ll want your soap at thin to medium trace. That way it is thick enough to hold the lines, but thin enough that the colors can swirl through.

      All About the Trace: https://soapqueen.com/bath-and-body-tutorials/tips-and-tricks/trace/

      The thickness of the chopstick you use will affect the swirl. The thicker the chopstick, the thicker the lines will be. Since you’re making a smaller batch, it may help to try this pattern with several tools. That way you can find the tool that gives you a pattern you love. 🙂

      -Kelsey with Bramble Berry

      4″ Silicone Loaf Mold: https://www.brambleberry.com/4-Silicone-Loaf-Mold-P5531.aspx

  2. Hello! I would like to try this out but do not have argan oil at the moment.. is there an oil with similar properties that I would be able to substitute for it in this recipe? Thanks!

    1. Hi CCK!

      Avocado or jojoba oil would make great substitutes! They’re both lightweight and moisturizing like the argan oil. Just make sure to run your recipe through the Lye Calculator again so you get the right lye and water amounts. 🙂

      Lye Calculator: https://www.brambleberry.com/Pages/Lye-Calculator.aspx

      Avocado oil: https://www.brambleberry.com/Avocado-Oil-P3198.aspx

      Jojoba oil: https://www.brambleberry.com/Jojoba-Oil-Golden-P3219.aspx

      -Kelsey with Bramble Berry

  3. Was told Argan Oil would loose it properties while saponification on CP. What are your thoughts? Just got a 4oz bottle of oil and my plan was to use it in a CP soap.

    Thanks

    1. Hi Sharlene!

      Personally, I have found that my soap made with Argan oil feels great on the skin, so while some may think it looses some of it’s properties…my skin says otherwise! 🙂 If you are worried about this, you may want to use your Argan Oil in a leave in product instead, like a body butter or lotion. You may enjoy this lotion recipe!

      Argan Shea Lotion:
      https://soapqueen.com/bath-and-body-tutorials/lotion/argan-shea-lotion/

      -Amanda with Bramble Bery

  4. Hello. Are you insulating this soap with a lid and towels? When you said to let it sit in the mold, I wasn’t sure if you insulated it. Thanks.

    1. Hi Barbara!

      Although it isn’t shown in the pictures, we did cover the top with a piece of cardboard and wrapped it in a towel to help insulate it. If you get a chance to try this recipe out, we’d love to hear how it turns out for you. =)

      Happy Soaping!
      -Becky with Bramble Berry

  5. Had a blast doing this tonight,with a few little oil changes to make it my own ;). I did need to add more black oxide to get past that grey color, it also seemed off to me that that amount used in the squeeze bottle was the same amount used in the remaining 4 cups? Anyways as I stood back to admire my work and allow the gloating to begin I realized I had forgotten my fragrance oil, instantly humbled. I recovered and left the room to go get the alcohol when I heard a crash, came back to find my i’ll placement of the scale caused it to drop,smashing into my mold and really messing up my swirl. I don’t think I needed that much humbling, but the soap gods saw fit.

    1. Hi Jodi!

      I am so sorry to hear about your frustration in your last soaping session. We are hear to lend a listening ear and totally understand those kind of experiences. And, you are correct about the squeeze bottles. If you have any other questions about this recipe, let us know. 🙂

      -Becky with Bramble Berry

      P.S. We hope that your next soaping session goes easily and with no problems at all =)

  6. I would love to know what knife that is used to cut the soap? And where to get one? Do you carry them?
    My foster license will not allow me to have lye so am limited to creating with Melt and Pour, but ohhhhh how I love to watch and drool over these tutorials!
    Many Thanks
    Jan Pace
    Power Of Three Creations
    Fallbrook, CA

    1. Hi Jan!

      The knives that we use to cut our cold process soaps are basic knives that you can find at any kitchen supply store. Make sure that you find a non-serrated blade as they work the best when cutting! We don’t carry them at this time, but I will suggest that to our Product Development Team. =)

      Happy Soaping!
      -Becky with Bramble Berry

      P.S. If you get any fun photos of your melt & pour soap creations, we’d love for you to share them with us on Bramble Berry’s Facebook page.

      https://www.facebook.com/BrambleBerry

Comments are closed.

{"email":"Email address invalid","url":"Website address invalid","required":"Required field missing"}

The Latest from Soap Queen TV

Inspired by Gems & Crystals

All About Essential Oils

The Power of Charcoal

Create Your Own Clay Face Mask

DIY Bath Bombs

Cold Process Soap Tips & Tricks

Learn the Basics of Cold Process Soapmaking

Learn the Basics of Melt & Pour Soapmaking

Want to Start Your Own Soap Business?

Soap Business Success Stories

Soap Queen TV Favorites

Ingredient Spotlight

Disclosure

Unless stated otherwise, all images are original material and are copyrighted. If you'd like to use an image, please be a friend and credit the photo and link back to Soap Queen. Feel free to share, tweet and pin to your hearts content.