• March 27, 2014

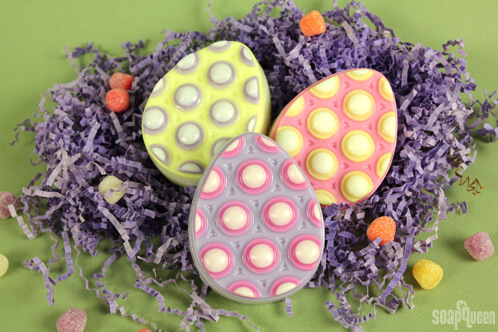
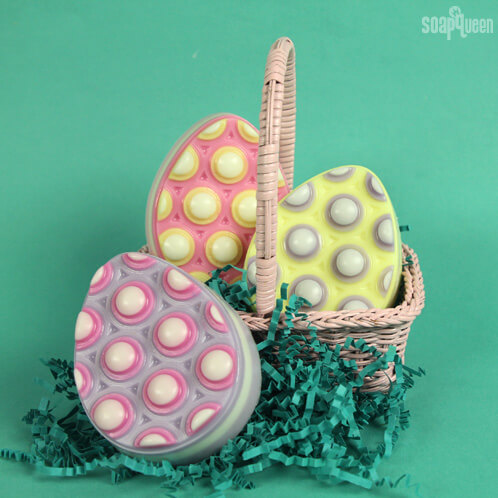
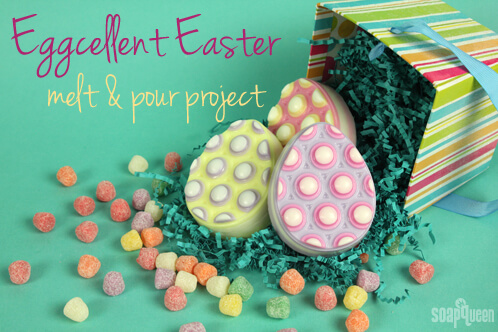
The Easter Bunny visited the Soap Queen blog early this year, and he brought these adorable melt & pour massage eggs with him! This is beginner-level melt & pour project is great for kids, and it features two eggscellent springtime fragrances — Eden’s Garden and Sweet Pea.

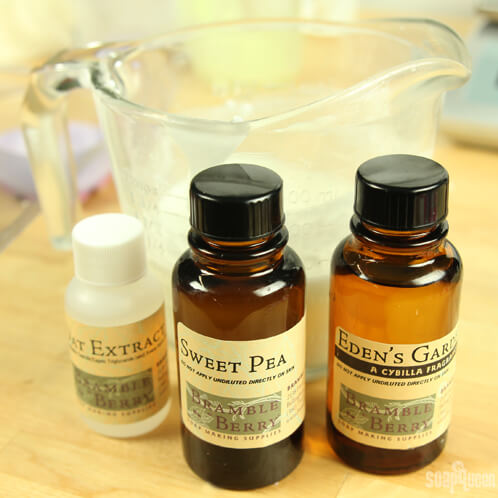
We also added Oat Extract to this project. Oat Extract is soothing for all types of skin and it’s especially popular in baby products. As with most extracts, add it your melt & pour soap base at 1 teaspoon per pound of soap base.

What You’ll Need:

Goat Milk Melt & Pour Base

Yellow Jelly Color (discontinued-substitute with Fizzy Lemonade Color Block)

Liquid Violet

Liquid Pink

Non-Bleeding Red (discontinued- substitute with Electric Bubblegum Color Block)

Oat Extract

Eden’s Garden Cybilla Fragrance Oil

Sweet Pea Fragrance Oil

6 Bar Oval Silicone Mold

Injector Tool

Droppers

Click here to add everything you need for this project to your Bramble Berry shopping cart!

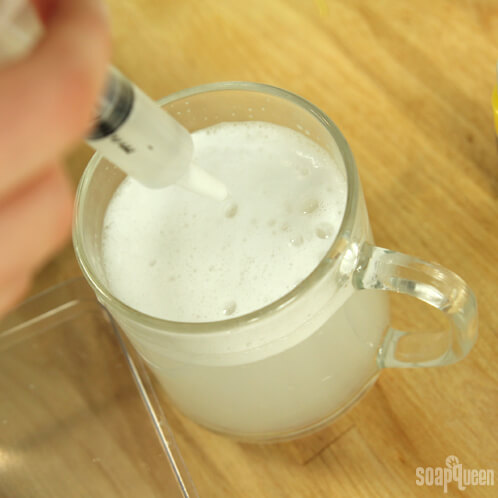
ONE: Cut and melt 2 oz. of Goats Milk Melt & Pour Base and heat in the microwave on 6 second bursts. Leave it uncolored. Using the Injector Tool, drop a small amount of white into the first divot of the mold. Spray with isopropyl alcohol to disperse bubbles and allow to dry for 10 – 15 minutes. NOTE: The Massage Egg Mold used in this project has been discontinued. It has been replaced with the 6 Bar Oval Silicone Mold.

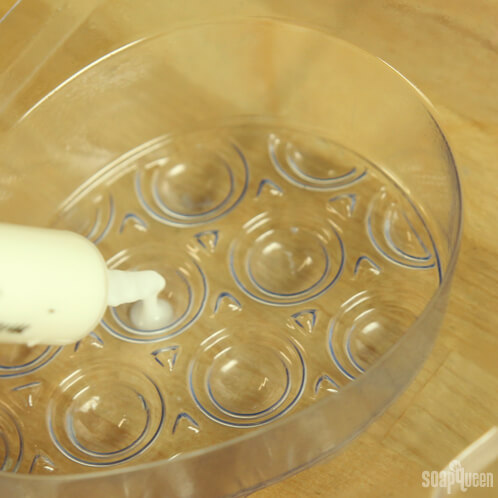
Tip: The injector tool will become clogged with hardened soap if you don’t push it out immediately after you’re done. Keep a cup of warm water near by so you can rinse the tool with hot water and keep it from getting clogged in between uses.

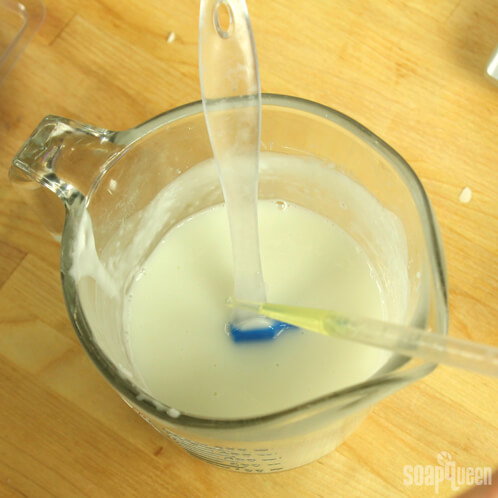
TWO: Cut and melt another 6 oz. of Goat Milk Soap base and heat in the microwave on 6 second bursts. Divide it equally among three containers, so that each contains about 2 oz. of soap each. Add one color per container in the following amounts:

  • 5 – 7 drops Liquid Pink and 1 drop Non-Bleeding Red to one container
  • 4 – 6 drops Jelly Yellow to a second container
  • 4 – 6 drops Liquid Violet to a third container

Keep these containers on hand because you will use them throughout the project.

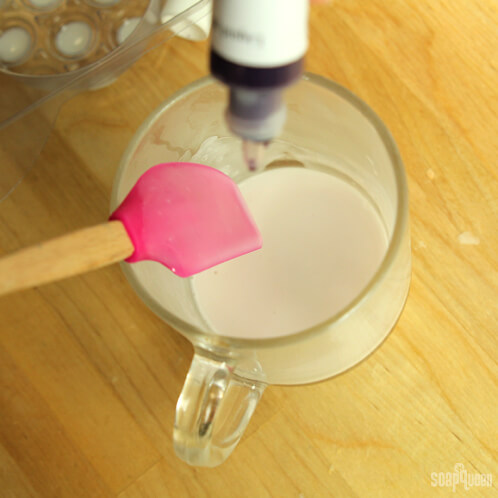
THREE: Stir to incorporate the colors into the melted base. Once the white soap in the mold had dried and the colored soap has cooled to around 130 degrees, spray the mold with isopropyl alcohol and then use the injector tool to fill in the small ring around the white soap. Spray with isopropyl alcohol to disperse bubbles and allow the soap the soap to dry for 15 – 20 minutes.

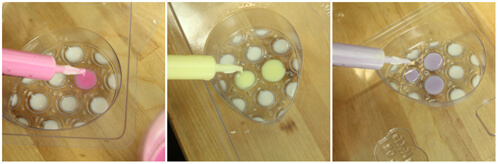
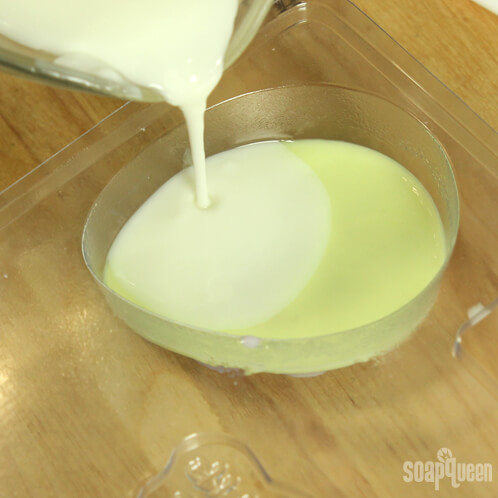
FOUR: By now your colored soap may have hardened, so give it a good stir and pop it into the microwave on 5 second bursts to remelt it if need be. When the melted soap has cooled to 130 degrees or below, spray the mold with isopropyl alcohol and pour a thin colored layer (about 1 centimeter) into the mold. You can choose whatever combination you’d like, but we poured purple over the pink dots, pink over the yellow dots and yellow over the purple dots.

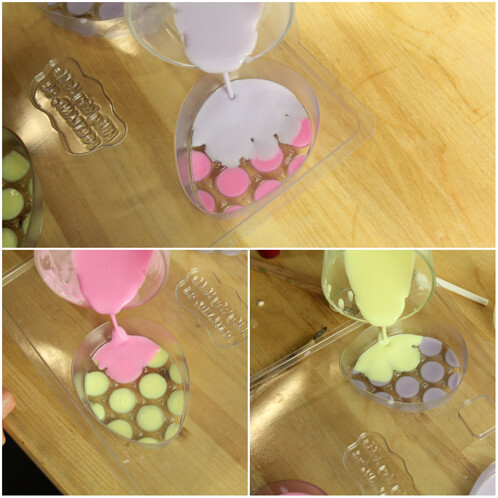
FIVE: Cut and melt 9 oz. of Goat Milk base and heat in the microwave on 10 second bursts. Leave this portion uncolored. Stir in 2 mL Eden’s Garden Cybilla Fragrance Oil, 1 mL Sweet Pea Fragrance Oil and 3 mL Oat Extract.

SIX: When the soap has cooled to 130 degrees or below, spray the mold with isopropyl alcohol and then pour 2 – 3 oz. of white soap into each cavity. Spray with isopropyl alcohol to disperse bubbles.

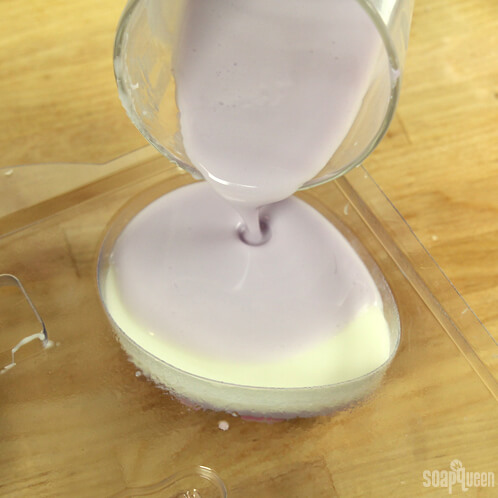
SEVEN: Add an additional 1 oz. to each container of colored soap. You may need to add a few more drops of color because of the added White Goat Milk base, but it’s completely up to you. Add 1 mL Oat Extract, .5 mL Eden’s Garden Cybilla and .5 mL Sweet Pea Fragrance Oil to each container and stir.

When the melted soap has cooled to 130 degrees or below, spray the mold with isopropyl alcohol and fill the cavity with the colored soap. Spray again with isopropyl alcohol to disperse bubbles.

Allow your soaps to dry for 30 – 60 minutes and then unmold. Your soaps are ready to use!

You may also like these

Become an email subscriber

Enter your email address below and you will receive all our new posts directly in your email inbox.

  1. Loved the tutorial! I purchased the mold and had so much fun making these, but I have an issue.
    When I popped the soap out of the molds, at least one divot on each bar didn’t pop out with the bar. It was stuck in the mold. Any suggestions on preventing this? Is there a way to repair the bars I’ve already made? Thanks!

    1. Hi Denise!

      So glad you love the tutorial! Also, alcohol can help those details stay on your soap. Right before you pour the layer on top of the dots, spritz them with 99% isopropyl alcohol. Make sure they dots are completely covered with alcohol.

      Sunday Night Spotlight: 99% Isopropyl Alcohol: https://soapqueen.com/bramble-berry-news/sunday-night-spotlight-99-isopropyl-alcohol/

      Then, when you unmold the soap, make sure it’s completely cooled and hardened. If it is, press directly on the dots when you’re pushing the soap out. That will help them pop out first, which helps them stick to the soap.

      To help your soap stick now, you can use melt and pour “glue.” Melt a small amount of soap in the microwave on 5 second bursts. When it’s liquid, brush it in between the soap and the dots and press the dots on firmly. Let that sit for several hours. The melted soap should help the dots stick to your base soap. 🙂

      -Kelsey with Bramble Berry

      1. Thanks! I used the alcohol spray but maybe I didn’t use enough. I’ll try again. I love the feel of this soap in my hands when washing and the lemon scent is wonderful!

        1. You’re welcome! I think covering the entire surface with alcohol should help those layers stick together. Also, so glad you like the soap! I love the bright colors and fresh springy scent. 🙂

          -Kelsey with Bramble Berry

  2. I spend so much time to make beautiful melt & pour soaps. But the beauty only lasts about 24 hours. My soaps sweat so much. Is there anything I can do? Additives to preserve them just a little longer? It’s so embarrassing giving soaps gifts that look wet. I am only adding fragrance and color. Next time I will buy the low sweat product, but I have so much of the other. I hate to waste all of it. I have at least 20lbs of clear and 20lbs of white.. Any suggestions would be appreciated. Thanks..

    1. Hi Jes!

      Oh no, I’m sorry that you’re having trouble with your melt and pour sweating. This is fairly common, but especially if you live in an area with high humidity. One suggestion, is as soon as the melt and pour is hard and out of the mold, is to wrap it in plastic wrap and store it in a dark, cool place. You may find this blog post helpful 🙂

      What’s That All Over My Soap:
      https://soapqueen.com/personal-ramblings/augh-whats-that-all-over-my-soap-2/

      -Amanda with Bramble Berry

  3. I need ur advise in re using the used soap left overs, I am talking about the soap we buy from markets. Its so difficult to microwave it. Any ideas u can propose to make use of it?

    1. Hi Shaima!

      Unfortunately there is not a good way to customize store bought soap. If you are interested in melting down soap to customize it further, I would recommend melt and pour soap bases! These bases are specifically formulated to be melted, and you can do so in the microwave very easily!

      Melt and Pour Soap Bases:
      https://www.brambleberry.com/Bases-Melt-Pour–C151.aspx

      You may also find this blog post about melt and pour helpful!

      Free Beginner’s Guide to Melt and Pour:
      https://soapqueen.com/bath-and-body-tutorials/melt-and-pour-soap/free-beginners-guide-to-soapmaking-melt-and-pour/

      I hope this helps 🙂

      -Amanda with Bramble Berry

Comments are closed.

{"email":"Email address invalid","url":"Website address invalid","required":"Required field missing"}

The Latest from Soap Queen TV

Inspired by Gems & Crystals

All About Essential Oils

The Power of Charcoal

Create Your Own Clay Face Mask

DIY Bath Bombs

Cold Process Soap Tips & Tricks

Learn the Basics of Cold Process Soapmaking

Learn the Basics of Melt & Pour Soapmaking

Want to Start Your Own Soap Business?

Soap Business Success Stories

Soap Queen TV Favorites

Ingredient Spotlight

Disclosure

Unless stated otherwise, all images are original material and are copyrighted. If you'd like to use an image, please be a friend and credit the photo and link back to Soap Queen. Feel free to share, tweet and pin to your hearts content.