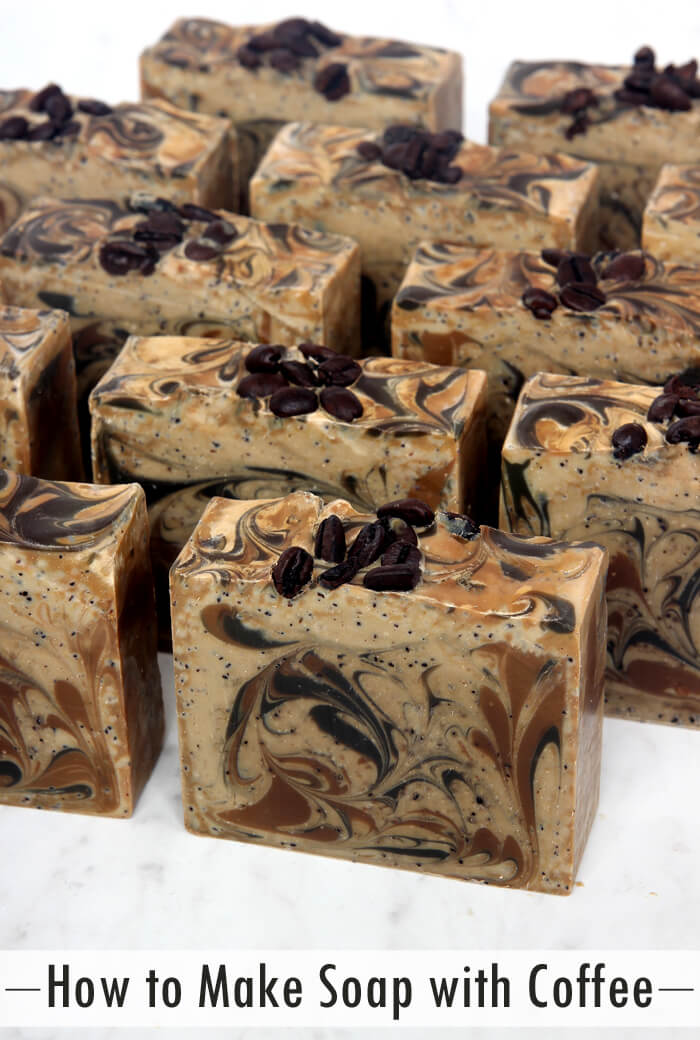
Here in the Pacific Northwest, we are known for our love of coffee. It’s not uncommon to have multiple Starbucks just blocks away from each other. There is also an abundant number of locally-owned coffee shops. If you love coffee as much as a Seattleite, making soap is a great way to include the ingredient in your products. In this coffee soap project, locally roasted coffee is used to really make these bars special. Using a local ingredient highlights the handmade aspect of your products.
Incorporating coffee into cold process soap is easier than you might think. The distilled water in cold process recipes can be swapped for plain coffee. The key is using distilled water to brew the coffee, and allowing the coffee to cool to room temperature before adding sodium hydroxide lye. Using coffee instead of water makes the soap batter quite dark, so keep that in mind when choosing the color palette. If you’re using plain brewed coffee, don’t worry about the soap overheating. Black coffee does not contain sugar.
Using coffee instead of water does not give soap a coffee smell. In fact, when you mix lye with coffee it does not smell very pleasant. This is because the lye “scorches” the coffee, resulting in a noticeable odor. The smell of the coffee and lye solution is usually not noticeable in the final bar. This is especially true if you’re using a fragrance oil in your recipe. For this soap, Espresso Fragrance Oil gives the bars a rich, delicious scent. Espresso Fragrance Oil does discolor in cold process soap due to the vanillin content. Titanium dioxide combats that slightly, but you can notice some discoloration on the top of the soap in the photos above and below. Learn more about vanilla discoloration here.
This soap also contains used coffee grounds. It’s important to add used rather than fresh coffee grounds. Fresh coffee grounds may bleed in the soap. The bleeding doesn’t hurt the bars in any way, but it is a cosmetic issue. It’s also a great way to use up leftover coffee grounds!
What You’ll Need:
5 Pound Mold with Sliding Bottom
Silicone Liner for 5 lb Wood Mold
Hanger Swirl Tool
54 oz. Swirl Recipe Quick Mix
7. 5 oz. Sodium Hydroxide Lye
17.8 oz. Plain Coffee
3 oz. Espresso Fragrance Oil
Titanium Dioxide Pigment
Brown Oxide Pigment
Black Oxide Pigment
2 Tbsp. Used Coffee Grounds
Whole Espresso Beans (for the top)

Click here to add everything you need for this project to your Bramble Berry shopping cart!
If you’ve never made Cold Process soap before, stop here! I highly recommend checking out our FREE four part SoapQueen.tv series on Cold Process Soapmaking, especially the episode on lye safety. And if you’d rather do some reading, Bramble Berry carries a wide range of books on the topic, including my newest book, Pure Soapmaking. You can also checkout the digital downloads for that instant gratification factor.
SAFETY FIRST: Suit up for safe handling practices! That means goggles, gloves and long sleeves. Make sure kids, pets, and other distractions and tripping hazards are out of the house or don’t have access to your soaping space. Always soap in a well-ventilated area.
COFFEE LYE PREP: First, we need to prep the lye solution. For this project, we are using coffee instead of distilled water. Brew the coffee using distilled water. Brew enough for the entire amount of liquid in your recipe, or brew less and supplement the coffee with distilled water. The strength of the coffee is up to you. The stronger the coffee, the darker your soap batter will be. In this recipe, we brewed enough coffee for the entire recipe and used a “normal” strength, which resulted in a rich, dark color. Remember to use distilled water for your coffee.
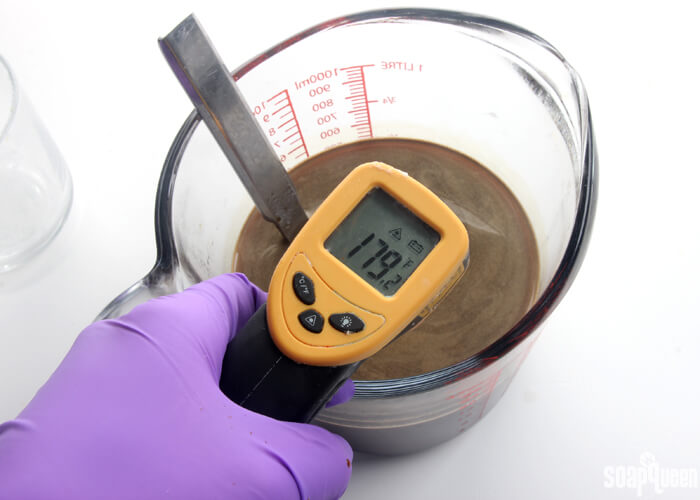
Measure out 17.8 ounces of coffee into the container you use to mix the lye solution. The coffee will be quite hot if freshly brewed and needs to cool to room temperature or below before adding the lye. The colder the coffee is when the lye is added, the colder it will be after the lye is added. If using room temperature coffee, the solution will reach temperatures of about 180 ° F, similar to adding lye to distilled water. If you want to use cold coffee, you can. The lye will take longer to dissolve because it won’t reach as high of a temperature.
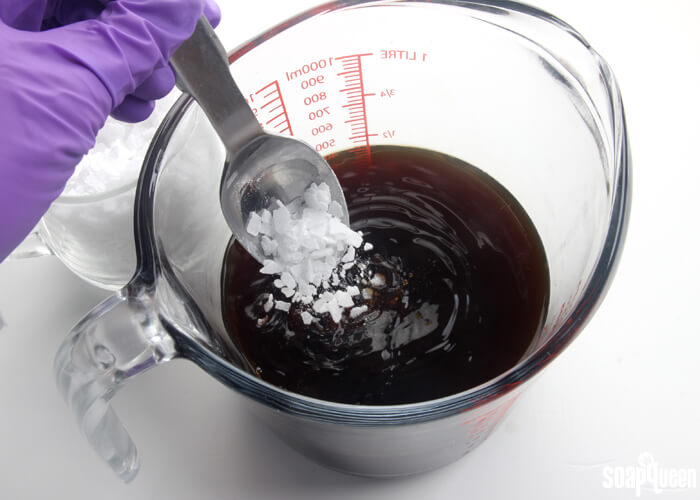
Once your coffee is an appropriate temperature (room temperature or below), slowly add the sodium hydroxide lye to the coffee and gently stir until the lye flakes are fully dissolved. The solution will start to darken in color, and smell quite unpleasant. This is normal! Luckily, the fragrance oil covers up any unpleasant odors.
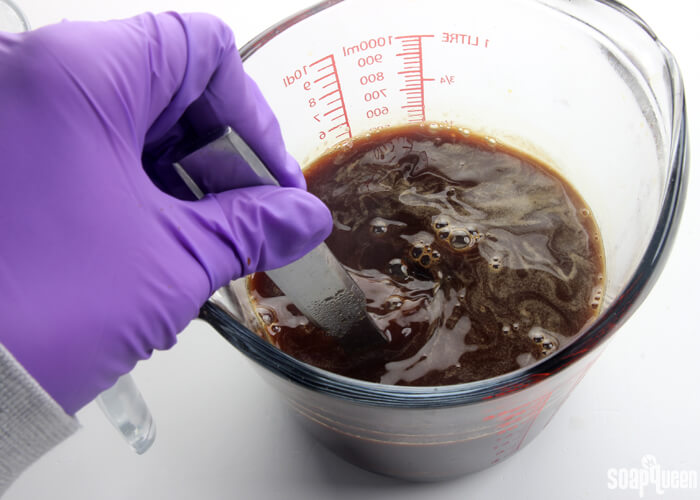
Your lye solution will become quite hot. Allow it to fully cool to about 130 ° F or cooler, depending on the temperature you like to soap at. I recommend allowing the container to cool slowly at room temperature, rather than placing the container in the fridge or freezer. The extreme difference in temperatures can crack a glass container. The lye solution will take about 2 hours to cool, depending on your room temperature. While the lye solution cools, prep your other ingredients and tools.
COLOR PREP: To ensure that the titanium dioxide blends smoothly into the soap batter, we recommend micronizing it before dispersing it in oil. Please note this is an optional tip but it does help with the titanium dioxide clumping in the soap. =) To micronize colorant, simply use a coffee grinder to blend the colorant to break up any clumps of color and prevent streaks of white from showing in the final soap. We like to use a coffee grinder that has a removable, stainless steel mixing area for easy cleaning. Disperse 3 teaspoons of titanium dioxide into 2 tablespoons of lightweight liquid oil, like sweet almond oil or sunflower oil. In this recipe, we used a slightly more concentrated colorant-oil ratio to avoid adding too much extra oil. Then in separate containers, disperse 1/2 teaspoon of Black Oxide and Brown Oxide into 1/2 tablespoon lightweight liquid oil. Use the mini mixer to help break up any clumps. Set aside.
FRAGRANCE PREP: Measure 3 ounces of Espresso Fragrance Oil into a glass, fragrance oil safe container. Set aside.
TOOL PREP: Bend the Hanger Swirl Tool to fit lengthwise into the mold. Set aside.
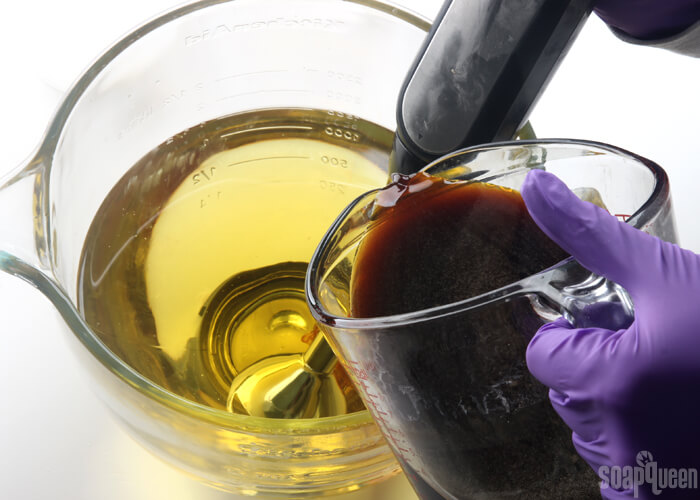
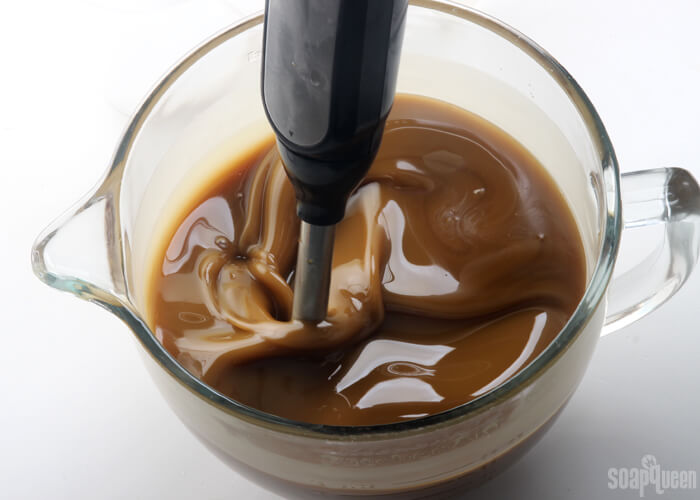
ONE: Fully melt the entire bag of the Swirl Recipe Quick Mix until there is no cloudiness. Shake to mix and measure out 54 oz. Once the lye coffee solution and the oils have cooled to 130 degrees F or below (and are ideally within 10 degrees of each other), add the lye to the oils and stick blend until thin trace. If you’d like a harder bar of soap that releases faster from the mold, you can add sodium lactate to the cooled lye water. Use 1 teaspoon of sodium lactate per pound of oils in the recipe. For this recipe, you’d add about 3.5 teaspoons sodium lactate.
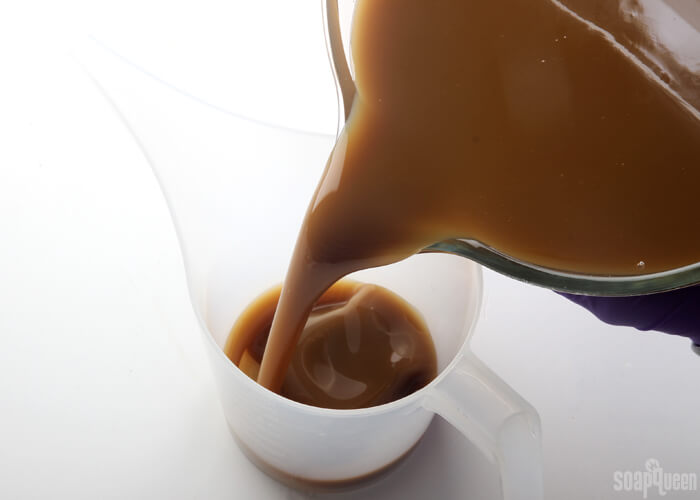
TWO: Once you have a thin trace, pour off 300 mL of soap into a separate container and 600 mL into another container.
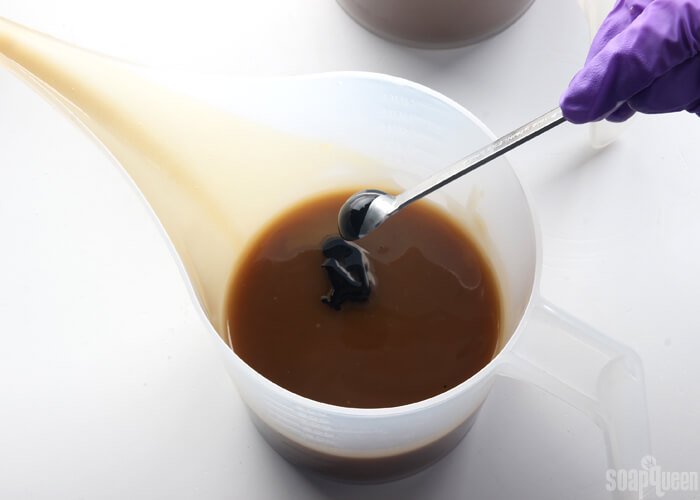
THREE: To the 300 mL of soap, add 1/4 tsp. dispersed Black Oxide. Then, add 1/2 tsp. dispersed Brown Oxide to the container with 600 mL of soap. Use a spoon or whisk to mix in the colorants.
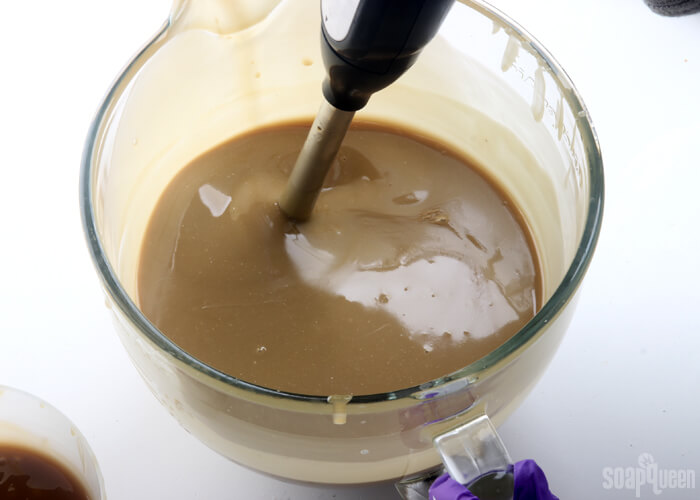
FOUR: To the large container of soap, add all the dispersed titanium dioxide. Use a whisk to mix in the colorant. Then pulse for a few seconds with the stick blender to help fully mix in the colorant. Add 2 tablespoons of used coffee grounds to the large container, and use a whisk to fully mix in.
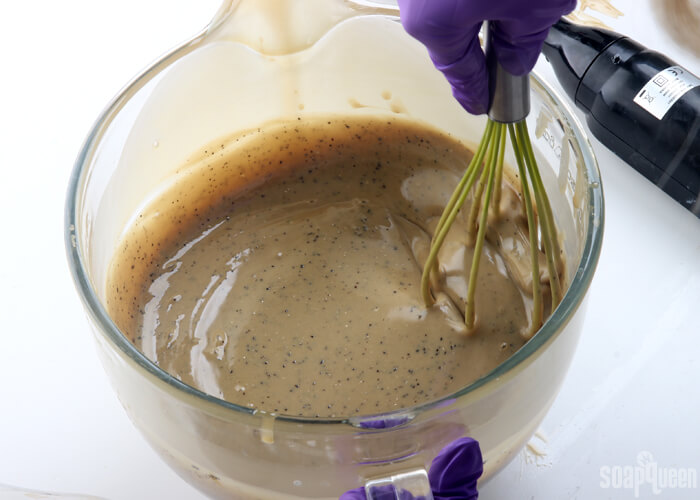
FIVE: Add the Espresso Fragrance Oil proportionately to each container of soap (it’s okay to eyeball it) and use a whisk to fully mix in the fragrance oil.
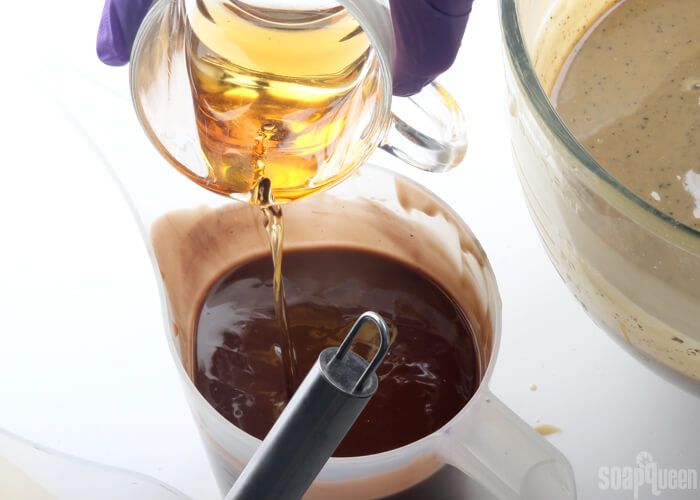
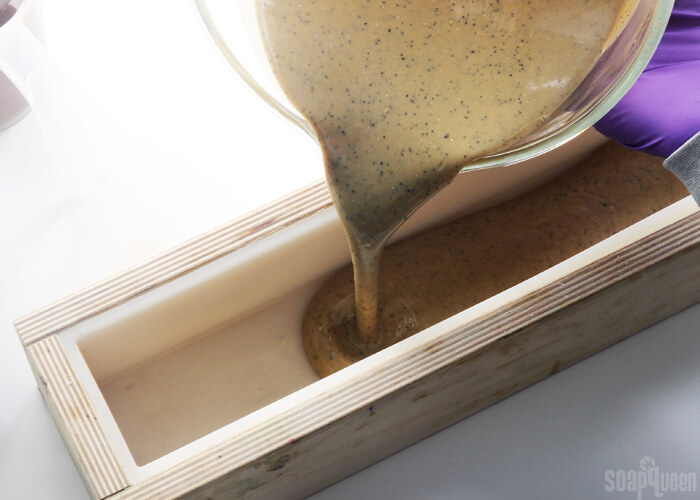
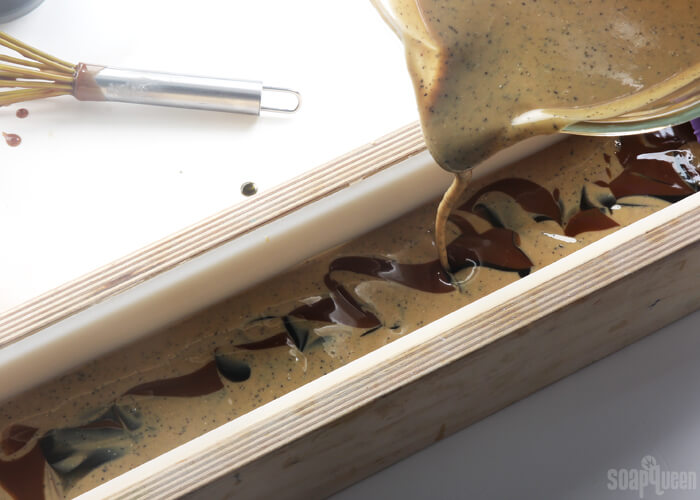
SIX: Pour some of the light soap into the mold – just enough to cover the bottom (about 1 inch).
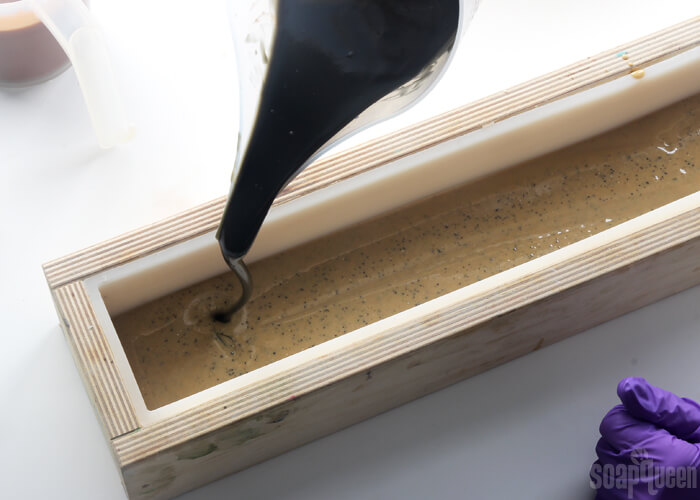
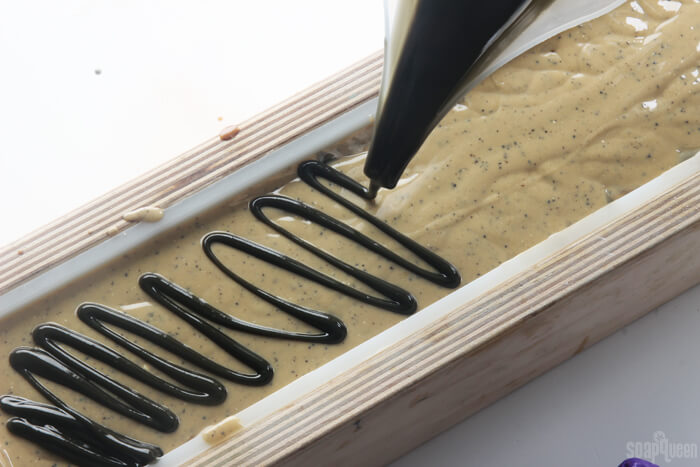
SEVEN: Holding the black soap several inches above the mold, pour a small and steady stream of black soap into the mold. Holding the container a few inches above the mold helps the black soap fall to the bottom of the mold. Pour the black soap all the way down the length of the mold. Don’t be afraid about pouring a straight line. Pouring an uneven line can make the swirl more interesting! Pour less black soap with each pass than brown and tan. A little bit of black soap goes a long way! You also need some black soap leftover at the end for the swirl.
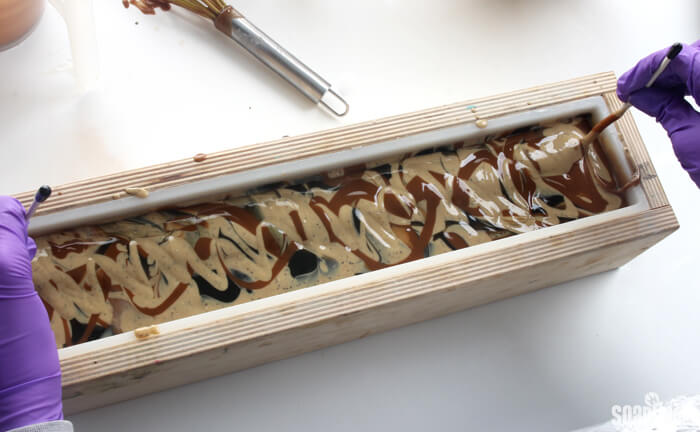
EIGHT: Pour more tan soap into the mold, followed by an imperfect line of the brown soap. Because you have more brown soap, pour a larger amount. Hold each layer several inches above the mold to help the colors break through. Don’t worry about being too exact during the pouring process.
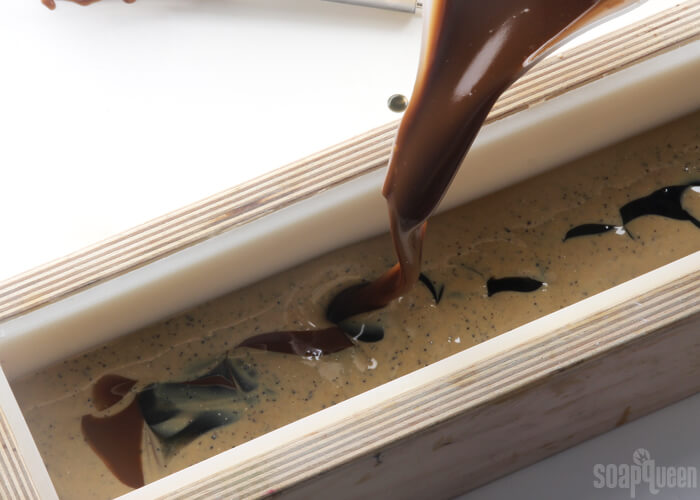
NINE: After pouring the brown soap, pour another line of tan soap into the mold, followed by more black. Continue this pattern (tan, black, tan, brown) until you have used up all the brown soap and have a small amount of tan and black soap left.
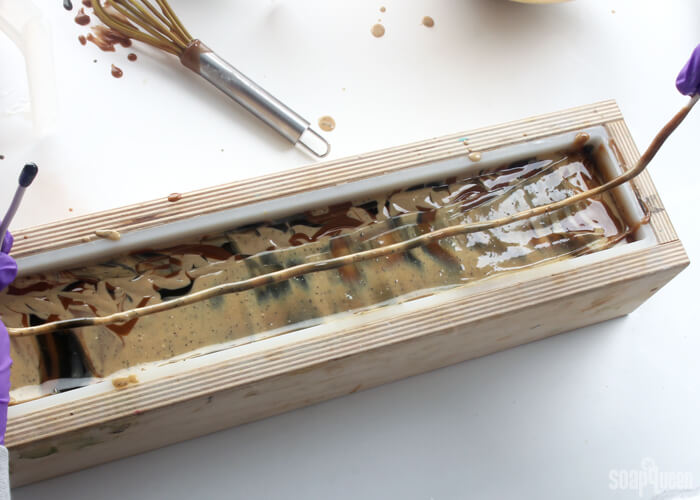
TEN: Give the mold a firm tap on the counter. Insert the Hanger Swirl Tool into one side of the mold, and begin making loops in the center of the mold with the tool. Continue the loop-de-loop motion at varying heights within the mold. This technique is not an exact science. I “looped” the Hanger Swirl Tool about 6-8 times within the mold. If you like more whispy swirls, feel free to do more loops! The swirling motion wasn’t quite a butterfly swirl (made famous by Zahida of Handmade in Florida) but was very similar! See Zahida’s video here to get a better idea of what the swirling motion looks like. Remove the Hanger Swirl Tool by pulling up and out along one side of the mold.
ELEVEN: Tap the mold on the counter to settle the soap and get rid of bubbles. Cover the entire top with the rest of the tan soap. Tap the mold on the counter again to settle the top layer.
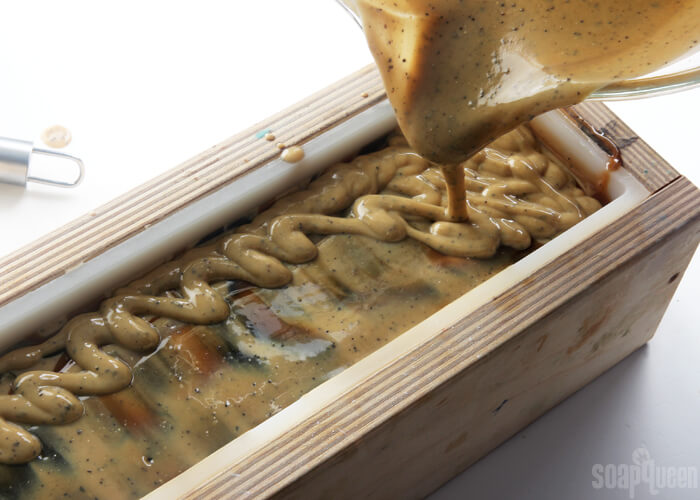
TWELVE: Drizzle a small amount of the black soap on top. Don’t worry too much about what this drizzle looks like, just make sure to leave a good amount of tan soap showing. It will give your swirls better definition.
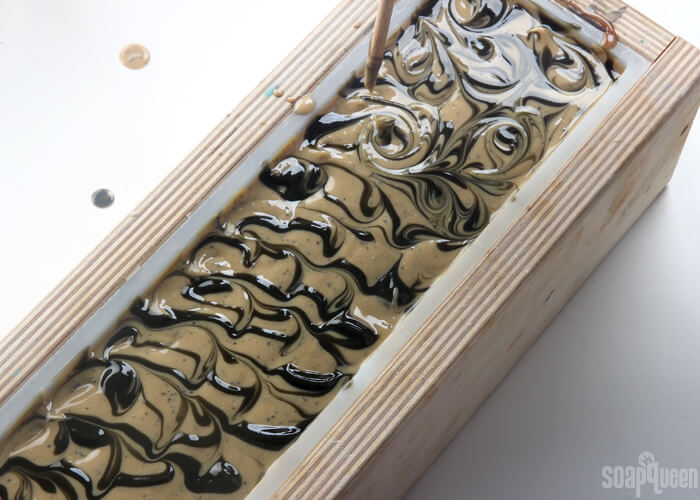
THIRTEEN: Insert a dowel or chopstick into the very top of the soap. The swirl I used for this batch was not very exact and precise, so feel free to have fun with it! First, I made scallop-like motions from side to side, down the length of the mold. Then, create “loop-de-loop” patterns randomly. There really is no right or wrong way to do this, so have fun with it. Just make sure to not over-swirl, or the color differentiation will diminish.
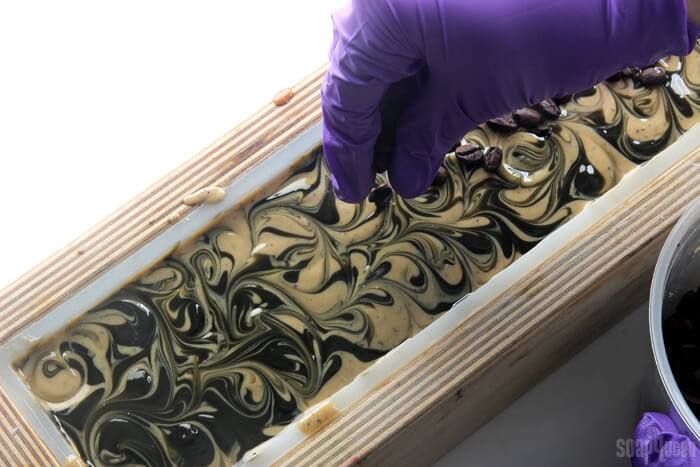
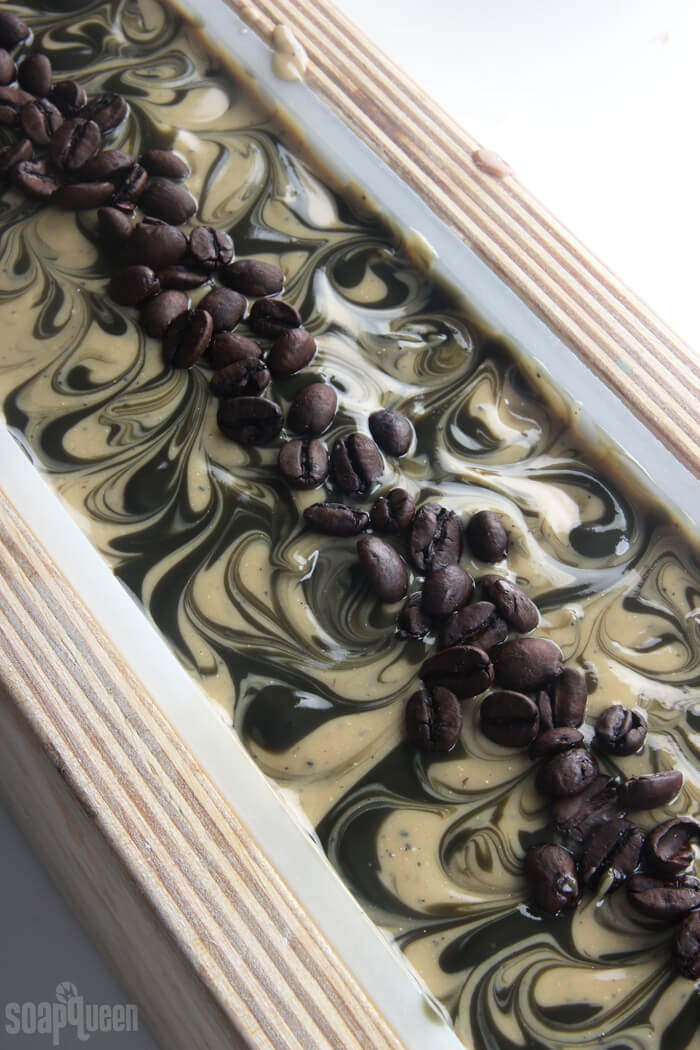
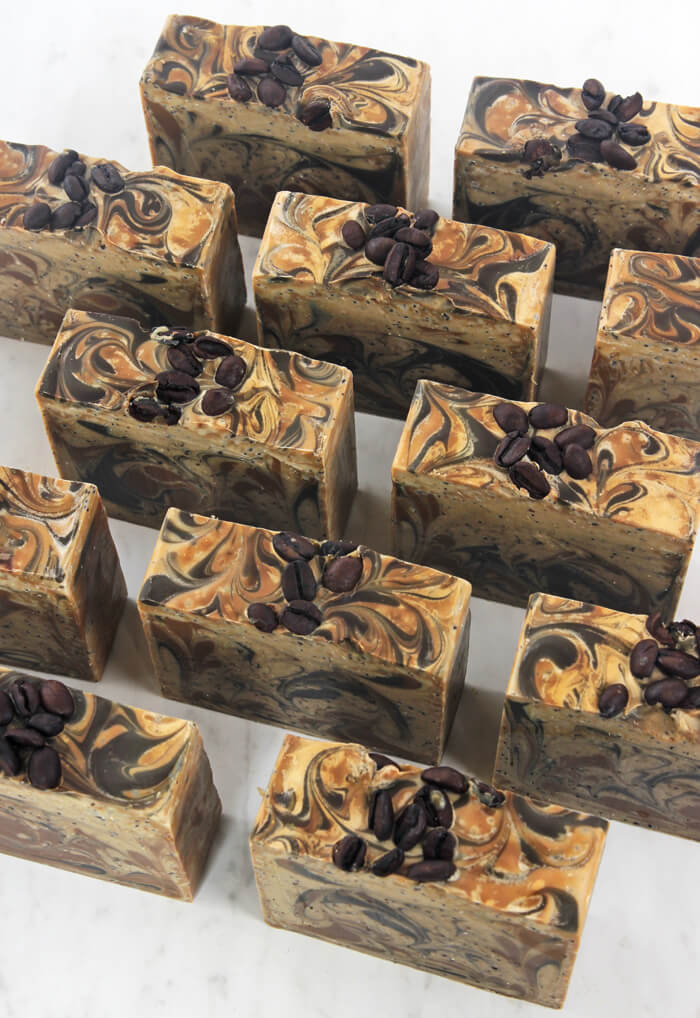
FOURTEEN: Once you’re happy with the top, drop whole coffee beans in the center of the soap all the way down the mold. Gently press the beans into the soap to help them stick better once cut.
Spritz the soap with 99% isopropyl alcohol to prevent soda ash. Leave the soap uncovered, and allow it to harden for 2-3 days. Remove from the mold gently, and cut into bars. To avoid drag marks from the coffee beans, lay the loaf on its side and cut with a sharp non-serrated knife. I went ahead and used the Multi Bar Cutter to cut my batch, and found that the coffee beans did cause some unevenness and drag marks. I was able to smooth them out with a Soap Shaver. Allow the bars to cure for 4-6 weeks and enjoy!

How to Make Coffee Soap
Ingredients
- 5 Pound Mold with Sliding Bottom
- Silicone Liner for 5 lb Wood Mold
- Hanger Swirl Tool
- 54 oz. Swirl Recipe Quick Mix
- 7. 5 oz. Sodium Hydroxide Lye
- 17.8 oz. Plain Coffee
- 3 oz. Espresso Fragrance Oil
- Titanium Dioxide Pigment
- Brown Oxide Pigment
- Black Oxide Pigment
- 2 Tbsp. Used Coffee Grounds
- Whole Espresso Beans for the top
Instructions
SAFETY FIRST: Suit up for safe handling practices! That means goggles, gloves and long sleeves. Make sure kids, pets, and other distractions and tripping hazards are out of the house or don’t have access to your soaping space. Always soap in a well-ventilated area.
- COFFEE LYE PREP: First, we need to prep the lye solution. For this project, we are using coffee instead of distilled water. Brew the coffee using distilled water. Brew enough for the entire amount of liquid in your recipe, or brew less and supplement the coffee with distilled water. The strength of the coffee is up to you. The stronger the coffee, the darker your soap batter will be. In this recipe, we brewed enough coffee for the entire recipe and used a "normal" strength, which resulted in a rich, dark color. Remember to use distilled water for your coffee. Measure out 17.8 ounces of coffee into the container you use to mix the lye solution. The coffee will be quite hot if freshly brewed and needs to cool to room temperature or below before adding the lye. The colder the coffee is when the lye is added, the colder it will be after the lye is added. If using room temperature coffee, the solution will reach temperatures of about 180 ° F, similar to adding lye to distilled water. If you want to use cold coffee, you can. The lye will take longer to dissolve because it won't reach as high of a temperature. Once your coffee is an appropriate temperature (room temperature or below), slowly add the sodium hydroxide lye to the coffee and gently stir until the lye flakes are fully dissolved. The solution will start to darken in color, and smell quite unpleasant. This is normal! Luckily, the fragrance oil covers up any unpleasant odors. Your lye solution will become quite hot. Allow it to fully cool to about 130 ° F or cooler, depending on the temperature you like to soap at. I recommend allowing the container to cool slowly at room temperature, rather than placing the container in the fridge or freezer. The extreme difference in temperatures can crack a glass container. The lye solution will take about 2 hours to cool, depending on your room temperature. While the lye solution cools, prep your other ingredients and tools.
COLOR PREP: To ensure that the titanium dioxide blends smoothly into the soap batter, we recommend micronizing it before dispersing it in oil. Please note this is an optional tip but it does help with the titanium dioxide clumping in the soap. =) To micronize colorant, simply use a coffee grinder to blend the colorant to break up any clumps of color and prevent streaks of white from showing in the final soap. We like to use a coffee grinder that has a removable, stainless steel mixing area for easy cleaning. Disperse 3 teaspoon of titanium dioxide into 2 tablespoons of lightweight liquid oil, like sweet almond oil or sunflower oil. In this recipe, we used a slightly more concentrated colorant-oil ratio to avoid adding too much extra oil. Then in separate containers, disperse 1/2 teaspoons of Black Oxide and Brown Oxide into 1/2 tablespoon lightweight liquid oil. Use the mini mixer to help break up any clumps. Set aside.
FRAGRANCE PREP: Measure 3 ounces of Espresso Fragrance Oil into a glass, fragrance oil safe container. Set aside.
TOOL PREP: Bend the Hanger Swirl Tool to fit lengthwise into the mold. Set aside.
- Fully melt the entire bag of the Swirl Recipe Quick Mix until there is no cloudiness. Shake to mix and measure out 54 oz. Once the lye coffee solution and the oils have cooled to 130 degrees F or below (and are ideally within 10 degrees of each other), add the lye to the oils and stick blend until thin trace. If you’d like a harder bar of soap that releases faster from the mold, you can add sodium lactate to the cooled lye water. Use 1 teaspoon of sodium lactate per pound of oils in the recipe. For this recipe, you’d add about 3.5 teaspoons sodium lactate.
- Once you have a thin trace, pour off 300 mL of soap into a separate container and 600 mL into another container.
- To the 300 mL of soap, add 1/4 tsp. dispersed Black Oxide. Then, add 1/2 tsp. dispersed Brown oxide to the container with 600 mL of soap. Use a spoon or whisk to mix in the colorants.
- To the large container of soap, add all the dispersed titanium dioxide. Use a whisk to mix in the colorant. Then pulse for a few seconds with the stick blender to help fully mix in the colorant. Add 2 tablespoons of used coffee grounds to the large container, and use a whisk to fully mix in.
- Add the Espresso Fragrance Oil proportionately to each container of soap (it’s okay to eyeball it) and use a whisk to fully mix in the fragrance oil.
- Pour some of the light soap into the mold – just enough to cover the bottom (about 1 inch).
- Holding the black soap several inches above the mold, pour a small and steady stream of black soap into the mold. Holding the container a few inches above the mold helps the black soap fall to the bottom of the mold. Pour the black soap all the way down the length of the mold. Don’t be afraid about pouring a straight line. Pouring an uneven line can make the swirl more interesting! Pour less black soap with each pass than brown and tan. A little bit of black soap goes a long way! You also need some black soap leftover at the end for the swirl.
- Pour more tan soap into the mold, followed by an imperfect line of the brown soap. Because you have more brown soap, pour a larger amount. Hold each layer several inches above to help the colors break through. Don’t worry about being to exact during the pouring process.
- After pouring the brown soap, pour another line of tan soap into the mold, followed by more black. Continue this pattern (tan, black, tan, brown) until you have used up all the brown soap and have a small amount of tan and black soap left.
- Give the mold a firm tap on the counter. Insert the Hanger Swirl Tool into one side of the mold, and begin making loops in the center of the mold with the tool. Continue the loop-de-loop motion at varying heights within the mold. This technique is not an exact science. I “looped” the Hanger Swirl Tool about 6-8 times within the mold. If you like more whispy swirls, feel free to do more loops! The swirling motion wasn’t quite a butterfly swirl (made famous by Zahida of Handmade in Florida) but was very similar! See Zahida’s video here to get a better idea of what the swirling motion looks like. Remove the Hanger Swirl Tool by pulling up and out along one side of the mold.
- Tap the mold on the counter to settle the soap and get rid of bubbles. Cover the entire top with the rest of the tan soap. Tap the mold on the counter again to settle the top layer.
- Drizzle a small amount of the black soap on top. Don’t worry too much about what this drizzle looks like, just make sure to leave a good amount of tan soap showing. It will give your swirls better definition.
- Insert a dowel or chopstick into the very top of the soap. The swirl I used for this batch was not very exact and precise, so feel free to have fun with it! First, I made scallop-like motions from side to side, down the length of the mold. Then, create “loop-de-loop” patterns randomly. There really is no right or wrong way to do this, so have fun with it. Just make sure to not over-swirl, or the color differentiation will diminish.
- Once you’re happy with the top, drop whole coffee beans in the center of the soap, all the way down the mold. Gently press the beans into the soap to help them stick better once cut.
- Spritz the soap with 99% isopropyl alcohol to prevent soda ash. Leave the soap uncovered, and allow it to harden for 2-3 days. Remove from the mold gently, and cut into bars. To avoid drag marks from the coffee beans, lay the loaf on its side and cut with a sharp unserrated knife. I went ahead and used the Multi Bar Cutter to cut my batch, and found that the coffee beans did cause some unevenness. I was able to smooth this out with a Soap Shaver. Allow the bars to cure for 4-6 weeks and enjoy!