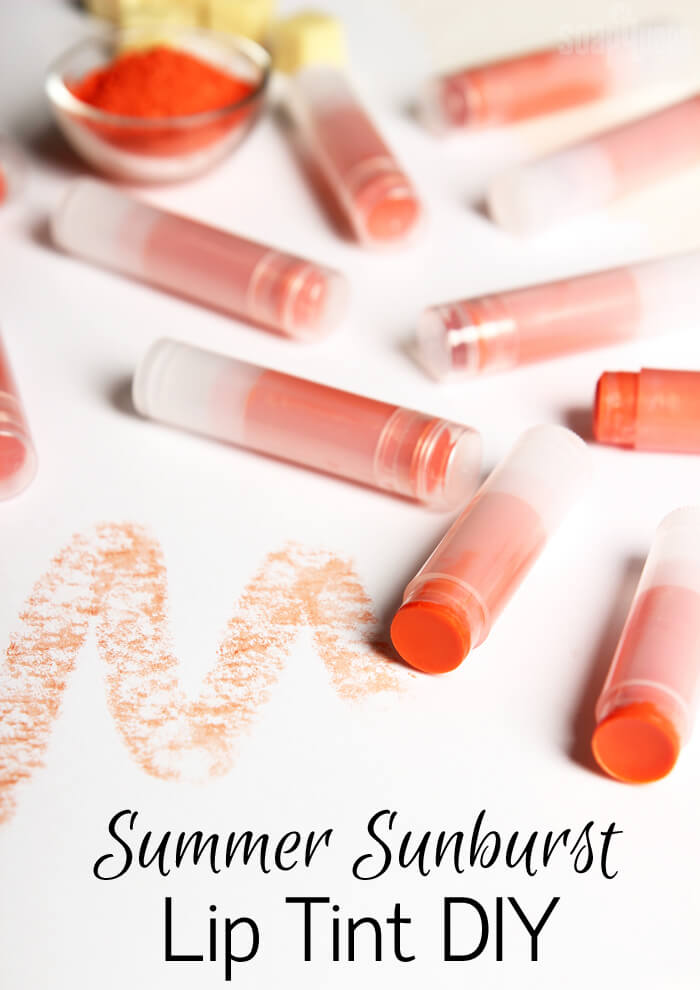
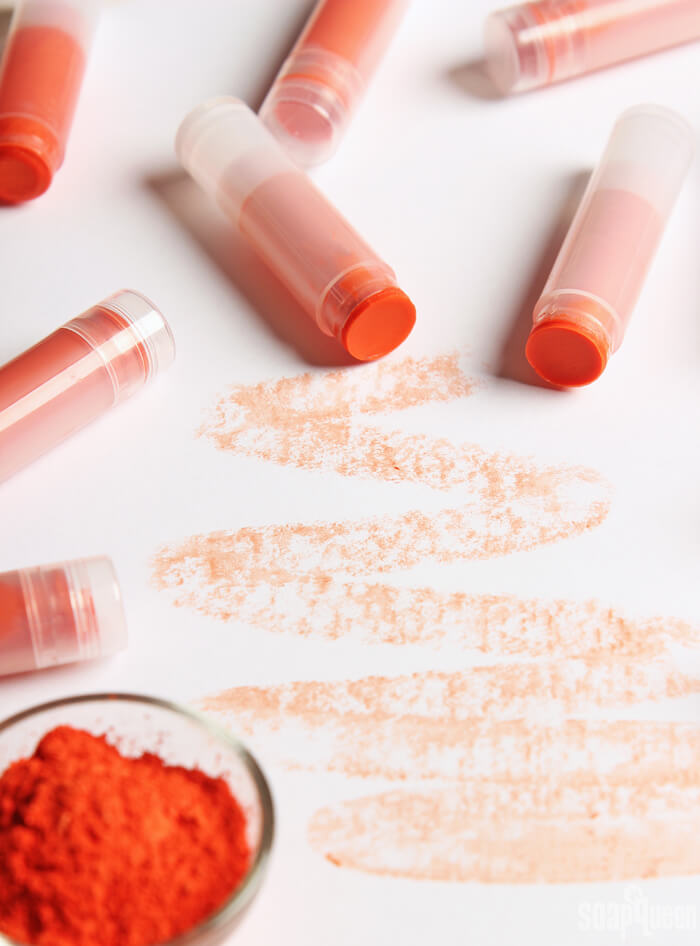
Orange lipstick has been popular for the past few years, especially during summer. It’s a surprisingly flattering hue for a wide variety of skin tones. These lip tints are made with the vibrant Sunset Orange Mica. It gives a light orange tint that can be built up to a more vibrant color. Scroll down to see the swatches!
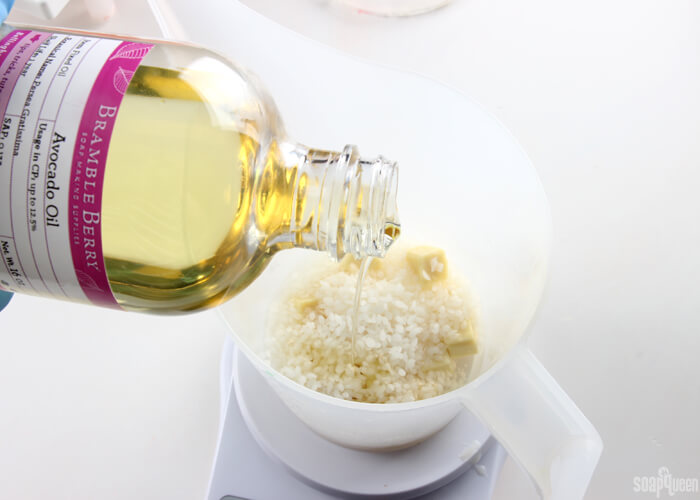
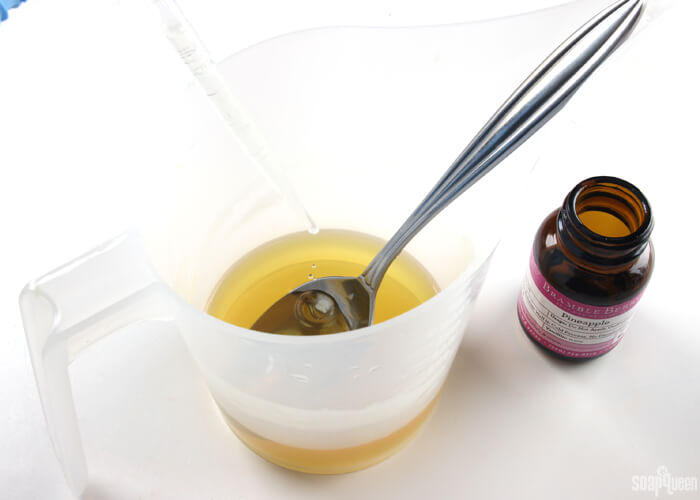
The tints are made with coconut oil, organic cocoa butter cubes, white beeswax and avocado oil. It’s a firm texture that glides easily on the lips. I added Pineapple Flavor Oil for a light scent, and a touch of Lip Smacking Sweet Flavor Oil. The pineapple notes smell amazing combined with the chocolatey scent from the cocoa butter cubes.
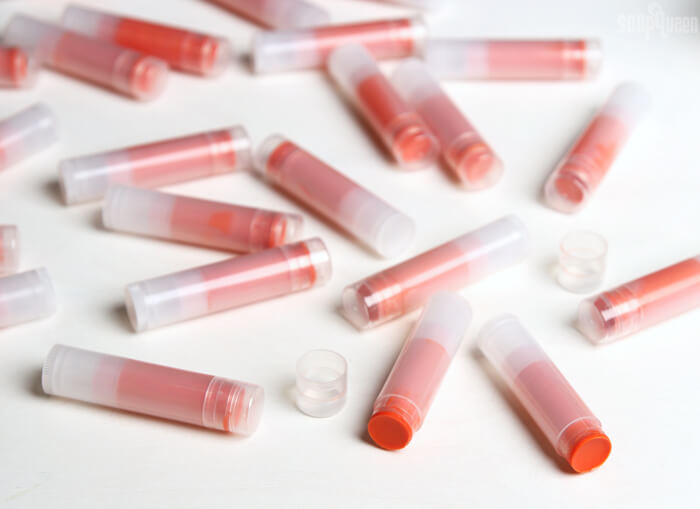
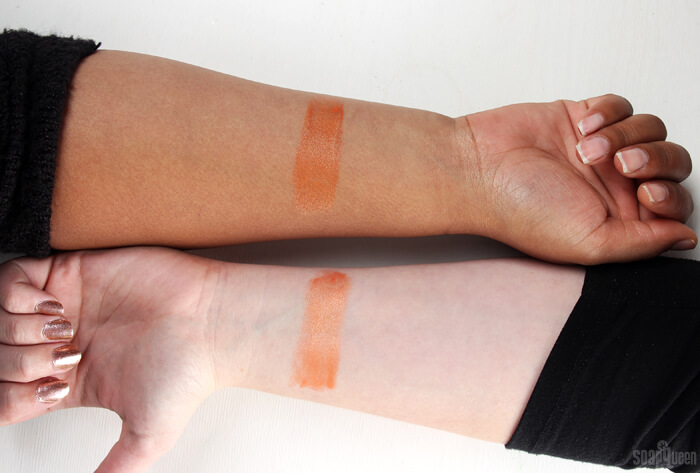
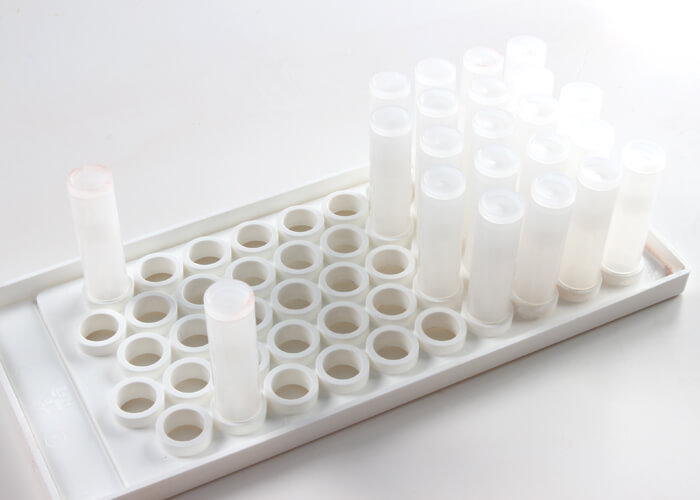
Below, you can see how the balm looks on several skin tones. This swatch was built up a few times for a more vibrant color. If you prefer a softer color, you can use a lighter application. I used the Lip Balm Pouring Tray in this tutorial because the recipe creates a lot of balm. Rather than pouring the mixture into each tube one by one, the Lip Balm Pouring Tray makes it easy to fill up plenty of tubes at a time. You can see the tray in action in this Making Lip Balm video.
What You’ll Need:
30 Clear Lip Balm Tubes
2 heaping Tbs. Sunset Orange Mica
1.2 oz. Coconut Oil
1.2 oz. White Beeswax
1 oz. Organic Cocoa Butter Cubes
.8 oz. Avocado Oil
3 mL Pineapple Flavor Oil
3 mL Lip Smacking Sweet Flavor Oil
Droppers
Optional: Lip Balm Pouring Tray, White Spatula & Heat Gun

Click here to add everything you need for this project to your Bramble Berry shopping cart!
[sq_products]
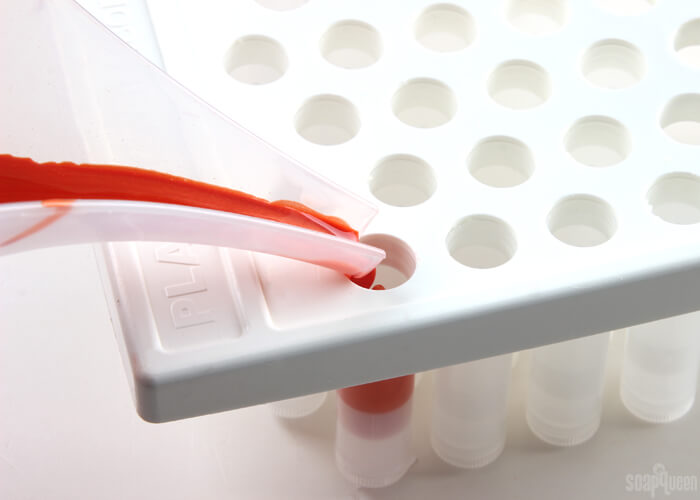
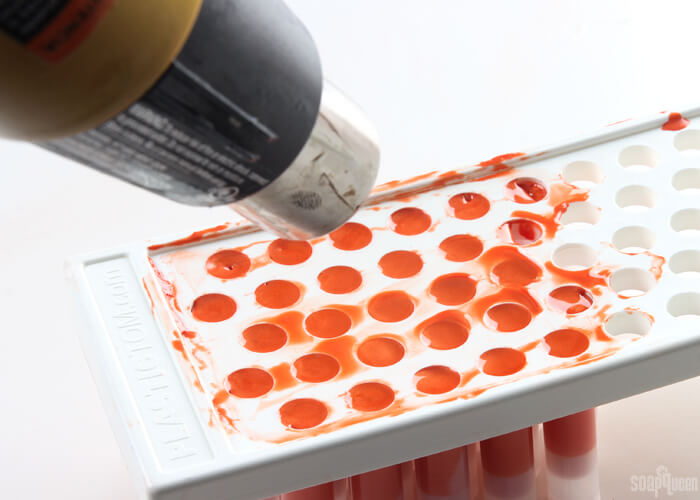
PREP TRAY: If using the Lip Balm Pouring Tray, insert the lip balm tubes into the bottom of the tray. Concentrate all the lip balm tubes into one end. This makes it easy to scrape the lip balm into the cavities if needed. Place a few lip balm tubes at the opposite end to stabilize the tray. To see this tray in action, check out this lip balm video on Soap Queen TV.
ONE: In a small, heat-safe container, add the coconut oil, cocoa butter cubes, white beeswax and avocado oil. Place in the microwave and melt using 30-60 second bursts. Beeswax has a high melting point and takes quite a long time to melt. Be careful – because of the high melting point, the heat-safe container can melt or explode in the microwave if it gets too hot.
TWO: Once everything is completely melted, add the Pineapple Flavor Oil and the Lip Smacking Sweet Flavor Oil and stir to combine.
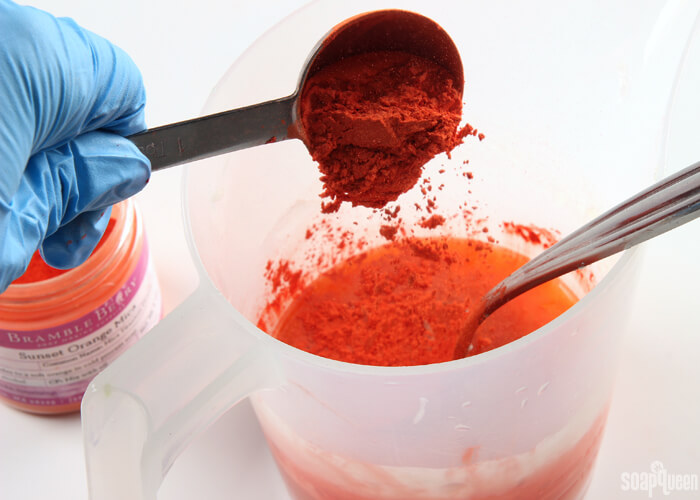
THREE: Add the Sunset Orange Mica, and stir to combine. Make sure to get rid of any clumps.
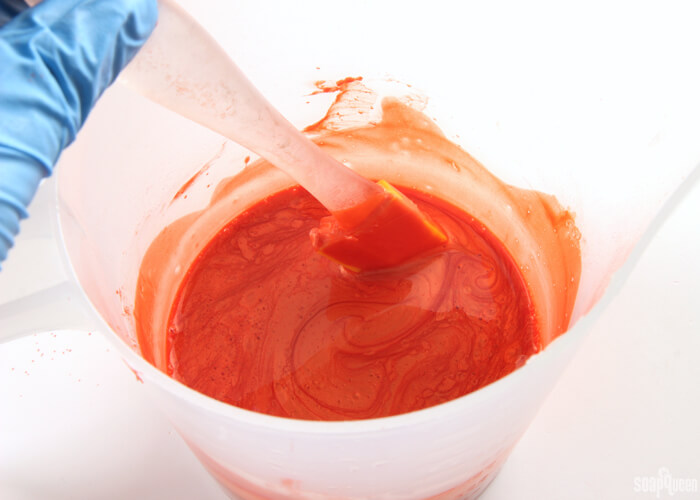
FOUR: Once the mixture is completely blended and smooth, begin pouring it into the tubes. If using the tray, don’t worry too much if some of the lip balm doesn’t make it into a tube. It can be scraped off the tray and used later! If necessary, remelt the lip balm in the microwave using 10-20 second bursts.
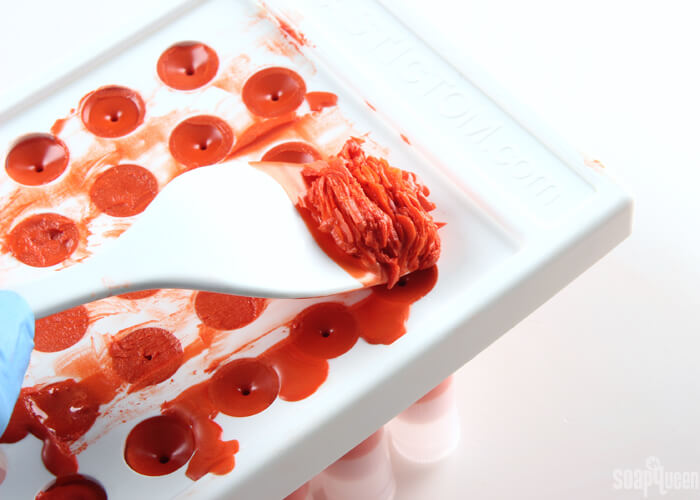
FIVE: Once all the balm has been poured, allow it to harden for several minutes in the tray. Then, scrape off any lip balm from the tray that did not go into a tube with the white spatula. You can also use a kitchen knife or soap cutter. Place the leftover balm back into the container, remelt and pour it into any empty or partially full lip balm tube.
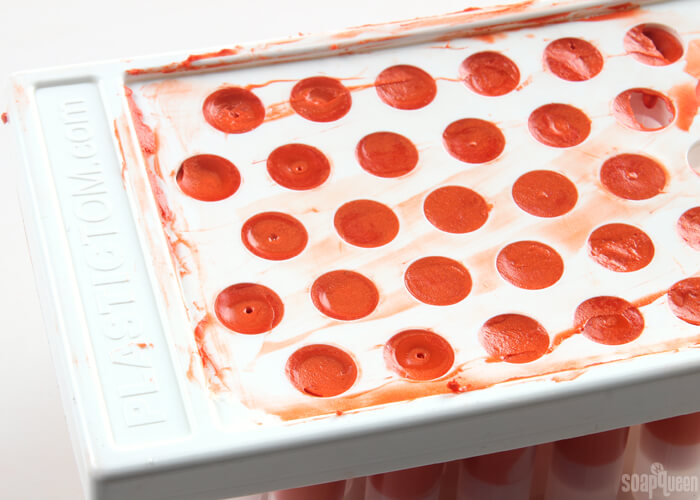
SIX: If you’d like to give the balms a nice smooth top, turn the heat gun on low and melt the top of the balms for just a second or two. This will also help get rid of the little “dots” in the center of the balms. Allow the lip balms to fully cool and harden, at least 3 hours. Once fully cooled, pull the tubes straight down from the tray. Pulling the tubes out at an angle will damage the top of the balm. If you’re a perfectionist, you can slice the top off the balm and melt the top with the heat gun to make it nice and smooth, as shown in this video.
Once the balm has cooled, put the caps on and enjoy. If you’re selling this lip balm, check out this post to learn how to correctly label it. We have found this balm has held up well in temperatures around 75 ° F. If you live in an extremely hot climate, store the lip balm in a cool place to prevent it from melting in the tube.
Keep sharing your orange photos on Instagram, Twitter and Facebook and tag them with #SoaptheRainbow for a chance to win a $10 gift certificate! Check the Bramble Berry Instagram account to see the past winners.

Orange Sunburst Lip Balm DIY
Ingredients
- Clear Lip Balm Tubes
- 2 heaping Tbs. Sunset Orange Mica
- 1.2 oz. Coconut Oil
- 1.2 oz. White Beeswax
- 1 oz. Organic Cocoa Butter Cubes
- .8 oz. Avocado Oil
- 3 mL Pineapple Flavor Oil
- 3 mL Lip Smacking Sweet Flavor Oil
- Droppers
- Optional: Lip Balm Pouring Tray & White Spatula
Instructions
PREP TRAY: If using the Lip Balm Pouring Tray, insert the lip balm tubes into the bottom of the tray. Concentrate all the lip balm tubes into one end. This makes it easy to scrape the lip balm into the cavities if needed. Place a few lip balm tubes at the opposite end to stabilize the tray. To see this tray in action, check out this lip balm video on Soap Queen TV.
- In a small, heat-safe container, add the coconut oil, cocoa butter cubes, white beeswax and avocado oil. Place in the microwave and melt using 30-60 second bursts. Beeswax has a high melting point, and takes quite a long time to melt. Be careful – because of the high melting point, the heat-safe container can melt or explode in the microwave if it gets too hot.
- Once everything is completely melted, add the Pineapple Flavor Oil and the Lip Smacking Sweet Flavor Oil and stir to combine.
- Add the Sunset Orange Mica, and stir to combine. Make sure to get rid of any clumps.
- Once the mixture is completely blended and smooth, begin pouring it into the tubes. If using the tray, don’t worry too much if some of the lip balm doesn’t make it into a tube. It can be scraped off the tray and used later! If necessary, remelt the lip balm in the microwave using 10-20 second bursts.
- Once all the balm has been poured, allow it to harden for several minutes in the tray. Then, scrape off any lip balm from the tray that did not go into a tube with the white spatula. You can also use a kitchen knife or soap cutter. Place the leftover balm back into the container, remelt and pour it into any empty, or partially full lip balm tube.
- SIX: If you'd like to give the balms a nice smooth top, turn the heat gun on low and melt the top of the balms for just a second or two. This will also help get rid of the little "dots" in the center of the balms. Allow the lip balms to fully cool and harden, at least 3 hours. Once fully cooled, pull the tubes straight down from the tray. Pulling the tubes out at an angle will damage the top of the balm. If you're a perfectionist, you can slice the top off the balm and melt the top with the heat gun to make it nice and smooth.
- Once the balm has cooled, put the caps on and enjoy. If you're selling this lip balm, check out this post to learn how to correctly label it. We have found this balm has held up well in temperatures around 75 ° F. If you live in an extremely hot climate, store the lip balm in a cool place to prevent it from melting in the tube.